It is often useful to search for related issues in order to identify information that you want to copy into the current issue. For example, you might have a business area that contains all your customers, and another business area where you want to create issues that any customer might report. This feature allows you to enter some key identifying information about a customer, such as their name, email address or telephone number, bring back all matching records, and then select the specific customer that you want to associate the customer issue with.
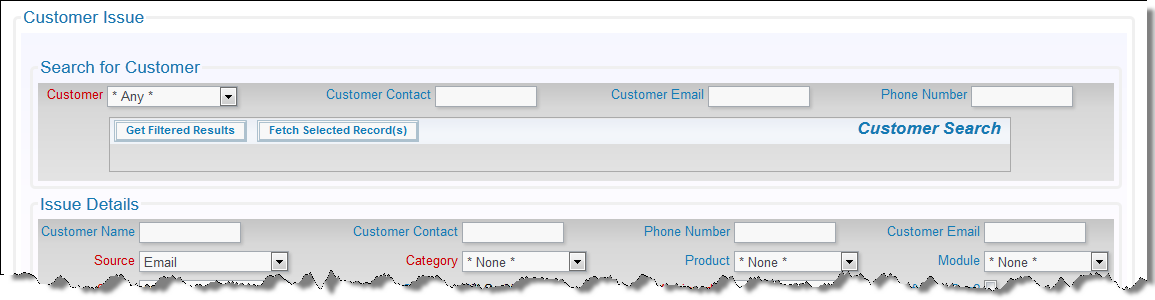
Initial customer search
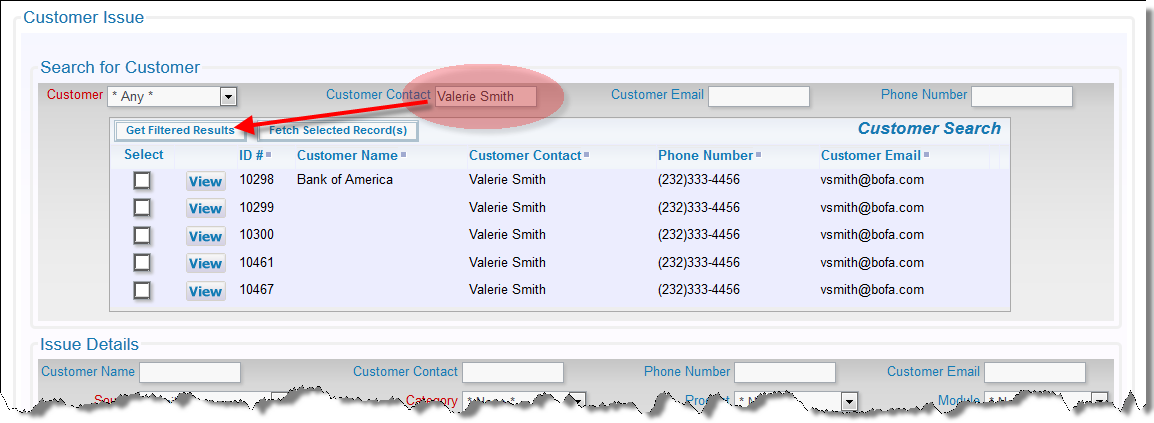
Entering the search criteria and seeing the results
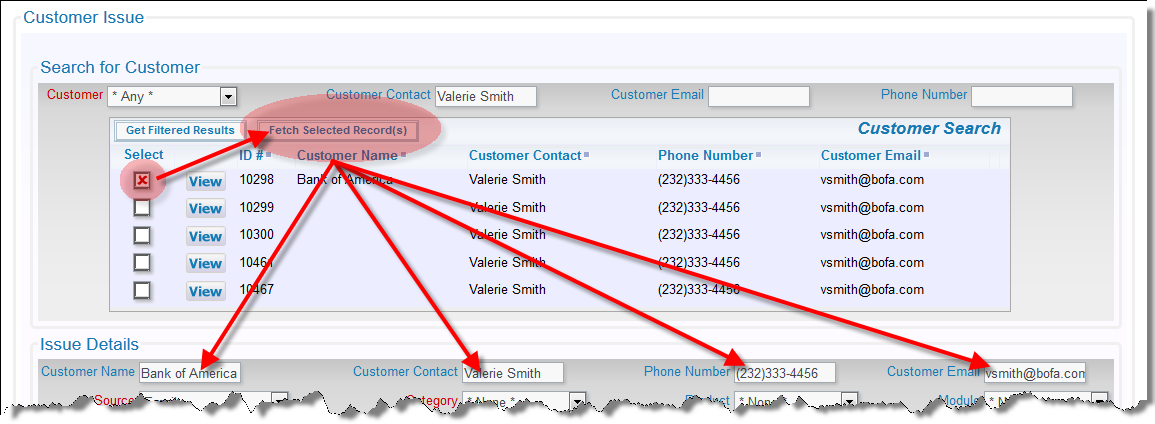
Selecting the result and populating the issue
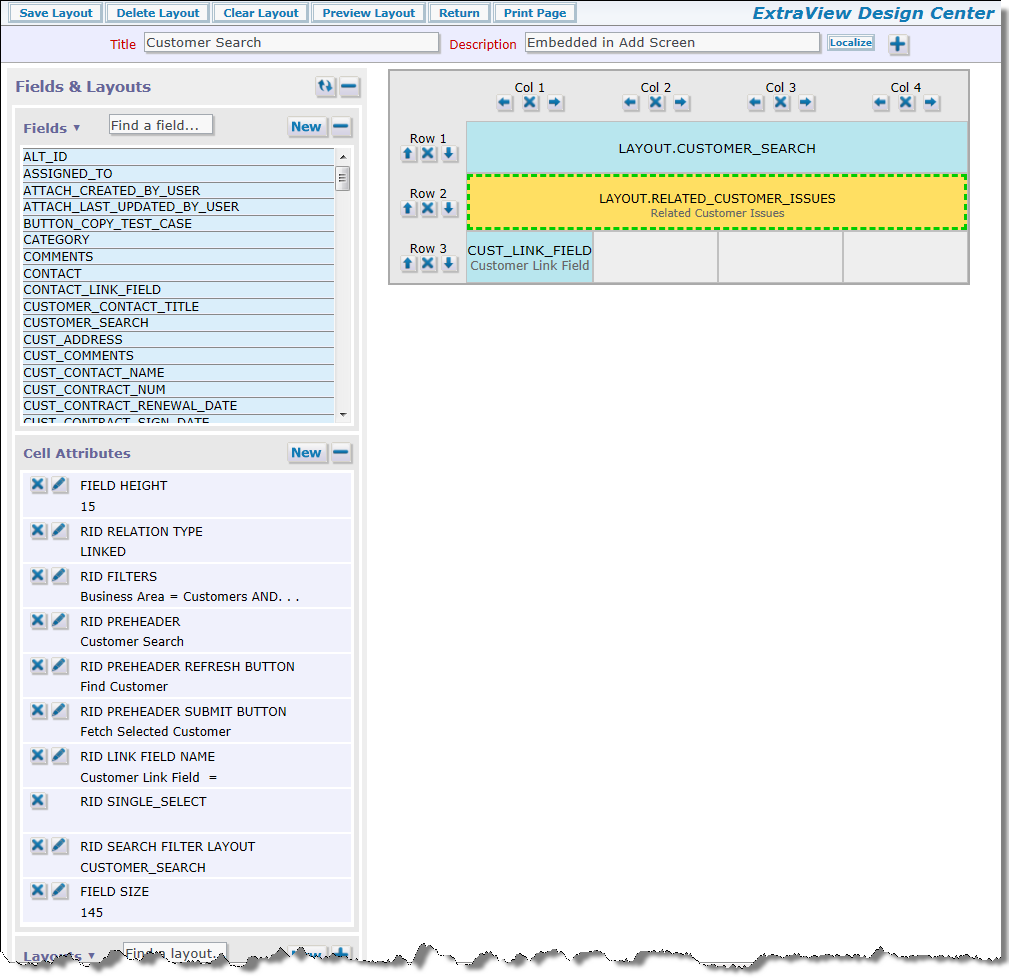
When you look at the above screenshot, you will see that you have a search capability, a search results area, and the underlying add screen into which you want the selected record to appear. The basic configuration is this:
First, create a new layout type. This may have any name and any title, but it must have a usage type of Search. This is used to contain the search filters that will be displayed to the user. For our example, we will use the name CUSTOMER_SEARCH. Next, add the new layout to the area and project where it is needed, creating a new layout. Onto this layout, you will place the fields to be used as filters. No special layout cell attributes are required, but you may use whatever attributes help you provide an aesthetically pleasing display. Save this layout.
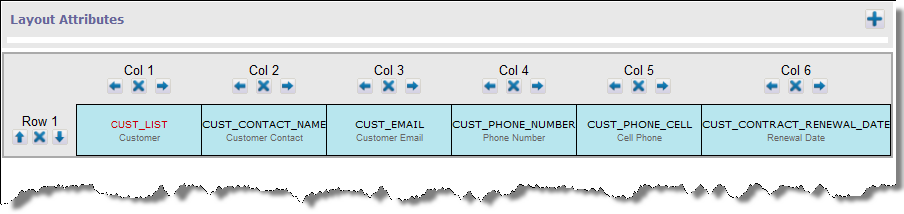
The search layout
This is used to contain the results of the search. Note that the fields displayed do not need to match the fields within the search layout, although it is common to see several fields in common. Create a new layout type to contain the related issue display. By convention, begin the name of the new layout type with RELATED_ and followed by remaining characters that provide an unique name for the layout. The usage type of this layout must be Report. For our example, we name this layout type RELATED_CUSTOMER_ISSUES. Now, add the new layout to the area and project where it is needed, creating a new layout. In the first column of the layout, place the inbuilt field with the name RELATIONSHIP_GROUP_CHOOSE_BTN. This is used as the selector for the record(s) whose results you want to place into the add or edit screen. It is recommended that you only place the VIEW_BUTTON as any other button on this layout. You should not place other buttons such as EDIT_BUTTON or QUICKEDIT_BUTTON on this layout. Place the remaining fields that you want to display on the related issue display on the layout, and save the layout.
The related issue display layout
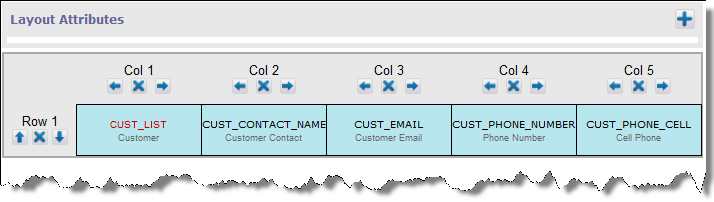
A link field is required to pass the results from the selection made on the Related Issue Display layout, so begin by creating this field, with a display type of text. Give this field read / write permissions for the roles that will be adding customers. This field must be placed on the add or edit screen, but it need not be visible. For example, you might provide this field with two layout cell attributes to hide it. Set a FIELD STYLE of display:none and a FIELD LABEL TAG of display:none as layout cell attributes, thus ensuring the field can never be seen on the screen by any user. Note that you cannot use the FIELD/LAYOUT VISIBLE IF layout cell attribute. This is because this attribute only places the field into the HTML form when it becomes visible. We need the field on the form even when it is invisible to be used as the link field. In our example, we use the name CUST_LINK_FIELD.
Place your search layout on the add or edit screen. This layout does not require any layout cell attributes, but you might decide to hide it using FIELD/LAYOUT VISIBLE IF, once you have made your selection from the results of the search.
Place your related issue display layout on the add or edit screen. This is the place where you configure several layout cell attributes that link that bind all the elements together:
The search layout
The business rules work by getting the values of the ID's within the CUST_LINK_FIELD and linking the current issue to the selected values. There are three basic premises; you are retrieving a single result into fields in the current issue, you are retrieving multiple results into repeating row records or you are retrieving multiple results into related issues.
In this case the CUST_LINK_FIELD will contain a single value which is the ID of the record we will associate with the current issue. This is done with business rules similar to the following:
<== link customerSearchLink ==> AREA='Customers', ID=CUST_LINK_FIELD

<== refresh ==>
if (CUST_LINK_FIELD.{changed}) {
  CUST_NAME          = (customerSearchLink).CUST_NAME;
  CUST_CONTACT_NAME  = (customerSearchLink).CUST_CONTACT_NAME;
  CUST_PHONE_NUMBER  = (customerSearchLink).CUST_PHONE_NUMBER;
  CUST_EMAIL         = (customerSearchLink).CUST_EMAIL;
}
The link directive establishes a link based on the ID of the issue we want to retrieve being equal to the value contained in the CUST_LINK_FIELD field we created.
The commands within the refresh directive establish the assignments to be made when the CUST_LINK_FIELD is populated from the search results.