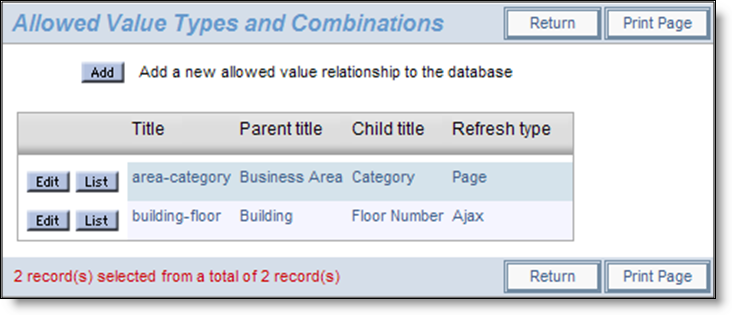
Once the allowed value type has been created, navigate to Allowed Value Types administration menu. The following screen with your metadata appears:

Allowed Value Types
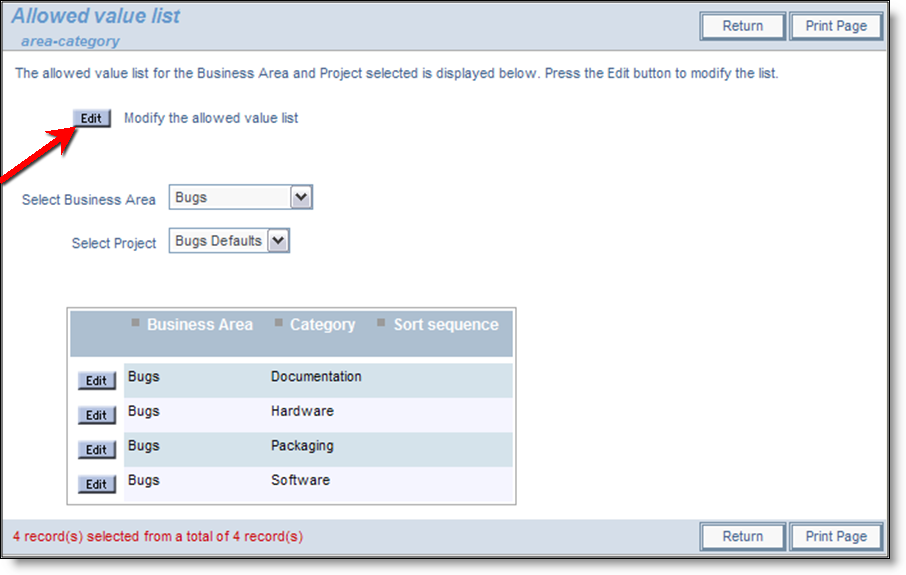
Once you have created the dependency relation above, you can view or specify the details of the relationship. For example you can view or modify which values of Owner will appear in a list box based on a selected Category. To do this, click the List icon next to the applicable Allowed Value Title. Note that the prompts for the Business Area and Project are only displayed if these are enabled in your system.

Allowed Value List
If Business Areas and / or Projects are enabled, you can select any combination from the select lists to view the entire list of values defined for the allowed value relationship. To modify an allowed value list, click on the Edit button. If Business Areas and / or Projects are enabled, you can define the values for the global area and global project, or you can define the values such that they only exist within a selected Business Area and Project.

Managing the Allowed Value List
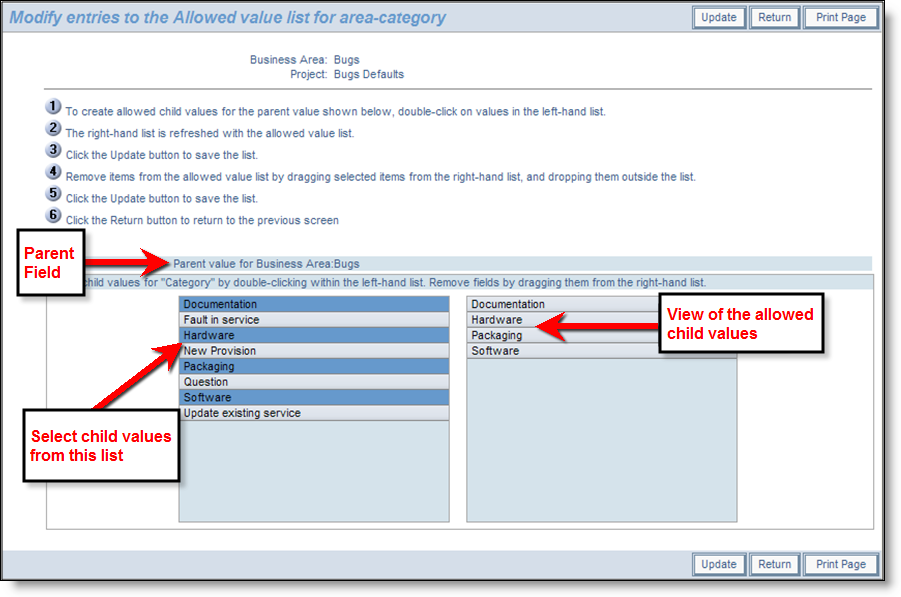
When you modify an allowed value list, the screen will look similar to the example above. You select the allowed child values from the left-hand list, by double-clicking with your mouse on each value you want to allow as a child. The value will then appear in the right-hand list. You remove allowed child values by holding your mouse button down on the list item in the right-hand list, and dragging the value out of the selection box. Note that if the parent field is AREA, then you cannot modify the parent list value from this screen, but you need to return to the previous screen to make a new selection. When you have selected the values as the valid list of children in the left-hand list, values are updated when you press the Update button. Note that the selected list displays the child values in the order they will appear in lists on other screens. This order is set in the list management screen for the value, unless you want to use the default alphanumeric order. When you have modified the list, you must press the Update button to make your changes in the database. You can select other parents and modify their children before pressing Return to return to the previous screen.
Note: If the parent value is either the AREA or PROJECT field, you can only select its value from the previous list of Allowed Values.
Note: You can also maintain the allowed values from the List maintenance screens. When a list field value is a child in an allowed value relationship, you can select the parents to which it belongs from the List maintenance screen. The two methods of maintaining allowed values are complementary. The method described here is more convenient to use if you want to make the entries from the parent field, while the method available from the List maintenance screen is more convenient if you want to make your modifications from the child field. You will typically place both the parent and child values in the allowed value relationship onto an add, edit, or embedded layout. If you place just one of them on a layout then the allowed values are not rendered; the field on the layout behaves as a normal list. You should always place the parent field on the layout before the child field, as there are occasions when the fields are processed in order, from left to right, top to bottom.
There is a special use of allowed values that is only relevant when the parent field is the field set in the behavior setting named COMPANY_NAME_LIST_UDF and the child field has a display type of User. In many circumstances, you only want the user to be sasociated with the value set in the COMPANY_NAME_LIST_UDF. As opposed to having to set this relationship manually on each occasion you create a user, this relationship can be built automatically for you.
First, within the screen that maintains the allowed value lists, choose the appropriate Business Area and Project. Assuming the parent field is that nominated in the COMPANY_NAME_LIST_UDF setting, and the child field is a User type field, you will see an additional prompt on the screen Auto-populate child values? If you check this and click Update, all existing values in the Allowed value relationship will be deleted and the allowed values are built for you. From this point onwards, each time to create a new user, the appropriate allowed value relationship is populated for you.