Custom Email Templates
This feature allows the administrator to create standard email templates for email notification in situations where a standard response is warranted. For example, if your product team had a number of issues entered by the members of a beta test group, and they wanted to be able to send a standard confirmation to a group member whenever there was a resolution, this feature could be employed for this purpose. Another example is that a customer support representative could choose from one of several standard replies to a customer reporting a problem. These replies could be geared to acknowledging receipt of a problem, informing the customer of progress towards resolution of a problem or notifying the customer that a problem has been resolved. Custom email notifications may be sent from the edit screen of an issue, using the Email button on the menubar, or they may be sent using an automated process via a business rule. From the administration Operational Tasks menu, click the Email Templates button. The following screen appears:

Email Templates screen
To add a new email template, click the Add button. The following screen appears:

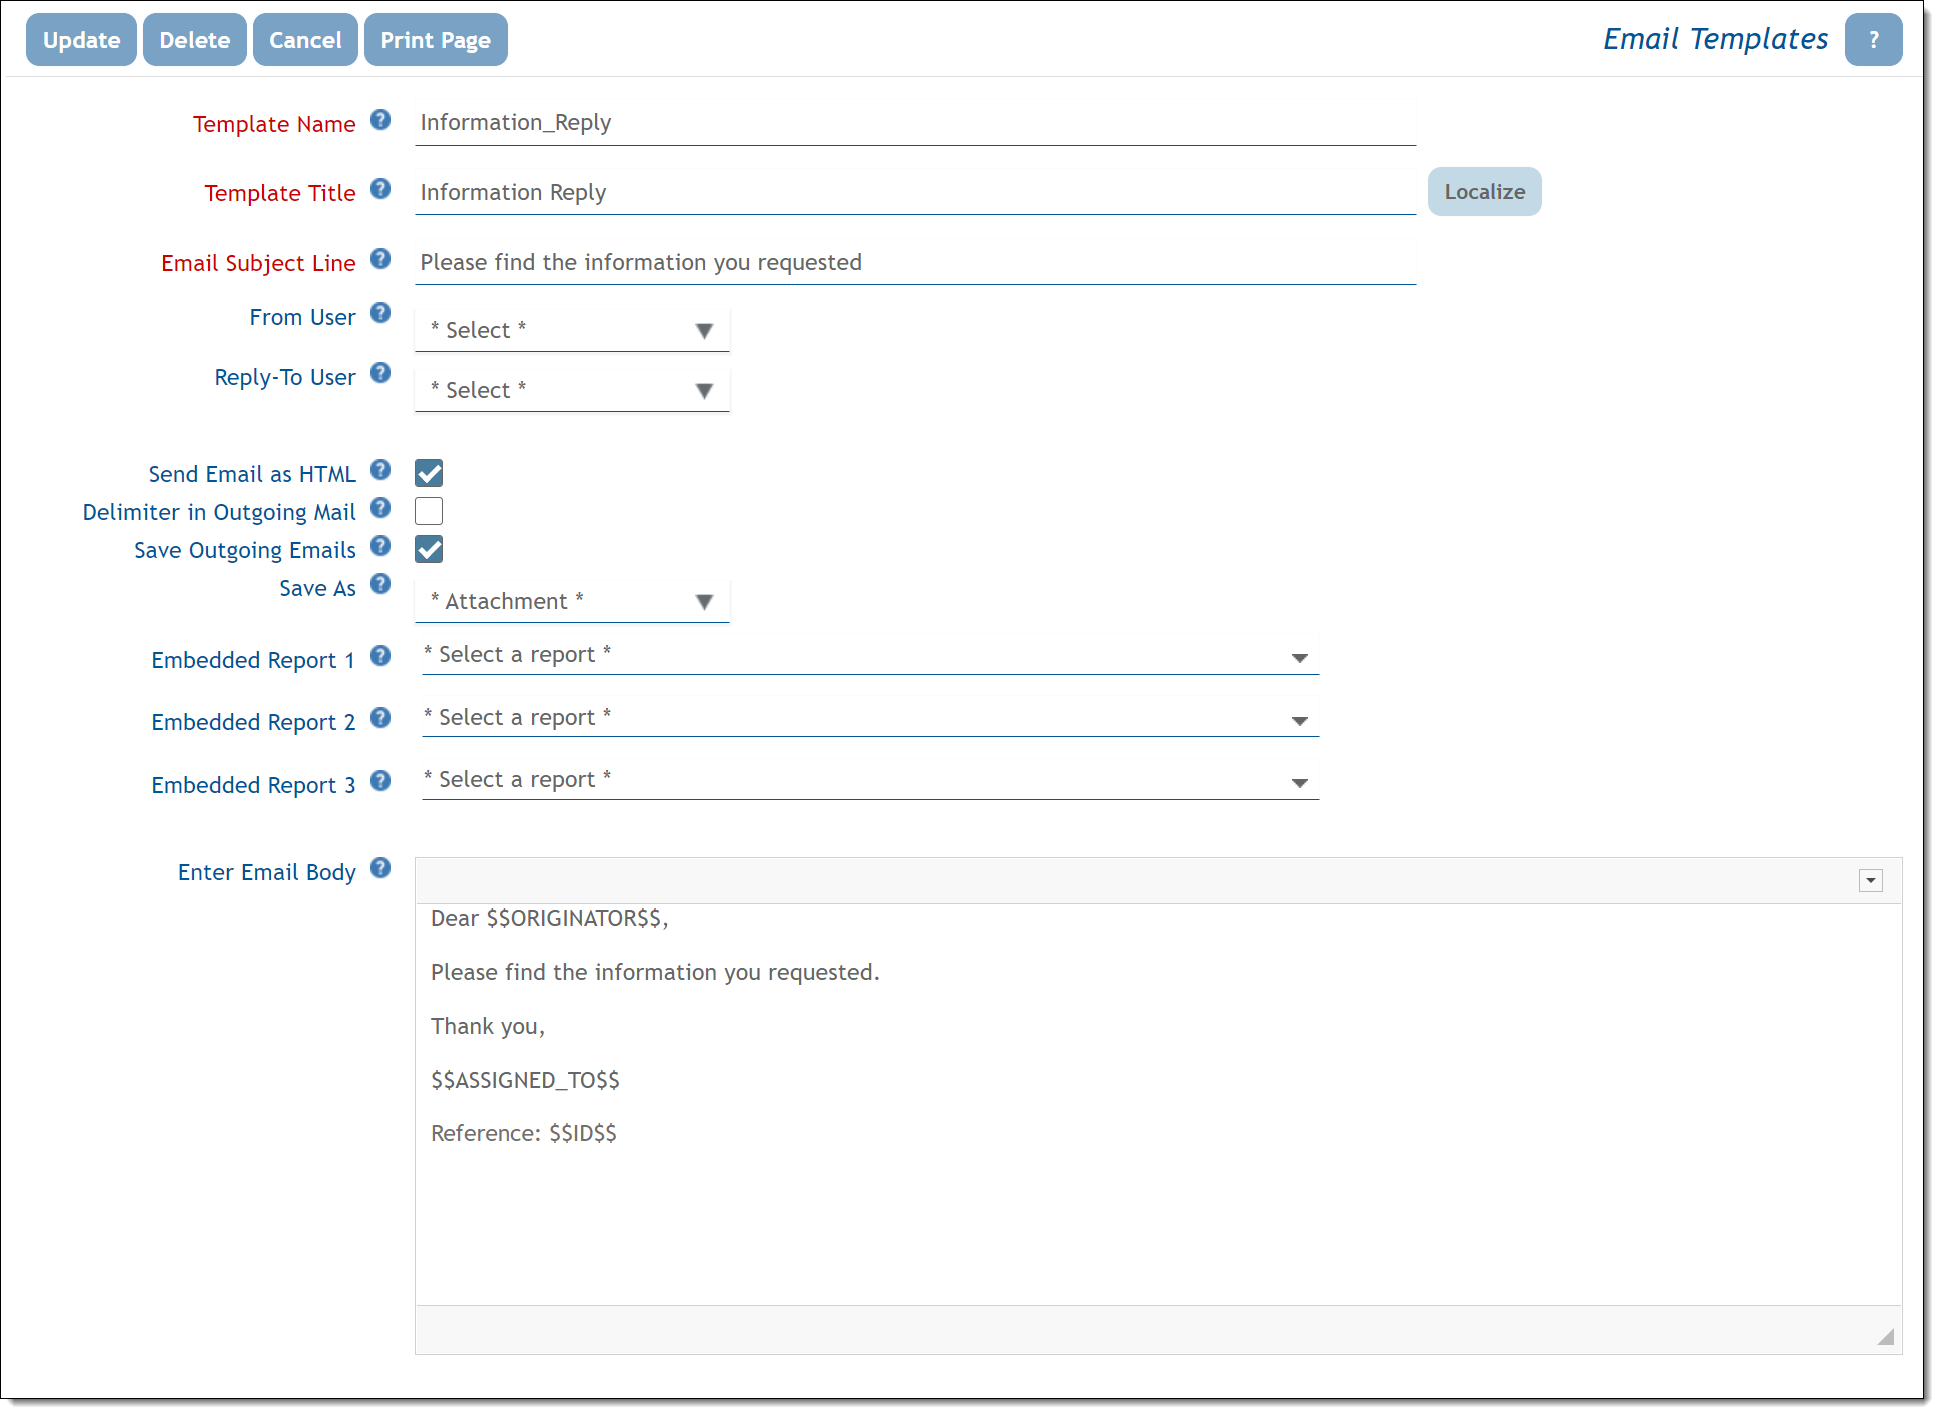
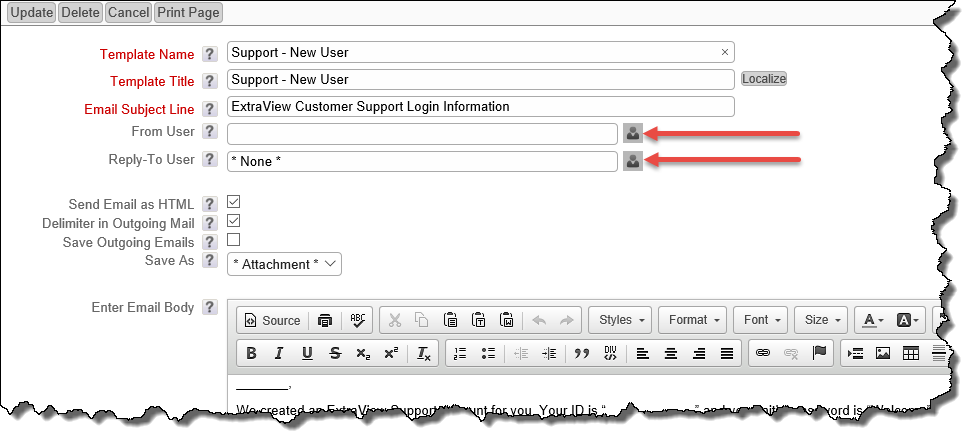
Add Email Template screen
- Provide a name for the template
- Provide a title for the template
- Provide the email subject line for the outgoing email. This may include tokens that will be replaced by field values when the email is sent, as described below
- If you want to specify the email as originating from a specific user, select the user’s name from the From User list. This allows you to select a single user whose primary email address will be used as the From Address. Note that you can select the current user, in order to allow the sender to be the person who initiates the email. If this option is not selected, the email address in the EMAIL_FROM_USER_ID behavior setting is used
- If you want to specify the Reply-To User of the generated email to be set to the primary email address of a specific user, select their name from the Reply-To User list. This allows you to select a single user whose primary email address will be used as the reply-to address. Note that you can select the current user, in order to allow the recipient of a reply to be the person who initiates the outgoing email. If this option is not selected, the email address in the EMAIL_FROM_USER_ID behavior setting is used
- Indicate whether the mail is to be sent as plain text or as HTML using the checkbox Send Email as HTML
- If you intend for the recipient of the outgoing email to reply to the email when you generate the email from the edit screen of an issue, and for EVMail to process the reply, such that it will update the issue with the recipient’s reply, then check the box Delimiter in Outgoing Mail. This introduces an invisible delimiter into the email so that EVMail will discard all the mail following this delimiter, leaving only the recipient’s reply to the mail being added back into the issue. The text for the delimiter is defined in the behavior setting named EVMAIL_DELIMITER_TEXT.
- The outgoing email can be saved back with the issue from which you originated the template. You enable this behavior by checking the Save Outgoing Emails option
- If you are saving the outgoing email, then the default is to save it as an attachment to the issue. However, if the outgoing email is text, then you have the option to save the outgoing email into a field with a display type of log area. You can choose from the list, to either save as an attachment, or from the list of available log area fields. Make sure the users who use the template have write permission to this field
- You have an option to embed up to three different reports within the body of the outgoing email. Select the reports from the three report lists. You can place the reports at any point within the body of the email. Use $$EMBEDDED_REPORT_1$$, $$EMBEDDED_REPORT_2$$, and $$EMBEDDED_REPORT_3$$ for each of the reports respectively. It is highly recommended that you place each report on a new line within the body of the email
- When the outgoing email is attached into the issue from which it was generated, it can be viewed in the normal way that you view all other attachments. Note that the header information used to process the emails is not visible with one exception. The exception is that you will be able to see the names of attachments you might have added to the outgoing email. This allows better auditing of the history of email transactions. Just like in email clients, if the user wants to see all the email header information, they can view the source of the downloaded attachment
- Use the text area to compose the email that is to be sent. The text for the email can be plain text, or can be HTML. The appropriate type of text box will be displayed, dependent upon the selection for whether the mail is to be sent as HTML or as plain text.
Within the subject and the body of the mail, you may insert tokens that are replaced when the email is sent. These tokens represent the value associated with the field from the record that is currently displayed when the mail is being sent. For example, if you want to substitute the issue ID in the mail, you will use $$ID$$. To insert the issue status, you will use $$STATUS$$. Valid tokens are data dictionary field names, data dictionary UDF’s as well as the following:
| $$SYSDATE$$ | The current date, including time |
| $$SYSDAY$$ | The current date |
| $$SITE_URL$$ | The URL of the site |
| $$EXT_SITE_URL$$ | The external site URL. This provides a link within the email which can be used to access ExtraView from the email being generated. The most common purpose for this is to drill down to an issue using the $$ID$$ or $$ALT_ID$ of the issue |
| $$LOG_AREA_FIELD.MOST_RECENT$$ | This convention allows you to refer to any field with a display type of LOG AREA. When this is set into an email template, only the most recently added entry into the LOG AREA field is entered into the body of the outgoing email. Obviously, substitute LOG_AREA_FIELD with the name of your User Defined LOG AREA field. |
It is possible to substitute the From User and Reply-To User values at runtime, by populating their values from fields on the underlying edit screen. The fields used to populate the template must have a display type of either TEXT FIELD or USER and must be single-valued. The template will contain $$FIELD_NAME$$ in the From User and/or Reply-To User fields. The $$FIELD_NAME$$ must exist on the edit screen. When the user enters data into the edit screen, they may either enter a valid User ID or an explicit email address.

An example email template body:
| Dear $$CUSTOMER_NAME$$,We are in receipt of your issue, reported on $$DATE_CREATED$$, is receiving our prompt attention.Our records show that you reported the issue with the following description:
$$DESCRIPTION$$ We will contact you as soon as we can provide a solution to your report. Thanks, $$OWNER$$ |
would produce email output similar to:
| Dear Brian Jones,We are in receipt of your issue, reported on 12/11/2002, is receiving our prompt attention.Our records show that you reported the issue with the following description:
I cannot access the top-level widget within the cabinet of the power supply, unless the power is turned off and the unit is disconnected from the power. I understood that changes like this could be achieved without powering down the equipment. Can you please provide a solution? We will contact you as soon as we can provide a solution to your report. Thanks, Tony Smith |
You may include image fields and document fields as part of a custom email. When you place an image field name into a custom email (e.g. $$MY_IMG_FIELD$$), the image will appear inline within the body of the email. If you place a document field (e.g. $$MY_DOC_FIELD$$), then the name of the document file is placed into the email body in place of the token, and the document is added as an attachment to the outgoing email notification.
As well as fields that you can refer to with the tokens surrounded with the $$ characters, there is a selection of inbuilt variables that you can refer to as tokens. This list is:
- APP_HOME – the relative path to the WEB-INF folder on your application server
- BG_COLOR – one of the two background colors used to draw tables in ExtraView
- BG_ALT_COLOR one of the two background colors used to draw tables in ExtraView
- BROWSER_NAME – the name of the user’s browser that generates the email
- COMPANY_LOGO_IMG_HOME – the relative path to the location where the CompanyLogo.gif is stored
- DEFAULT_FONT – the name of the default font used in the installation
- EXT_URL – the absolute path to the ExtraView installation
- FIXED_WIDTH_FONT – the name of the fixed width font used in the installation
- IMG_HOME – the relative path to the location where the ExtraView images are stored
- JAVASCRIPT_HOME – the relative path to the location of the ExtraView JavaScript files
- LABEL_COLOR – the color of labels on ExtraView screens
- STYLESHEETS_HOME – the relative path to the location where the ExtraView stylesheets are stored
- WINDOW_BGCOLOR – the background color of the ExtraView screens
Once you click the Add button to save the template, it will appear in the template select box for users when they click the Email button from a given issue’s Edit screen.
Note: A field named EMAIL_ADDRESS is available as a UDF field with a display type of Text. This field may be placed upon layouts. It serves a special purpose. When a user accesses the custom email function from the edit screen, to send an ad-hoc email, or an email created from a predefined template, this field will be used to automatically populate the email address to which the mail is to be sent. This simplifies communication to users who, for example, enter an email address when reporting an issue. The value stored in this field automatically gives a return address.
Links to ExtraView Functions
Please view the Application Programming Interface Guide for additional information. You may embed API calls within your email templates to access different ExtraView functions from within your email sent with an email template. Typical syntax within an email template to provide a drilldown link to view an issue and to edit an issue are:
To view an issue:
<p>Drilldown Link: <a href="$$SITE_URL$$/evj/ExtraView/link.html?p_action=doEditDisplayEmail&p_option=Display&
p_id=$$ID$$&p_from_action=email&p_from_option=email">Click here to view issue number $$ID$$</a></p>
To edit an issue:
<p>Drilldown Link: <a href="$$SITE_URL$$/evj/ExtraView/link.html?p_action=doEditDisplayEmail&p_option=Display&
p_id=$$ID$$&p_from_action=email&p_from_option=email">Click here to view issue number $$ID$$</a></p>
Note that the hard-coded URL address has been replaced in the above examples with the setting SITE_URL. The value for this is set by ExtraView when the application server starts or is taken from the behavior setting named SITE_URL if this has a value.
