Example 2
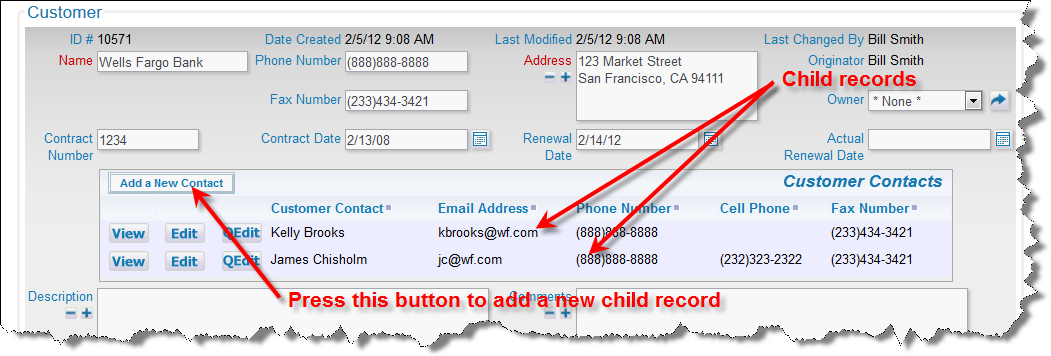
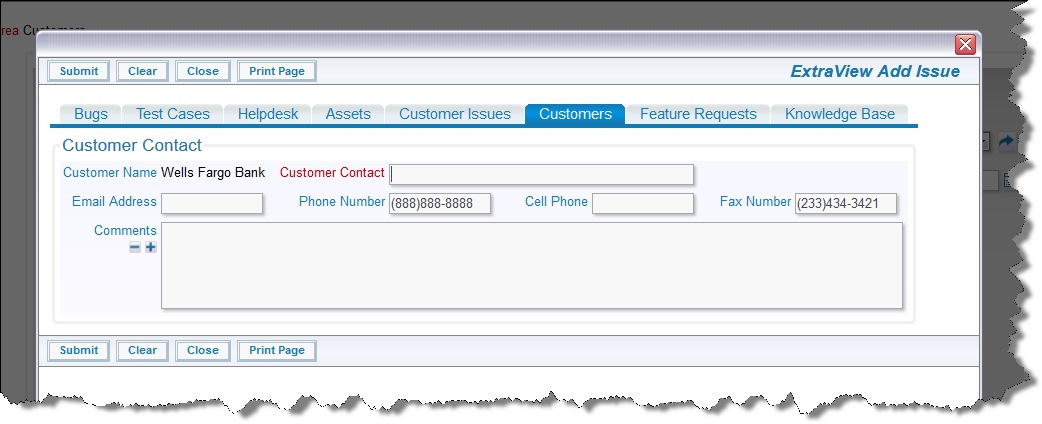
A common requirement is to have one issue (the parent issue) create related issues as children. For example, you might have a process that spins off an arbitrary number of actions to employees around your organization, and for each of these employees to complete a task before the parent issue can be closed. You want to have an Add button on the parent issue to add the child issues one-by-one. This example shows how a parent customer screen can add any number of contact records to different people as child records. At the same time, some fields from the parent issue are “pushed down” into the child record, to pre-populate the child record with values that are required.

Adding related issues from an Add or Edit screen

The popup Add window where you add the child record
To setup this feature, use the following sequence as a guide:
- This feature presently only works when your installation uses the ID field, as opposed to the ALT_ID field, as the unique identifier for all issues
- Definitions and screens for parent issues to which you want to add the children. For this example let’s say this parent issue is in a Business Area titled Customers and the data is stored in the Project titled Customer Information. The name for the Business Area is CUSTOMERS and the Project is named CUSTOMERS_DATA
- Definitions and screens for child issues to be added to the parent. For this example let’s say the child issues are in the same Business Area titled Customers but the data is stored in a separate Project titled Customer Contact. The Project is named CUSTOMERS_CONTACT
- Have a one-to-many relationship group defined for the link. For our example, we will name this CUSTOMER_CONTACTS
-
You need a button defined as a field in the data dictionary, which is used to add the child records. This must be created as a field on the Label tab and can have any name. Its display type must be Button. The title of the field is used as the text for the button on the screen. In our example, the field is named CONTACT_ADD_BUTTON. There is an attribute that you can define for this button field, which controls a number of elements:
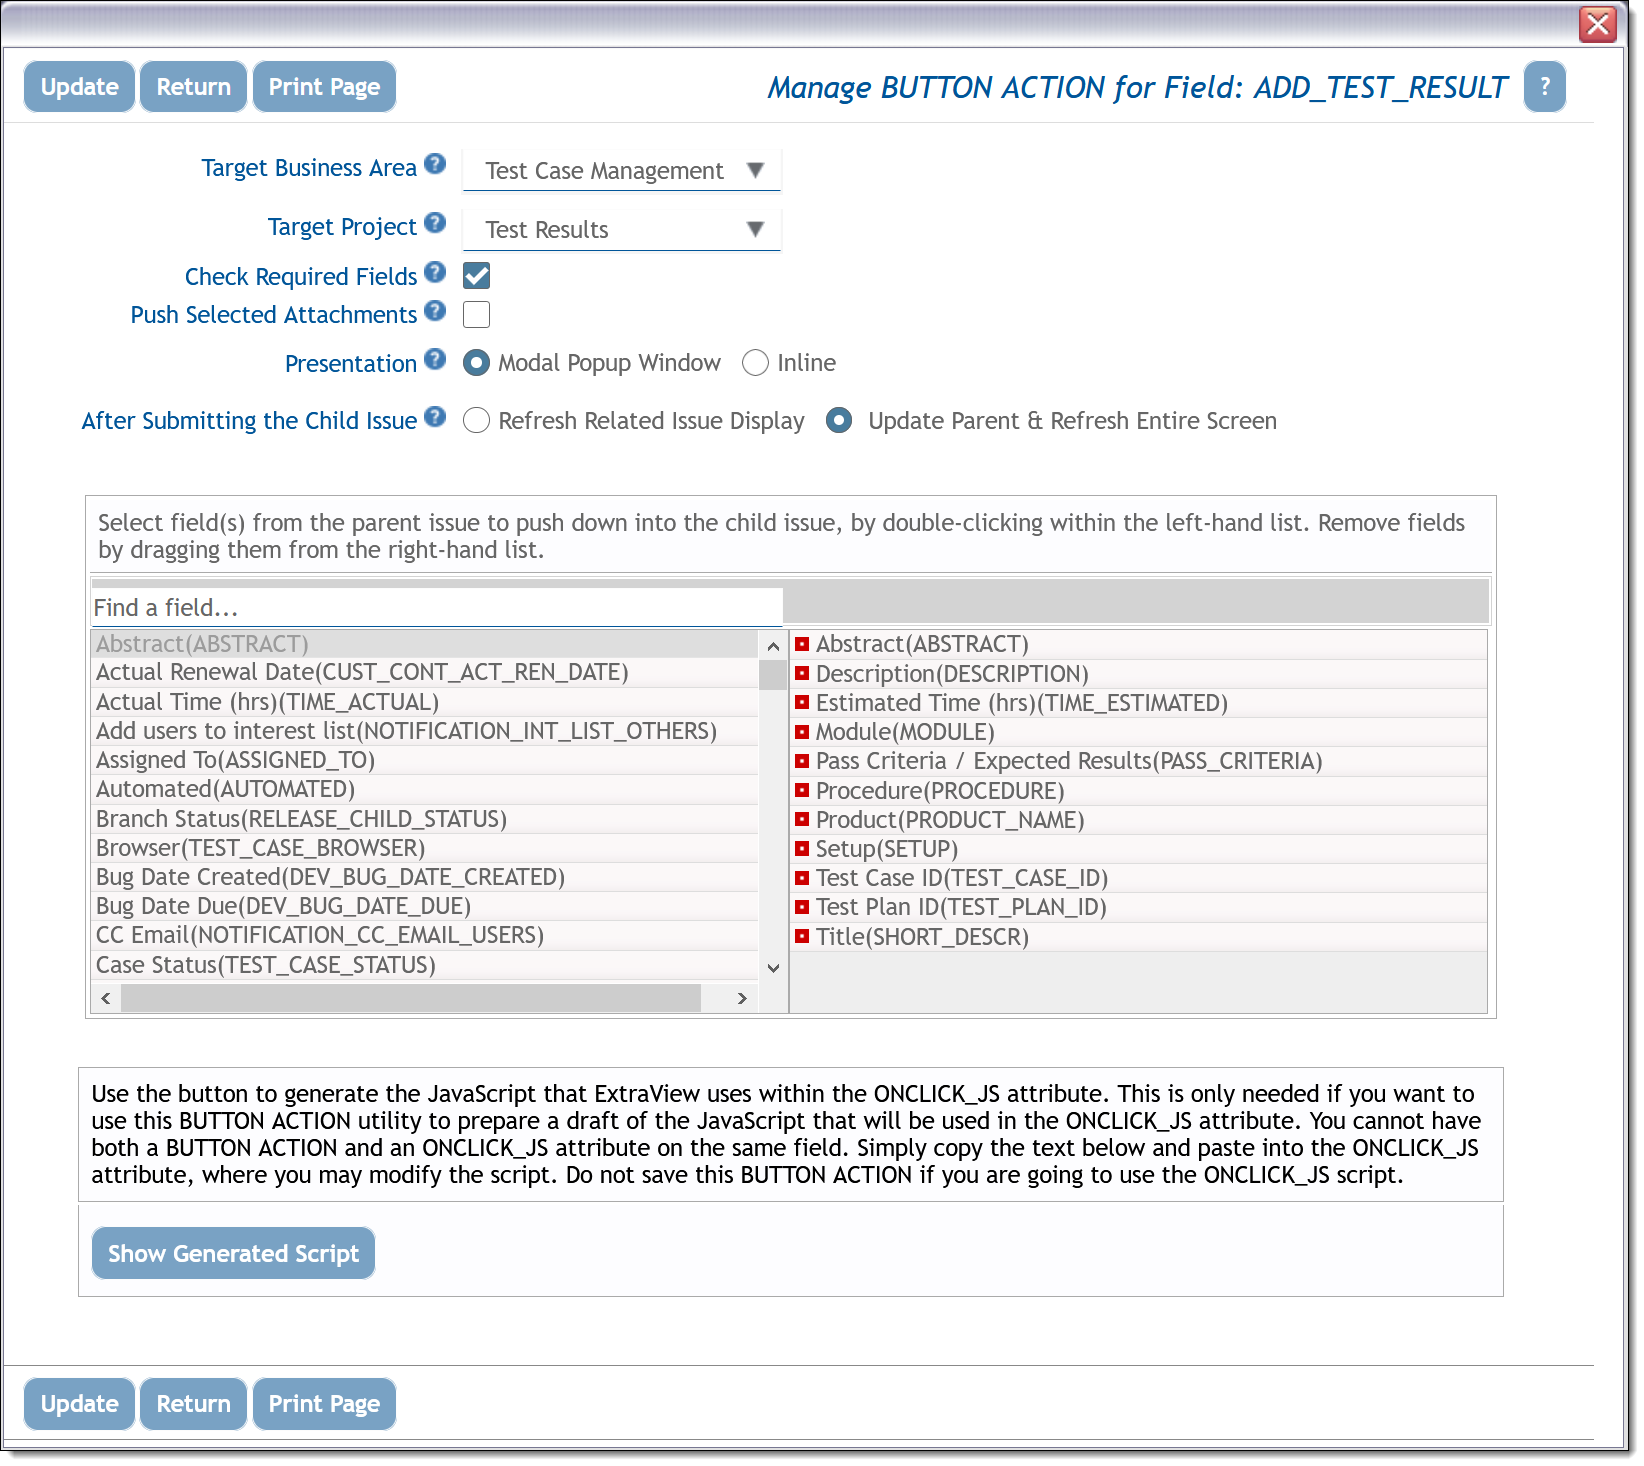
- Which Business Area and Project into which you want to add the child record
- The behavior when you submit the child issue, for example, whether to just refresh the parent window with the information from the new child record, or whether update the parent record with information from the new child record
- To define a set of fields from the parent record that you want to “push down” to the child record, so the values of these fields can automatically be assigned to fields in the child record
This attribute is the RID BUTTON ACTION attribute and should be configured under the Global Attributes tab within the Data Dictionary. The configured attribute will look like this:
 Configuring the Button Action
- Create a layout type to hold the related issues or use the inbuilt related issue display layout named RELATED_ISSUE_DISPLAY. If you create your own layout type, the name must start with RELATED_, followed by other characters. For example, name the layout type RELATED_CONTACTS and make sure that its usage is Report. In our example we will just use the inbuilt RELATED_ISSUE_DISPLAY
-
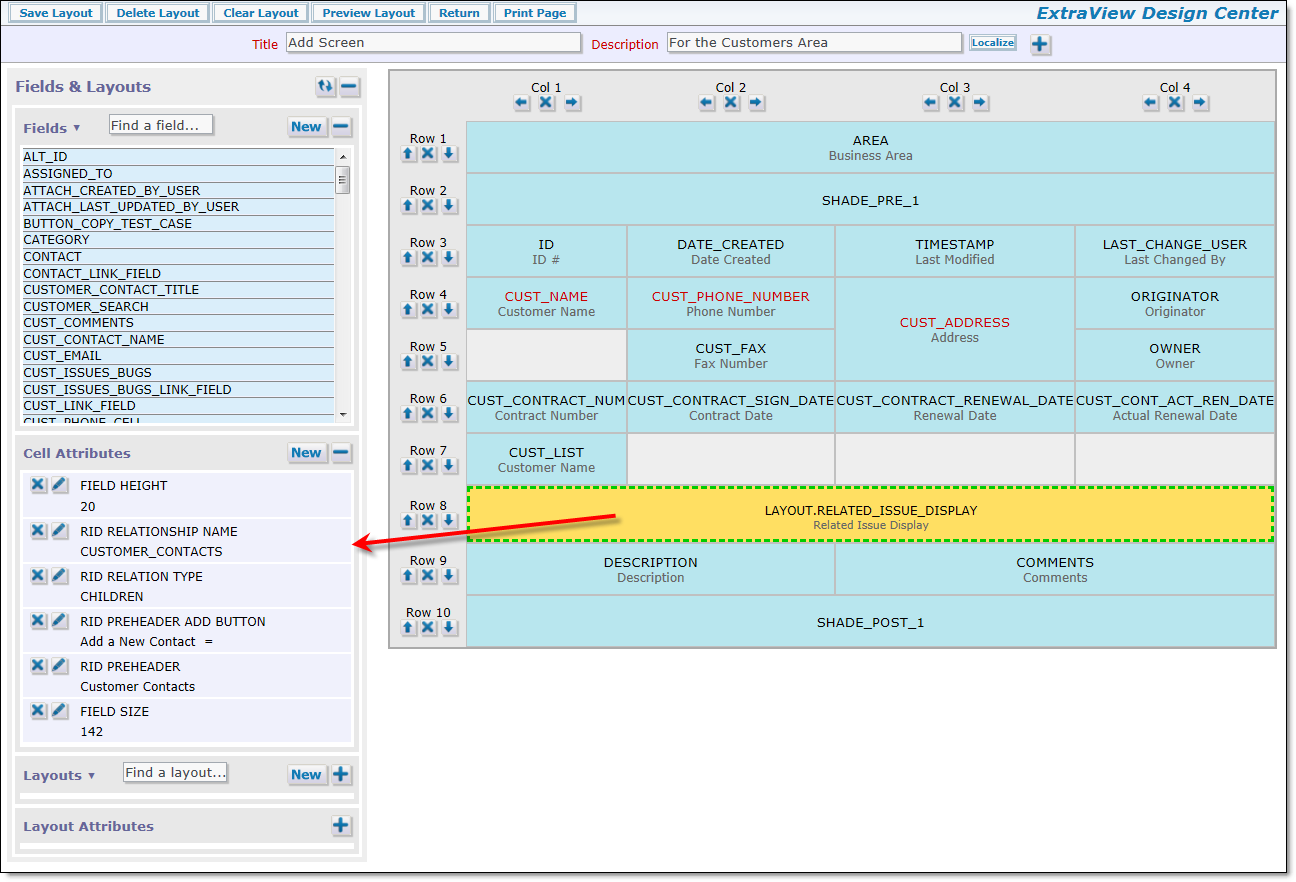
Add the layout you are using into the Customers Business Area and the Customer Information project. In our example, this is the RELATED_ISSUE_DISPLAY. Onto this layout, add the fields from the child issue that you want to display on the related issue display on the parent issue. This might look like this:

The Related Issue DisplayThe layout cell attributes that you see are used as follows:
- FIELD HEIGHT – This provides a maximum height before the child issues will be displayed with a scroll bar. This is approximately the number of rows of data
- RID RELATIONSHIP NAME – This should be CUSTOMER_CONTACTS for our example
- RID RELATION TYPE – This should be CHILDREN for our example
- RID PREHEADER ADD BUTTON – The name of the button you created in the data dictionary
- RID PREHEADER – The title you want to place at the top of the related issue display, to the right of the add button
- FIELD SIZE – The width of the related issue display, approximately in characters
- Test the configuration by adding the essential fields to the parent record, then clicking the add button and adding a child record.
