Mass Updating of Issues
Click for administrative information
Assuming the administrator has given you permission, there will be a button labeled Mass Update Issues on Quicklist Reports, Detailed Reports and the Column Reports that you generate. This button allows the batch or mass update of fields to which you have permission to update. For example, you may want to re-assign all the open issues assigned from one person to a different person. Another example may be to move a range of issues open against a specific release to another future release of the product. Not all fields can be updated by this method.
Fields that are of the display types Custom, Document, Image, and Label cannot be updated with this utility. If you are using the ExtraView feature that allows multiple repeating records to be creating against each issue, then the fields on the repeating records cannot be updated with this facility.
To use this feature:
- First, prepare and run a Quicklist, Detailed Report or Column report
- Click on the Mass Update Issues button on the menu bar of the report
- Select the field or fields that you want to update from the list of fields offered to you. Against each field you may enter the new value you want to apply to all the issues
- Add additional fields as required and select values for these. After selecting the first field for updating, a list of all the issues to be updated will be displayed, and you will see the current values for the field in these issues. As you add additional fields, their existing values are added to the list of issues
- You must check the button Generate Email button if you want the standard notification sent for each issue being updated. The default for this is not to send email, as you may be generating a very large list of updates and hence email notifications
- Click Update. Note that if you have updated a large number of issues, the process may take some time to complete.
Note: If the field you are updating is a multi-valued field or part of a repeating record that can have many values, then the update will add the new value to the existing list of values for the field you are updating.
Note: You may not be able to undo the mass update operation, so take care to review your choices before pressing the Update button.
Note: Allowed value combinations are not used within the Mass Update feature. It is the responsibility of the user to select valid allowed value combinations when selecting values from the lists in the Mass Update screen. If an incorrect combination is selected and the user proceeds with the mass update, then it will fail.
Note: You may update issues across multiple business areas and projects, provided the value to be updated does not violate any business rule such as a field being required.
Example: This shows how you can reassign all issues from one person to another with the Assigned To field, set the Category field to a new value and set the Due By date to a new value.
- Prepare and run your report that contains the issues to be updated
- From the resulting report output, press the Mass Update Issues button
- Select the Assigned To field and set a new value
- Select the Category field and set a new value
- Select the Due By field and set a new value
- Review the issues to be updated. You may deselect any issue you do not want to update with the checkbox at the left of the row
- Click Update all records to proceed with the updates.
You will see a screen similar to:
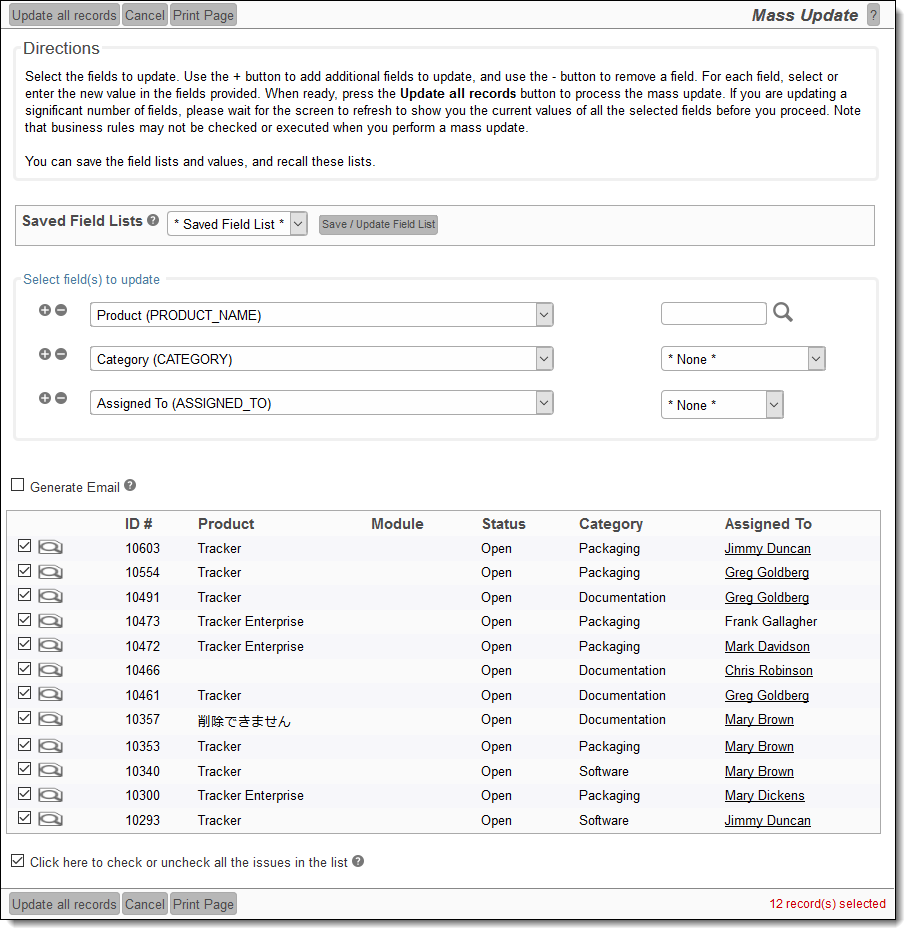
Mass update screen
If the field you are trying to update is dependent upon another field (for example a module field may be dependent upon product), then you will be prompted for the parent field, then the child field, to ensure that the relationships between the values are kept intact and only valid combinations are stored. If you try to update a parent field that would invalidate the child records, for example trying to set the product field to a value that is not appropriate for a given module, you will receive an error for that issue, or issues, and these issues will not be updated.
Note: You can only update issues that are within your currently set Business Area and Project. If your search results contained any issues, or items in any other Business Area or Project of the system, they will not be updated.
When ready, you press the Update all records button. You will be asked to confirm that you want to update the issues. Expect the update to take one – two seconds per issue to perform the update. Updating the issues is a process that happens in the “background” of the computer server. This has a number of advantages. First, it makes the mass update process less prone to error conditions if your local computer malfunctions or crashes midway through the process, or the communications network is disrupted for some reason. Second, managing the mass update as a background process allows ExtraView to monitor for attempts for one user, or several users to start mass updates while other mass updates are still running. This can lead to data integrity or data corruption problems, and of course is highly undesirable. While the mass update is underway, you will see a progress window as follows:
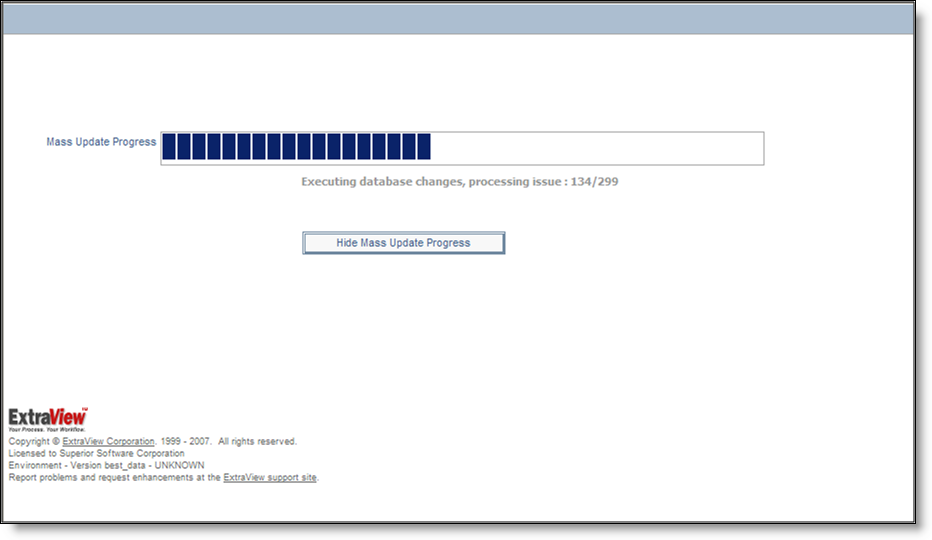
Mass update progress bar
Note: Pressing the button to hide the progress bar, or closing the window has no effect on the execution of the mass update. As a background process, it will continue. The progress bar is purely for informative purposes. Once the mass update is complete, and assuming you have not closed the progress window, you will see a summary of the mass update, including any errors encountered. The most common error is trying to perform a global mass update across several business areas, when the field you are trying to update is not on the edit screen for the business area and project to which the issue belongs.
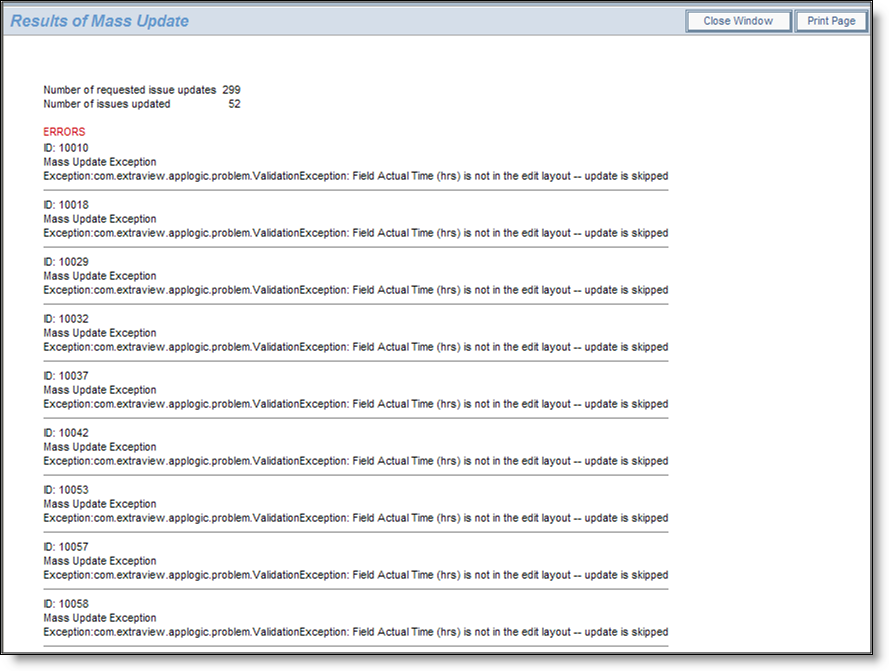
Results of a mass update, showing errors
Mass Update and Multi-Valued Fields
Multi-Valued fields are treated differently for the purpose of mass update. When you select one or more values in a multi-valued field to be updated, the selected values are added to the current values within the field. The existing field values remain untouched. If you want to replace the values in the field, first mass update the multi-valued field to a value of * None *, then perform the update you want to add the values to the field.
Mass Update and Repeating Rows
Mass update works with repeating rows, but there are a couple of points to consider:
- If the report from which you initiate a mass update does not include any filters on fields in the repeating rows, and you then decide to mass update one or more fields on the repeating row, then ExtraView does not have enough information to target specific repeating rows for the mass update. All repeating rows of all the issues that are being mass updated will be updated to the value or values you provide.
- If the report from which you initiate a mass update includes a filter on one or more fields on repeating rows, then ExtraView will only update these repeating rows during the mass update.
Mass Updates on the Results of Hierarchical Reports
Once a hierachical report has been output, it may be necessary to mass update all the issues reported within a level of the hierarchy. When the user presses the Mass Update Issues button on the menubar of the output of a hierachical column report, a dialog similar to this will appear:
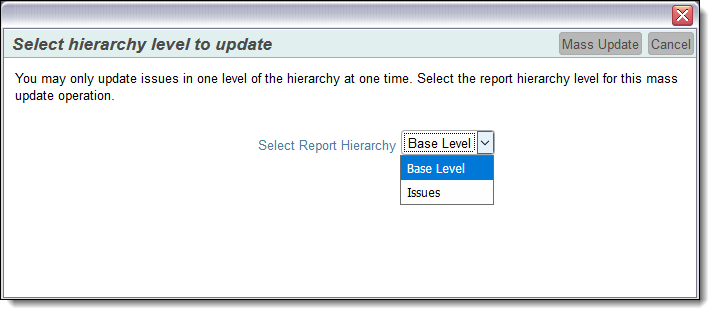
Select the level of the hierarchy at which you want to update the issues from the list displayed and click Mass Update. The mass update operation will proceed in the usual way after this selection, and only the issues that exist at that level of the hierarchy will be handled. You cannot update issues at more than one level of the hierarchy in one operation.
Saving the Mass Update Selections for Future Use
There are circumstances where you might wish to perform the same mass update repeatedly. To achieve this, the * Saved Field List * allows you to save, delete and retrieve lists that you set up. The popup that is accessed from the Save / Update Field List looks like this:
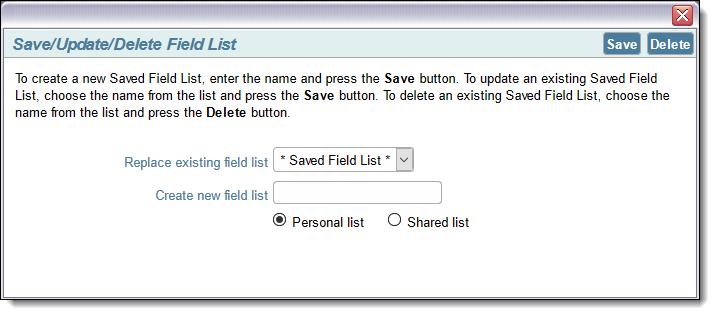
You may save a field list for personal use, or if you have permission, for public use by others who have permission to the mass update utility.
Special Use Case – Trigger Mass Update Without Updating Specific Fields
There are occasions when you want to be able to trigger mass updates over a range of issues, without updating specific fields selected on the Mass Update screen. This is usually done when you want to trigger some business rules within the PREUPDATE or POSTUPDATE directives, and these rules will make the updates to the issues. To achieve this, select the issues to be updated, then perform the mass update by selecting * None * as the field to update. ExtraView will then update all the selected issues, executing the business rules which will make the updates.
Click for administrative information
