Quicklist Reports
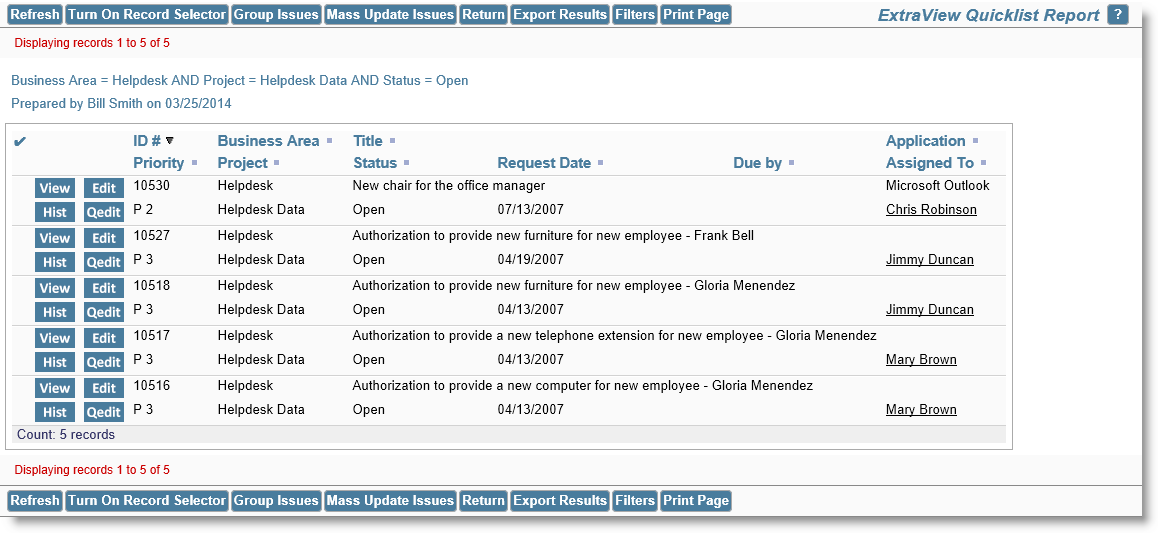
Quicklists are reports where the format (i.e. the fields that are displayed) is prepared by your administrator. Typically this report is designed to show you the most important and most frequently accessed fields. Selecting Run Quicklist Report and pressing the Go button will generate a report using the filters selected on the screen in the Query Filter section. The resultant report can be sorted by any of the fields displayed, with a single mouse click. Quicklists are ideal for selecting a group of records for further examination. For example, a manager might want to create a Quicklist of newly submitted issues, and then view or edit each in turn, in order to assign them to the appropriate person. Additionally, a manager could create a Quicklist of all the issues with an Open status, in order to see the average number of days in status for purposes of assessing efficiency or resource allocation.

Quicklist Report
Quicklist reports may be sorted on any field in the title, by clicking on the title. When you first click on a field, the report is resorted, using the field you selected in an ascending order. Clicking on the title a second time will resort the report again, this time using the field in a descending order. If you sort on one field, then choose a different field to sort the report on, the first field is still used in the sort order, but secondary to the field you just clicked on. If your administrator has enabled the option, a button named Turn On Record Selector will be on the menu bar of the Quicklist report. The function of this button is to allow you to see a selector by each record on your Quicklist report. When you use the selector to choose records from the Quicklist report, you can then perform one of the following mass operations on the selected records:
- Produce a Detailed Report with the selected records
- Perform a Mass Update of the selected records
- Export the results to local file on your computer, in a variety of formats
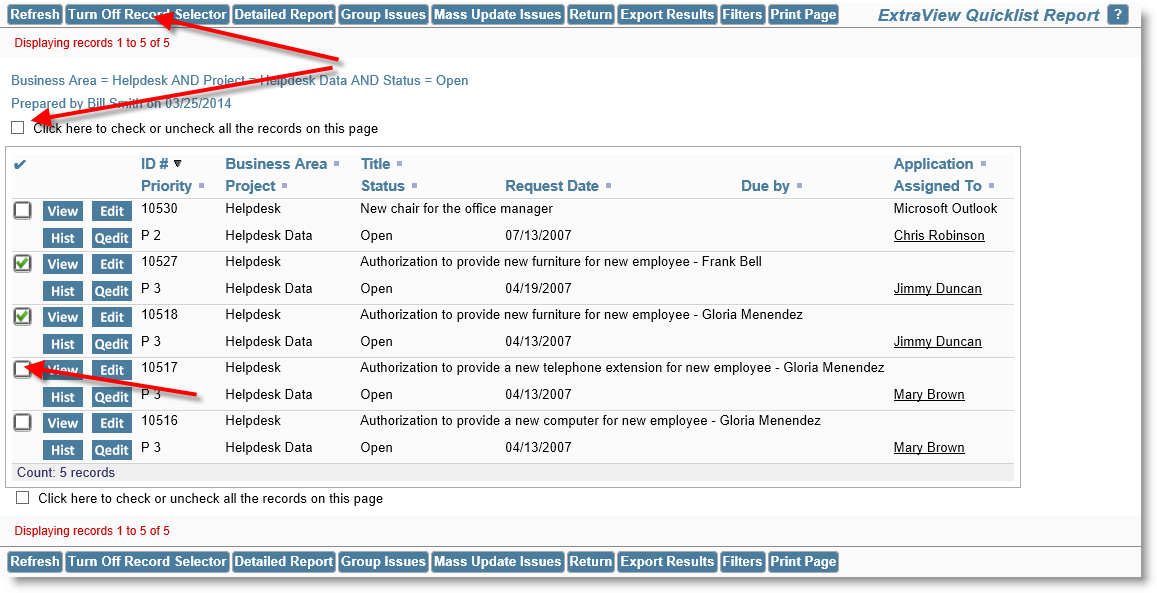
View other areas of this guide for information on each of these features. Turning on the record selector alters the Quicklist report by displaying a checkbox by each record, as shown on the following screenshot. Click on the checkbox to select each record. You can turn off the record selector with the button Turn Off Record Selector on the menu bar. To execute one of the mass operations, simply click on the appropriate button on the menu bar. You may also select all the records on the page by checking the box by the prompt Click here to check or uncheck all the records on the page.

Quicklist record selector
Exporting Results
Clicking the Export Results button pops up a selection lists as shown in this screenshot: 
Simply click on the output format you would like to save the results within, and a local file will be created on your computer.
Quickedit
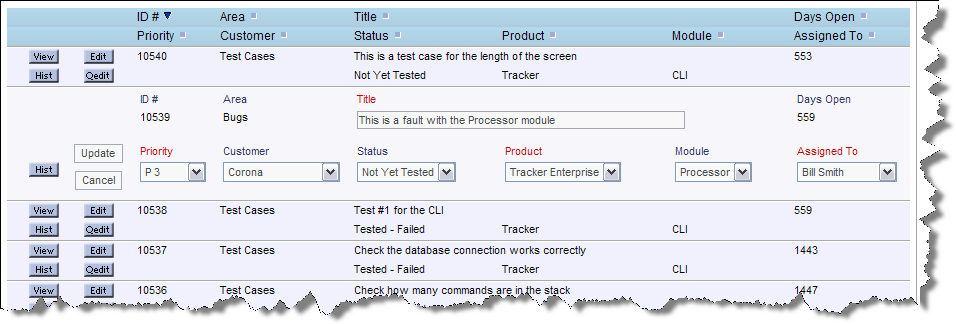
Many Quicklist reports will have a Quickedit button. This allows you to update any of the fields on the report, without entering the Edit screen. You may enter Quickedit for as many items as you like.

Quickedit mode
When you press the Update button within a Quickedit session, all rules and validations are performed, exactly as if you were in the Edit screen. Therefore, if a field becomes required as part of your update, and the field is not on the Quicklist layout, then a window pops open and asks you to enter a value for the missing field.
Hover Text Popups
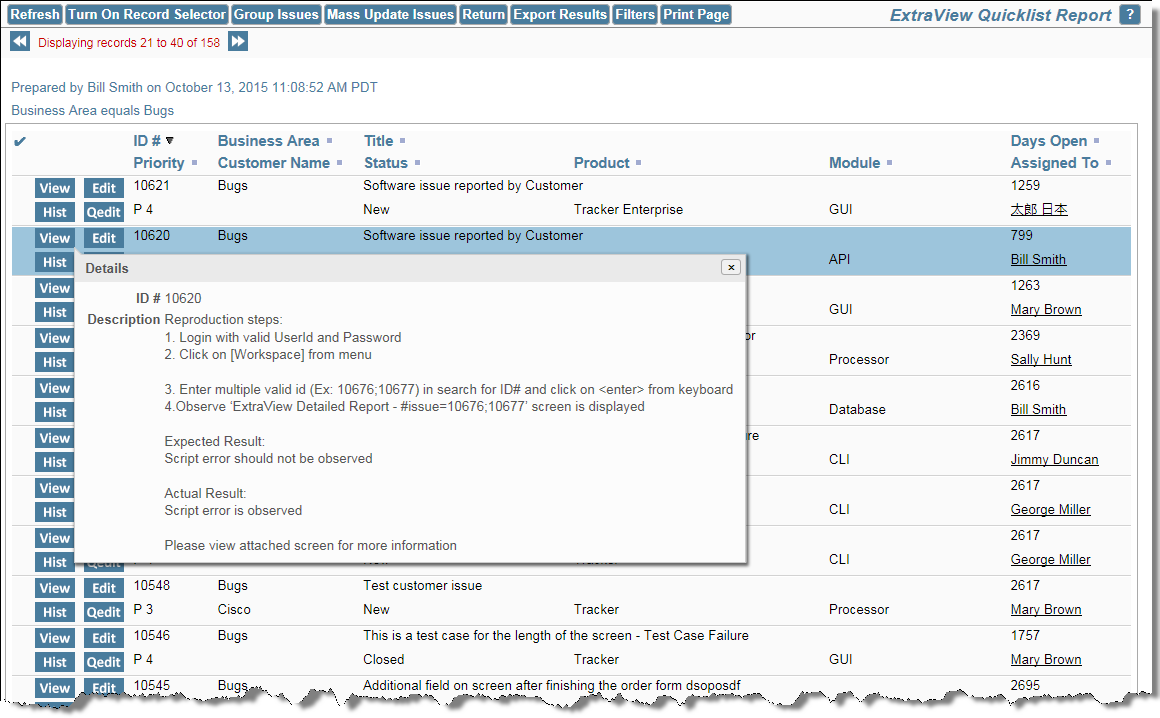
Your Quicklist reports may have been configured with hover text. This is the content of specific fields that your administrator allows you to see when you hover your mouse over the View button, without clicking the button. This is often a shortcut to viewing the entire issue. A popup appears, with the contents of the fields that were configured. A typical hover text popup looks like this:

