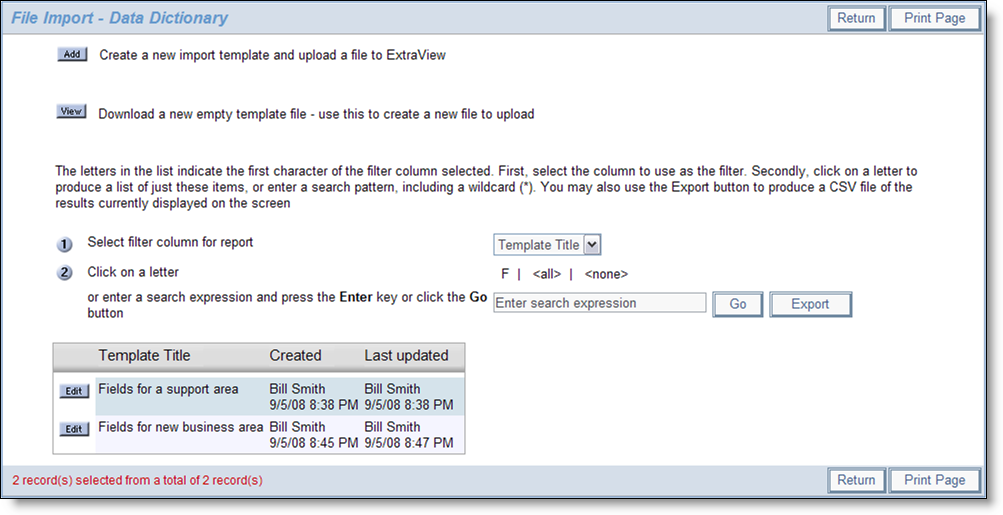
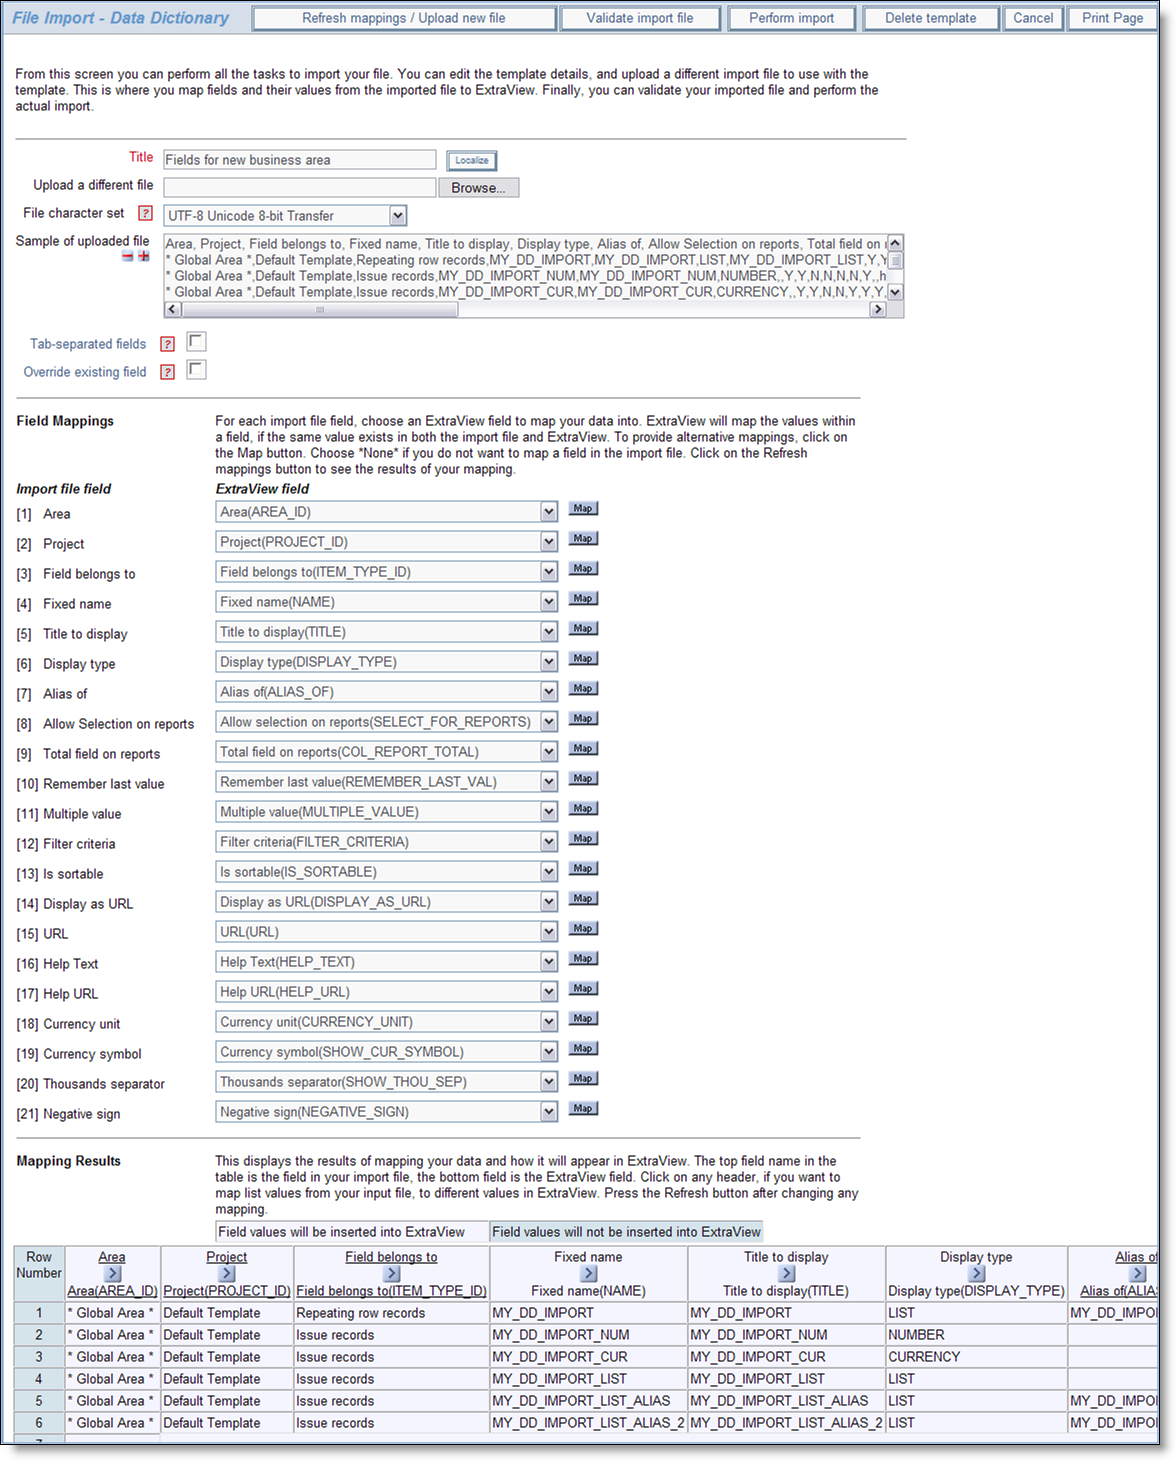
The purpose of this feature is to create new fields in the data dictionary from a spreadsheet. When creating a large ExtraView installation, there is often a significant amount of replication with similar fields, but with different names. You are able to create a spreadsheet with a set of fields plus their attributes from a comma- or tab-delimited file, and upload this file into ExtraView. Note that the template that you download is a Microsoft Excel spreadsheet. This allows the use of validation within the spreadsheet while preparing the input file. You must save the file as a comma-delimited or tab-delimited file before you import it back into ExtraView.
Significant validation is performed on the file you upload, with a similar two-step process as in uploading issue data. You are also able to save the templates you create for future use, allowing you to prepare fields in batches, and upload them as and when you are prepared.

Importing fields from a spreadsheet
Use Microsoft Excel or a similar spreadsheet tool to create your input data. An empty spreadsheet for use as an input file can be downloaded from within the utility. You must save the file as a comma-delimited or tab-delimited file before you import it back into ExtraView See the previous screenshot for details of how to download an empty spreadsheet.

Similar to the web-based input for the data dictionary, the following fields are available for input:
| Field Name | Description |
| Area | The title of the Business Area for the field. If the field is to be global, use * Global Area *. This field is required |
| Project | The title of the Project within the Business Area to which you want to load the fields. If you are creating a global field, this will be * Master Project * If you are loading the fields for use across a single Business Area, this will be the default Project for the Business Area. If you want the field to only be visible within a single Project, then you will use the title of that Project. This field is required |
| Field belongs to | This must be set to Issue records if you want the field to be available to the main body of issues, or to Repeating row records if you want to use the field on a repeating row. This field is required |
| Fixed name | This is the fixed name for the field. Names can only consist of the characters A to Z, 0 to 9, and ‘_’. The first character of a fixed name must be alphabetic and the name can be up to 30 characters in length. Names cannot contain characters from non-English alphabets. A further restriction is that you may not have two underscore characters together in a name. This field is required |
| Title to display | The display title for the field. This may be up to 100 characters long and may contain any characters such as punctuation. This field is required |
| Display type |
This must map to a valid display type within ExtraView. This field is required. The valid entries are:
|
| Alias of | If the field is to be created as an alias of another field, and the other field is of type list, tab, or radio button then place the other field name in this column |
| Allow Selection on reports | Create as Yes or No |
| Total field on reports | Create as Yes or No |
| Remember last value | Create as Yes or No |
| Multiple value | Create as Yes or No |
| Filter criteria | Create as Yes or No |
| Is sortable | Create as Yes or No |
| Display as URL | Create as Yes or No |
| URL | If you are using the field as a display as URL, then provide the URL here |
| Help Text | The help text for the tooltip on the field |
| Help URL | The URL to use if you are providing your own help on the field |
| Currency unit | The currency unit for the field |
| Currency symbol | The currency symbol to be used for the field |
| Thousands separator | Create as Yes or No |
| Negative sign | Create as Yes or No |
| Internal precision | A number from -24 to 10 indicating how many digits of precision should be maintained for internal computations with this field |
| Report precision | A number from -24 to 10 indicating how many digits of precision should be displayed on reports or read-only displays of this field |
| Rounding mode |
Select from one of the following list:
|
| Percentage type | Create as Yes or No |
This utility is very similar in usage to importing issue data. Please see the previous section in this guide for full instructions.

Importing fields into the data dictionary
The key difference in using this utility and using the import issue data feature is that there is a prompt on the screen, Override existing field. If you check this, then you may update the properties of the field given in the Fixed name column.