Typically, you follow the following steps to manipulate values:
You must work with fields that have been created within the Design Center or Data Dictionary. In addition, before a field appears within the parameters for a form, it must have been placed on that layout.
All values are normally stored in Maps and HashMaps.
The FormParameters value for p_assigned_to is not frequently used.
The most frequent method of manipulating values is to use a HashMap, indexed by the field name from the form on the web page. For example:
fp.get("p_assigned_to")
The key to the HashMap is the same as the data dictionary field name. For example:
values.get("ASSIGNED_TO")
A fundamental part of understanding how to code with User Custom methods within ExtraView is to follow how ExtraView places fields on screen layouts, such as the add issue screen or the edit screen. This is done by processing a series of parameters that are passed between the server and the client browser. The parameters are created within the ExtraView servlet, passed within HTML to the browser, handled by the browser, then submitted back to the servlet where they are processed. When processed in User Custom code, the programmer gets the parameter information from the FormParameters object that ExtraView creates. ExtraView creates a new FormParameters object for each request it receives from the web browser.
As an example, let us view how ExtraView processes the following user interactions once they have signed on to ExtraView:
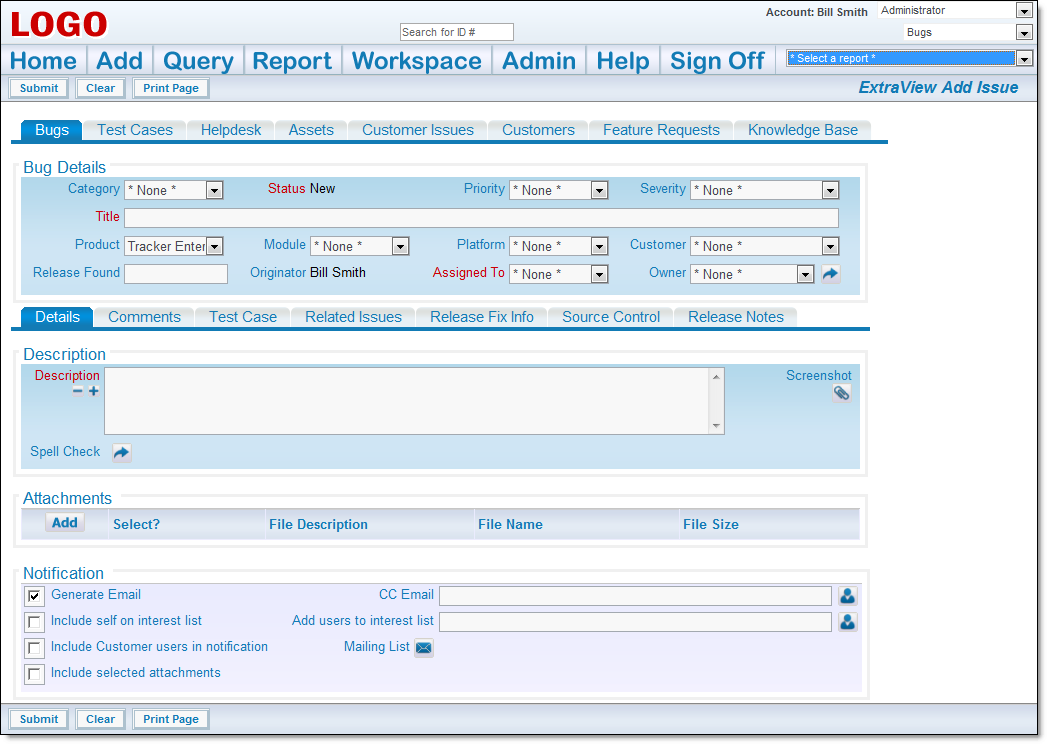 The Add Issue screen
Explained fully in the Administration Guide, the format and placing of all the fields on the Add Issue screen is maintained in the Design Center for the Add Issue screen, shown following:
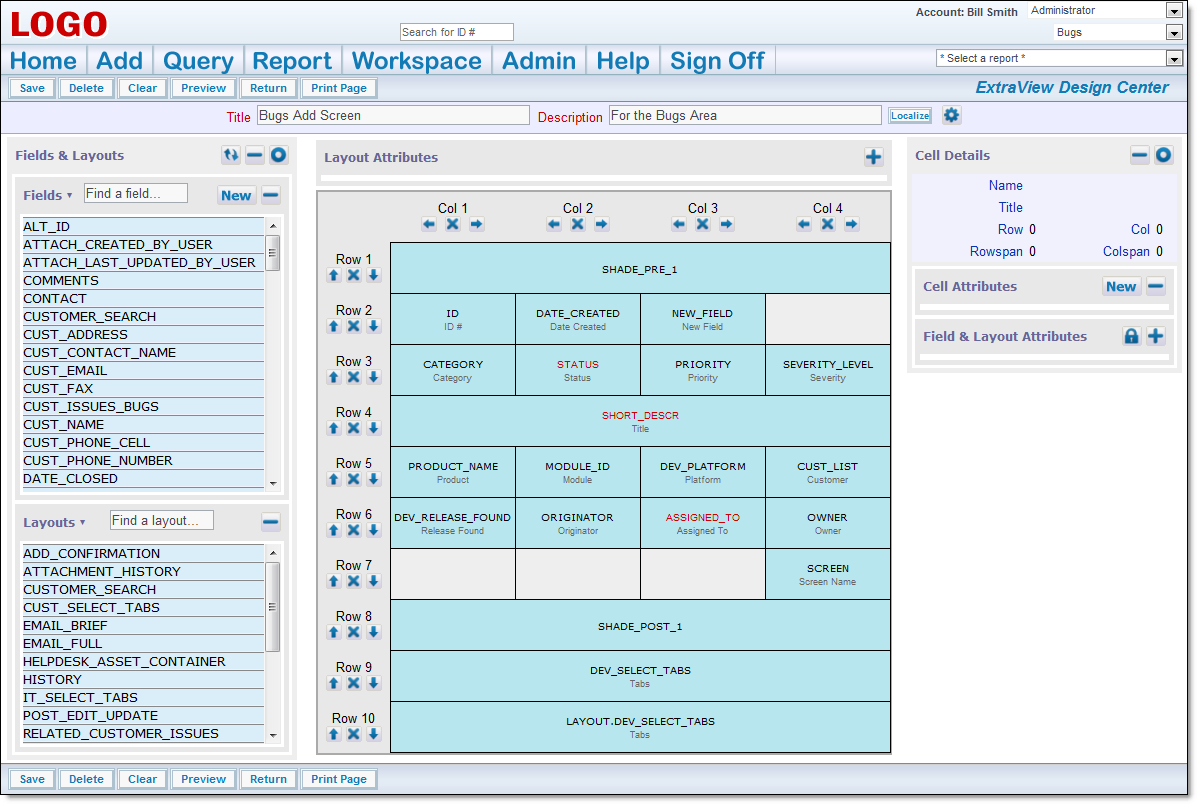 Design Center showing the Add Issue layout
The following excerpt from a debug session shows how ExtraView moved through the sequence of drawing the Add Issue layout in the browser:
SRQ:Parms:p_option = HomeDisplay
SRQ:Parms:p_action = doDisplay
SRQ:
SRQ:Parms:p_option = security.LoginDisplay
SRQ:Parms:p_action = getMenu
SRQ:
SRQ:Parms:p_option = Display
SRQ:Parms:p_action = doAddDisplay
SRQ:
SRQ:Parms:p_email_customer = unchecked
SRQ:Parms:p_area = 5
SRQ:Parms:p_generate_email = unchecked
SRQ:Parms:p_cc_email_EVDISPLAY =
SRQ:Parms:p_customer_company = 1456
SRQ:Parms:p_category = SOFTWARE
SRQ:Parms:p_date_created =
SRQ:Parms:p_cc_email =
SRQ:Parms:p_originator = BSMITH
SRQ:Parms:p_comments =
SRQ:Parms:p_option = Display
SRQ:Parms:p_short_descr = User cannot sign in unless a proper connection to the
database is established
SRQ:Parms:finished = drawingPage
SRQ:Parms:p_date_open =
SRQ:Parms:p_project = %25SMHww
SRQ:Parms:p_module_id = 5326
SRQ:Parms:p_assigned_to = BSMITH
SRQ:Parms:p_owner = G.GOLDBERG
SRQ:Parms:p_platform = 643
SRQ:Parms:p_release_found = {NULL}
SRQ:Parms:p_description = This is the description of the issue ....
SRQ:Parms:p_product_name = TRACKER_ENT
SRQ:Parms:p_status = NEW
SRQ:Parms:p_screenshot = {NULL}
SRQ:Parms:p_action = doAddDisplay
SRQ:Parms:stateVar = insert
SRQ:Parms:p_from_option = Display
SRQ:Parms:p_priority = P3
SRQ:Parms:p_from_action = doAddConfirmDisplay
SRQ:Parms:p_timestamp =
SRQ:
SRQ:Parms:p_option = Display
SRQ:Parms:p_action = doAddConfirmDisplay
Note that parameters with a null value were passed with a value of {NULL}. Also notice that list values are passed with the ID value of the list, not by using the title. This is because lists may contain duplicate titles, but the list ID's are unique. However, do not rely on using list ID values within your user custom program as these will change if you export the system metadata and import this into another instances. You should use code in your user custom program to extract the list ID's from the database in the constructor of your user custom class.
Once the issue is added to the database, a verification screen is displayed, which will look similar to the following:
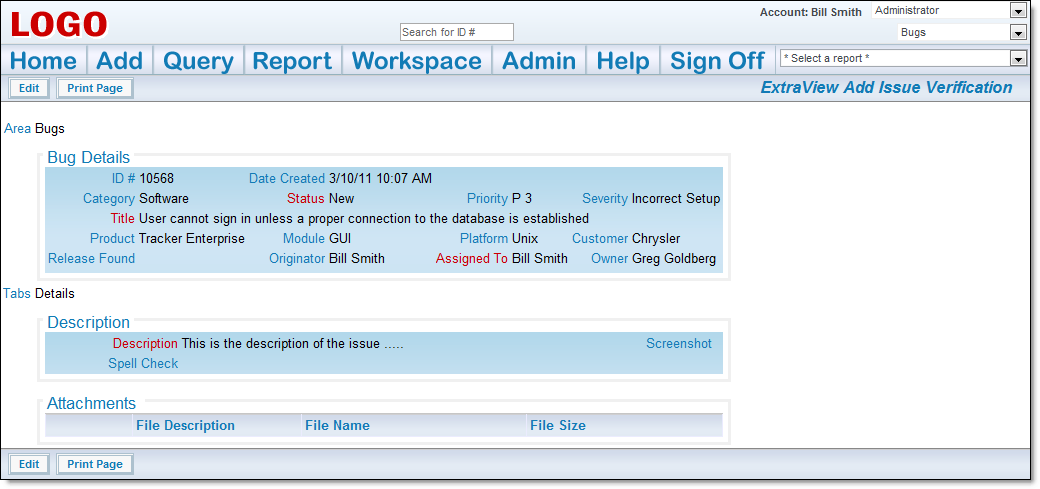 Verification screen after adding a new issue
ExtraView's standard functionality after submitting a new issue is to display the verification screen. You may control this functionality in user custom code, by altering the value of the form parameter named ADD_CONFIRM_PAGE. If you set this to a value of NO, the verification screen is bypassed. You should set this value in the user custom exit named preAddDisplay.
To understand this in more detail, let’s look at one individual parameter, and follow its trail. Let’s analyze the parameter named p_short_descr which maps to the field labeled Title, and with a value of User cannot sign in unless a proper connection to the database is established on the Add Issue verification screen.
This is a very simple example of a user custom class file. It is not a real-world example, but intended to show the basic structure of a user custom class file.
package com.extraview.usercustom;

import java.util.ArrayList;
import com.extraview.applogic.problem.Problem;
import com.extraview.presentation.ProblemFormParam;
import com.extraview.util.SesameSession;
import com.extraview.util.TextManager;

public class MyCompany
    extends UserCustom {

  public String ucEditPreUpdate(
      Problem pOldProblem,	ArrayList pOldReleases,
      ArrayList pOldModules,	 ArrayList pOldUdfs,
      Problem pNewProblem,	ArrayList pNewReleases,
      ArrayList pNewModules,	ArrayList pNewUdfs,
      SesameSession session,	ProblemFormParam pfp) {
    // this sample implements a new business rule that ensures the user
    // enters text into the COMMENTS field when altering the status of
    // an issue on the edit screen

    String errText = null;
    if (TextManager.isStringInvisible( (String) pfp.get("COMMENTS"))) {
      if (pNewProblem.getStatus() != null
       && (pOldProblem.getStatus() == null
       || !pOldProblem.getStatus().equals( pNewProblem.getStatus()))) {
        return "Comments are required when the status changes.";
      }
    }
    return null;
  }
}