Viewing Issue History
ExtraView retains a record of changes that you make to any issue. You can thus track the history of changes from the time the issue is first entered until it is finally closed. This provides a complete audit trail of all the changes, as a issue is tracked from its creation to its final closure.
- Click on the Edit button next to the issue you want to view.
- Click the History button at the top of the Edit screen.
-
There are four possible styles of History report. Your administrator will have selected which ones are most appropriate for your organization
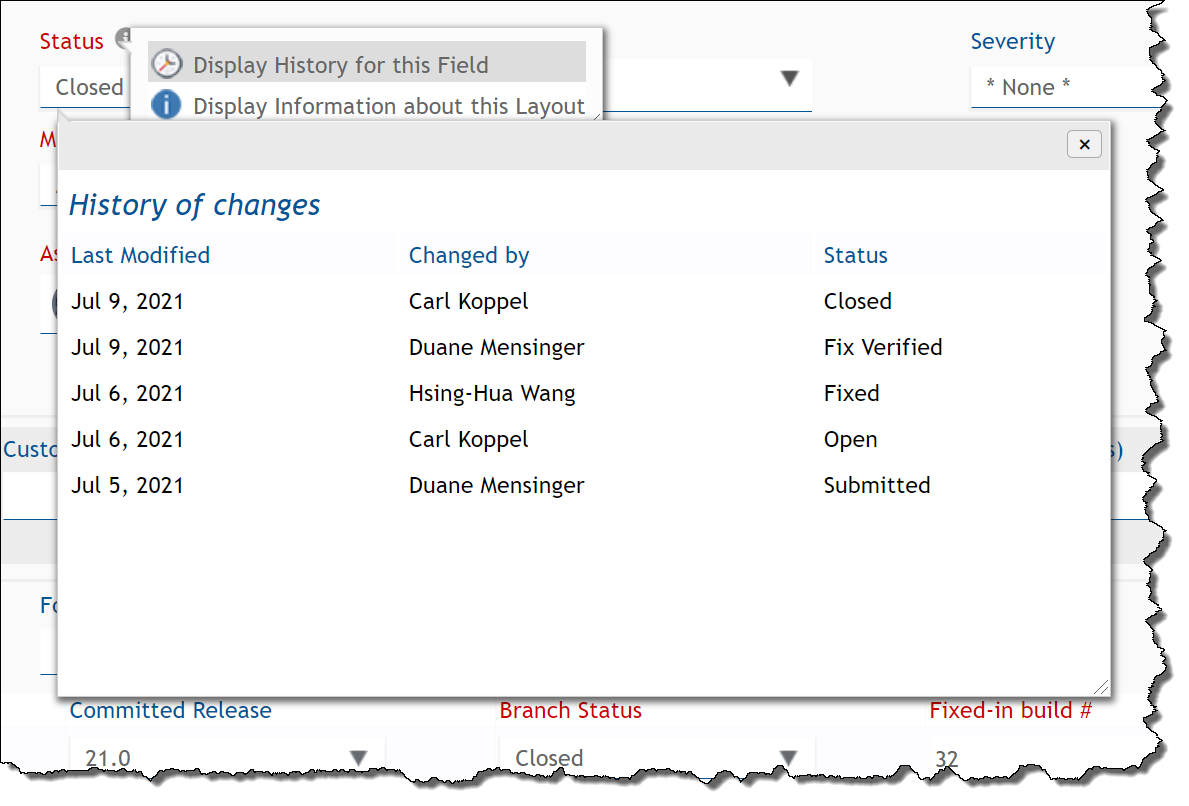
- The first style is a simple look at the key status changes, who made them and when they occurred. This is displayed as part of the edit screen
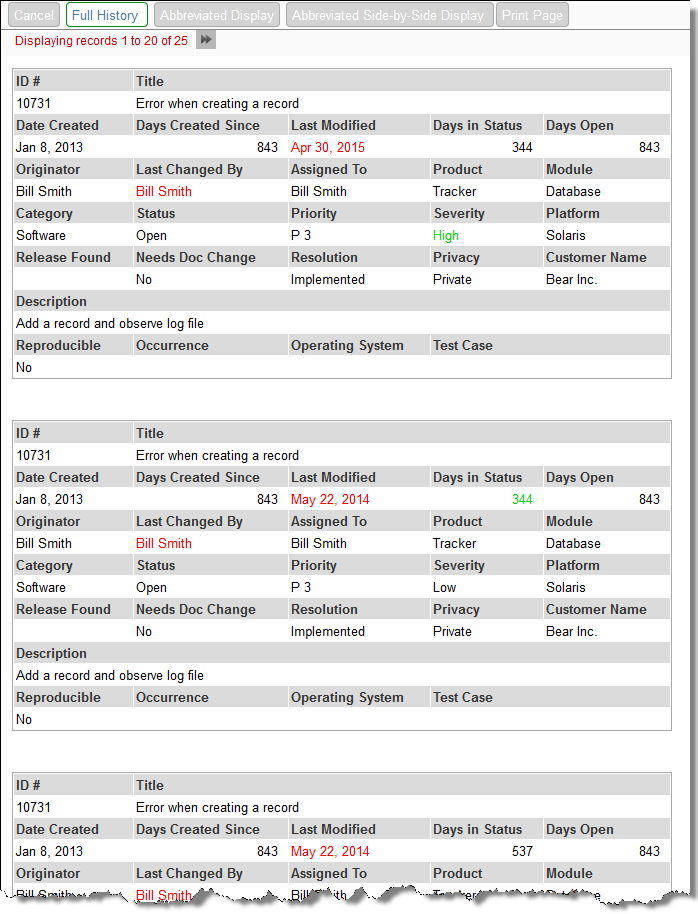
- The second type shows all fields on the record, for each entry. Your administrator will have configured a layout which determines which fields are displayed, and in what order they appear
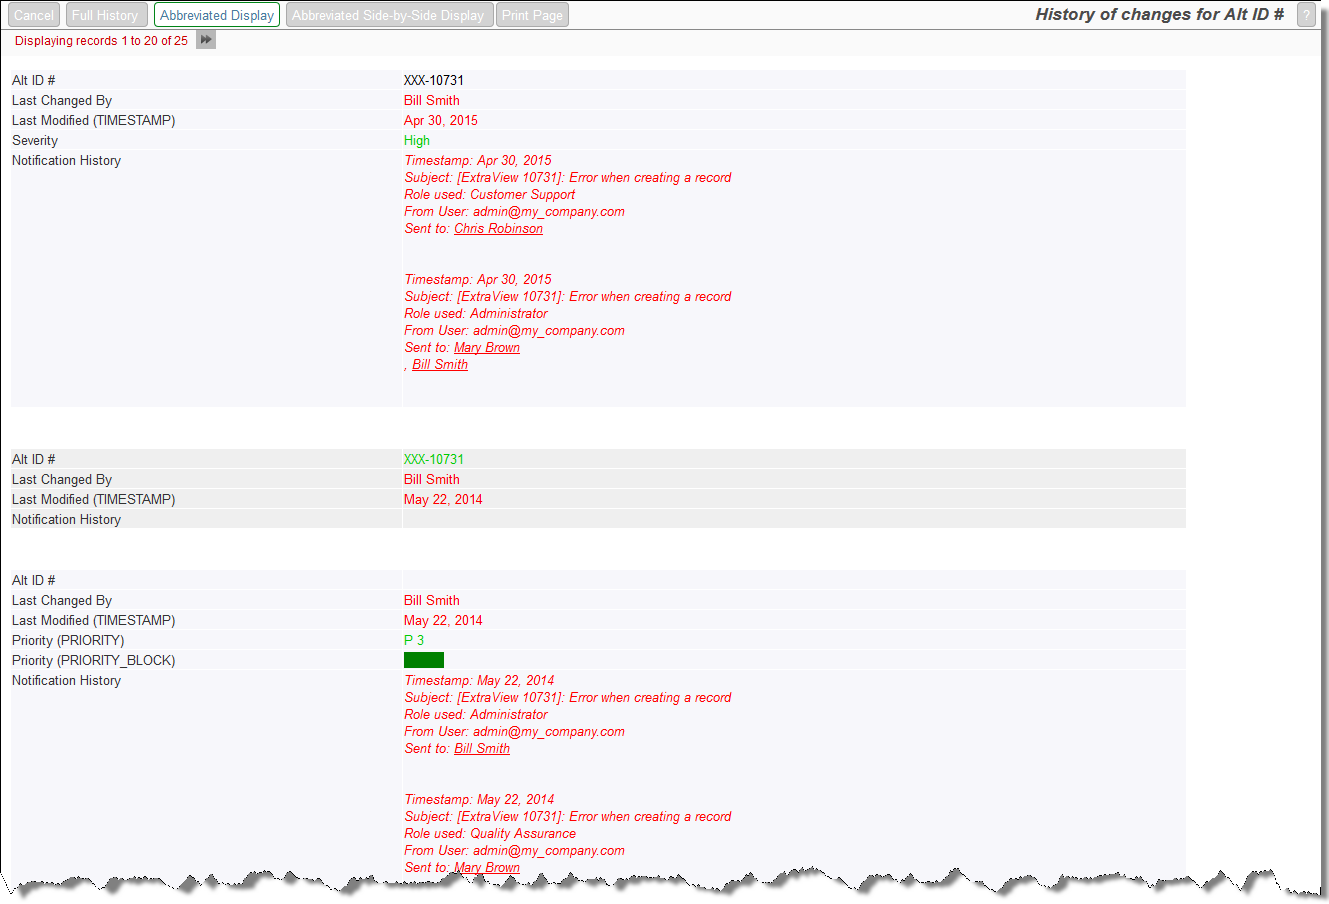
- The third style only shows the fields that have altered between successive edits. This is more concise and is most useful if you have a very large number of fields on the screen. This is known as the abbreviated history display
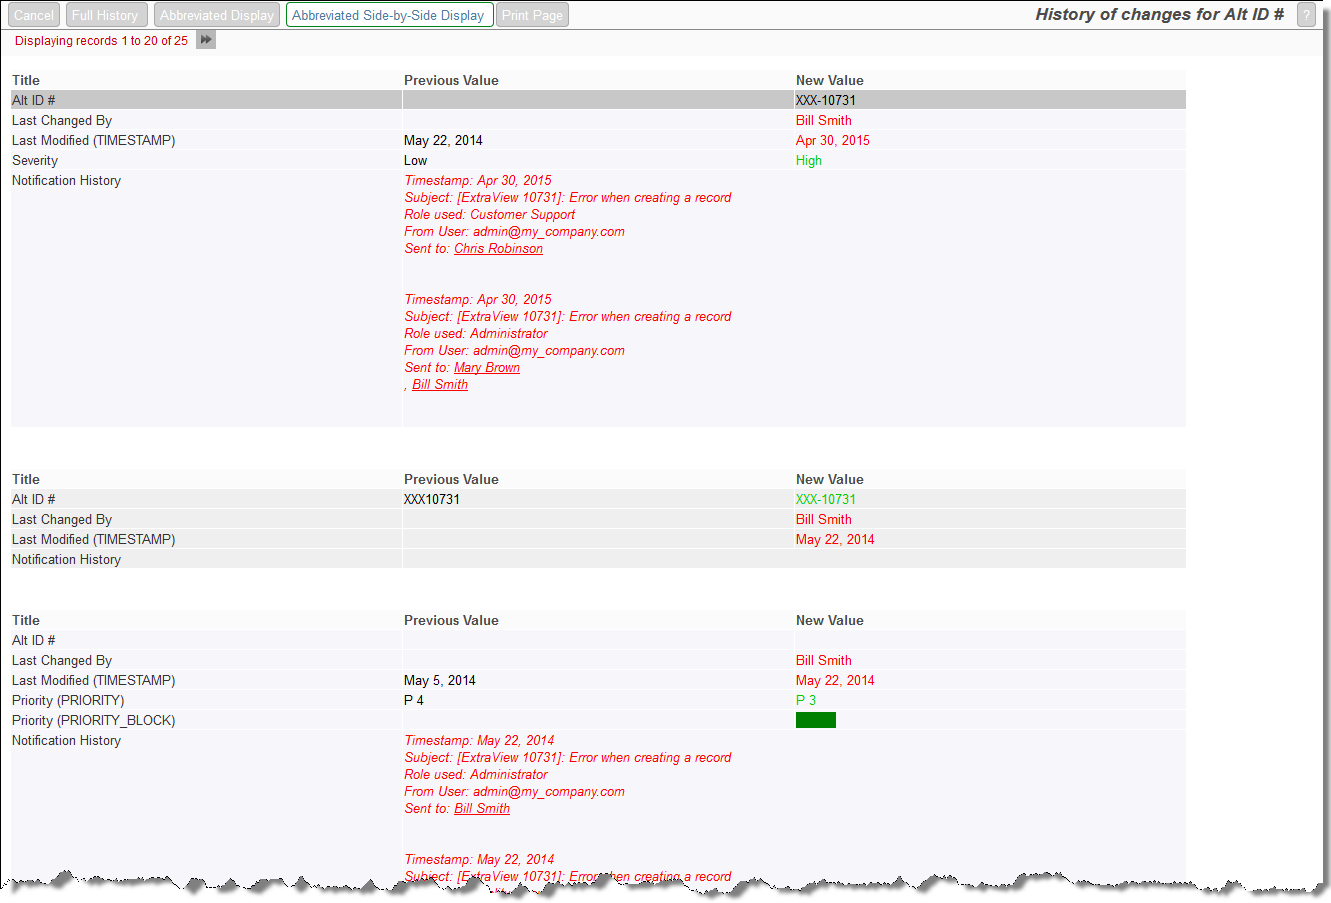
- The last type is similar to the third style, but within each history entry, the old value is shown alongside the current value. This is known as side-by-side history.
Depending on which of the history methods your administrator allows you to view, there will be a button on the menubar which allows you to view each of the methods with a single mouse-click.
Note: You will see the most recent records first. The changes between successive records are marked in different colors on the screen, allowing you to easily identify the field changes that were made in each edit session. Naturally, all the fields are in a single color on the last record on the report, since every field was new when the issue was entered.
The administrator will have chosen different colors to signify field additions, field value changes and field deletions. The simple history summary is a single read-only field that is displayed on the edit screen. This shows the changes in status only, who made the status change, and when the change occurred.

Simple Summary of History

History, displaying complete details

History displaying changes only

Side-by-side History view
History of an Individual Field
There is an option within each layout, and also at the level of each field, where you can enable a button that appears when you mouse over any field within the edit layout of an issue. This is controlled within the Design Center. When an end user mouses over a field, a small icon appears. When the user clicks on this icon, a menu pops up with an entry that allows the user to display the history of changes for that field only:

Display of Checkbox Values in History
Checkbox fields present a unique challenge within the history of an issue. Despite most people believing checkboxes have 2 values, Yes and No, there is actually the possibility of interpreting a third value, Undefined. This exists if the checkbox has never been set by the user. ExtraView’s reporting always display a Yes or No value for every checkbox, and the user cannot distinguish between No and Undefined on an add or edit screen. However, it can be important to distinguish between the No and Undefined values in the history of an issue. ExtraView uses the following conventions in History for the display of checkbox values:
| Full History | For consistency with reports, both No and Undefined checkbox values are represented with a No on the output. When an issue is first created, the No value is colored red. From that point, the No value is displayed in black, and a green Yes will appear when the user checks the box. |
| Abbreviated History | No entry is displayed for a checkbox when the issue is first created, unless the user checks the checkbox, in which case a red Yes will appear on the output. From the point forward where a checkbox value is changed, the new value always appears in green. |
| Abbreviated Side-by-Side History | No entry is displayed for a checkbox when the issue is first created, unless the user checks the checkbox, in which case a red Yes will appear on the output. From the point forward where a checkbox value is changed, the new value always appears in green. |
