Adobe PDF Report Templates & Mapping
You may configure one or more buttons on an edit screen to merge data with an Adobe PDF document, using any field data from the current issue (and related issues) that are displayed on the edit screen. The Adobe PDF document is created outside ExtraView using tools from Adobe. It is possible to further customize the contents of PDF document using custom code techniques – see the User Custom Guide. You will require access to, and a good working knowledge of Adobe Acrobat and/or Adobe LiveCycle Designer to create PDF forms that can be utilized with ExtraView.
The setup involves three basic steps:
- Create a template by uploading a PDF file, and mapping fields within the PDF file to fields within ExtraView. Note that fields that have the same name within ExtraView and within the PDF document are mapped automatically. Also note, from the example at the bottom of the page that Adobe forms use a particularly verbose means of identifying a field. The Adobe tools show the definitions of the fields which include their position within the document. The appearance of a typical field is something like:
Consult the Adobe documentation for more information.
- The PDF document file uses forms with fields, in a similar manner to which ExtraView uses layouts with fields
- Create and configure a button field to trigger the creation of the merged PDF document
- Place the button field on an edit screen layout.
The resulting Adobe PDF document is added into the ExtraView issue as an attachment or into the contents of a document type field.
Creating the Template
The template is created with the administration utility named Adobe PDF Report Mapping, found on the Operational Tasks administration menu. Within the utility, press the Add button to begin the process.
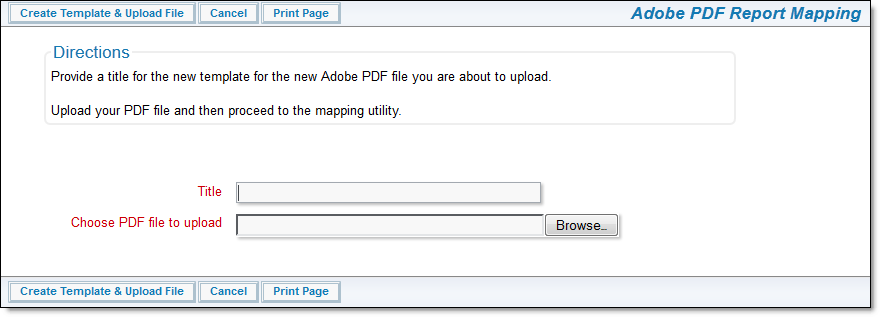
Simply provide the title to the template, and browse to and select your PDF document. Then click on the Create Template & Upload File button. You are then taken to the following screen:
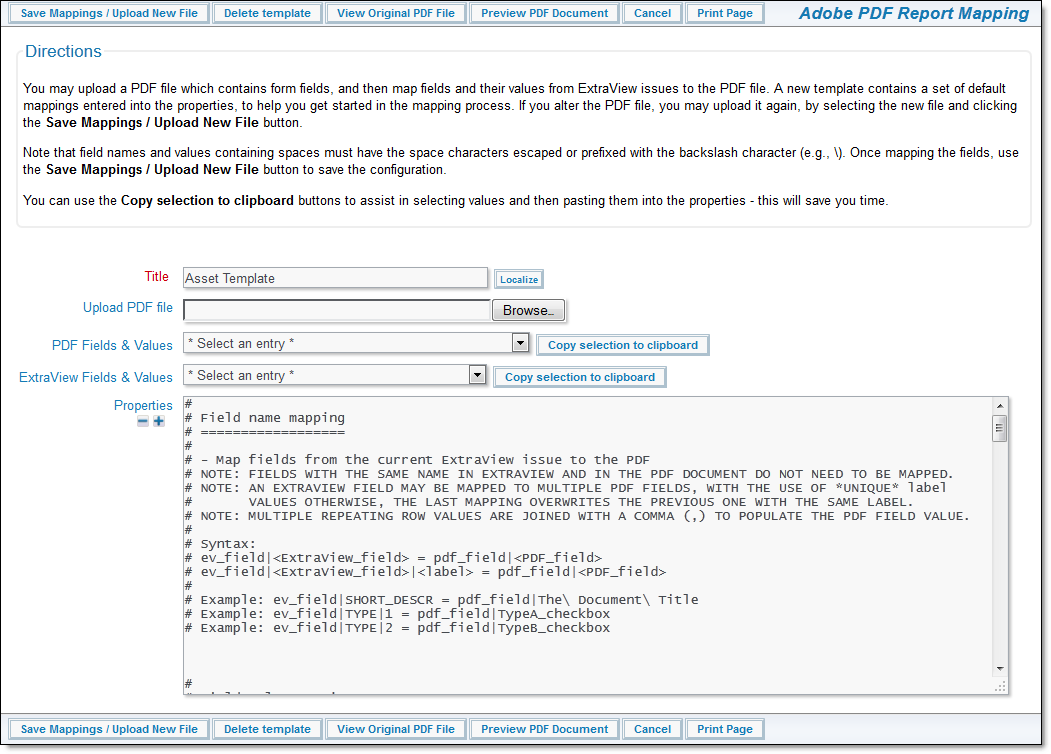
Options
- Save Mappings / Upload New File – This allows you to select a new file from your local computer and replace it the PDF stored on the server. Use the Browse button to select the file then press this button
- Delete Template – Delete the template and all related PDF files
- View Original PDF File – This allows you to view the original PDF that was uploaded. You may save this file for any purpose
- Preview PDF Document – Preview the mapped document.
General Points about Entering Properties
- You use the Properties box to provide the mappings
- All comments are on lines that being with a # character. These lines are ignored when processing the mappings
- Fields that have the same name within ExtraView as within the PDF document are mapped automatically for you. There is no need to include these in the mappings, unless you want to map them to different fields
- Use a \ character to escape a space character which follows
- The two rows on the screen labelled PDF Fields & Values and ExtraView Fields & Values are “helper” fields. They display the fields and their values that can be mapped. A button allows you to copy these fields and values to the computer clipboard so that you can paste them into the Properties. Of course, you can simply type the fields and values as appropriate into the Properties
- For multi-valued list fields, repeating row fields, and related record fields mapped to PDF text fields, the multiple values are concatenated with commas
- Multi-valued list fields can be mapped to multiple PDF checkbox or radio fields
- The properties file is checked for syntax & content errors when the Save Mappings / Upload New File button is clicked. Errors are listed on the screen, and the mapping template is not saved to the database when there are any errors.
Property Mapping
There are several key sections to the properties. You will see some examples as comments within the properties.
- Field name mapping
This is the primary method to map fields from ExtraView into a PDF document. Fields that have the same names in ExtraView and in the PDF document are mapped automatically. The basic construct of a mapping entry is:ev_field|<ExtraView_field> = pdf_field|<PDF_field>For example, if you want to map the ExtraView named SHORT_DESCR to a PDF field named TITLE you would use: ev_field|SHORT_DESCR = pdf_field|TITLE If you want to map a single ExtraView field to multiple fields within a PDF document, use a label parameter as shown here:
ev_field|<ExtraView_field>|<label_1> = pdf_field|<PDF_field_1> ev_field|<ExtraView_field>|<label_2> = pdf_field|<PDF_field_2>The <label_n> is any string that makes the left-hand side of the expression unique. For example, if you have the SHORT_DESCR field in ExtraView and you want to use that as a heading on a PDF with two pages with a heading field of hdr1 on page 1 and hdr2 on page 2, you would use:
ev_field|SHORT_DESCR|1 = pdf_field|hdr1 ev_field|SHORT_DESCR|2 = pdf_field|hdr2
In addition to ExtraView’s fields, you may also map the following:
- SYSDATE – The current date and time
- SYSDAY – The current date
- USER – The current user preparing the report
- Field value mapping
This section maps the values of fields in ExtraView to the values of fields in the PDF document. Once again, if the value of the field is identical in both ExtraView and the PDF document, then there is no need to provide a mapping. Further, mappings are typically provided only for enumerated list type fields, with display types such as List, Popup, Checkbox, Radio Button, Tab, etc. Value mappings for text, date and numeric type fields are not required. The syntax to map a value is as follows:
ev_value|<ExtraView_field>|<value> = pdf_value|<PDF_field>|<value>
For example, we might want to map the value of Not Fixed as a value in the ExtraView field named STATUS to a checkbox field in a PDF document, where the checkbox field is named Not finished_checkbox:ev_value|STATUS|Not\ Fixed = pdf_field|Not\ Finished_checkbox|On
Note the use of the \ character to escape the space character. It is possible to map the one ExtraView field value to multiple fields within the PDF form. The syntax is as follows:ev_value|<ExtraView_field>|<value>|<label> = pdf_value|<PDF_field>|<value> - Filtered field name mapping
Defining filtered field mapping entries is similar to field name mapping entries. They provide a mechanism to use repeating rows and related issues for a specific issue that you are using to prepare a PDF document. The filter itself is defined in the section Filter definition for repeating rows and/or related records. You must define an entry in that section for every filter you use in this section. The syntax for a filtered field mapping is as follows:
filter_ev_field|<Filter>|<ExtraView_field> = pdf_field|<PDF_field>
Use either of the above two forms, depending on whether you are mapping to a single or to multiple fields in the PDF document. For example, to apply a filter named myProjectFilter which refers to a field named ADDRESS within a related issue you might have this entry for the mapping:
filter_ev_field|myProjectFilter|ADDRESS = pdf_field|Address - Filtered field value mapping
This provides a means to map ExtraView field values where the field is on a repeating row or a related issue. The filter itself is defined in the section Filter definition for repeating rows and/or related records. You must define an entry in that section for every filter you use in this section. The syntax for a filtered field value mapping is as follows:
filter_ev_value|<Filter>|<ExtraView_field>|<value> = pdf_value|<PDF_field>|<value>
For example, we might want to map the value of Not Fixed as a value in the ExtraView field named STATUS of a related issue to a checkbox field in a PDF document, where the checkbox field is named Not finished_checkbox. We want to use the relationship defined by the filter named myProjectFilter:
ev_value|myProjectFilter|STATUS|Not\ Fixed = pdf_field|Not\ Finished_checkbox|On
It is possible to map the one ExtraView filtered field value to multiple fields within the PDF form. The syntax is as follows:
filter_ev_value|<Filter>|<ExtraView_field>|<value>|<label> = pdf_value|<PDF_field>|<value> - Default date format
This section defines a default date format to be used to place all ExtraView date and day display type fields on the PDF document. The format used is known as the Java Simple Date Format. You can see a definition of the date formatting here. An example of using the default date format is:
DEFAULT_DATE_FORMAT = MM/dd/yyyy - Date format for specific fields
This section defines a date format to be use for a specific PDF document field that contains a date. The format used is known as the Java Simple Date Format. You can see a definition of the date formatting here. An example of using the default date format is:
DEFAULT_DATE_FORMAT = MM/dd/yyyy - Document, image fields and file attachment mapping
You are able to map document field, image field display types as well as issue attachments from ExtraView issues to PDF documents. The syntax to map fields from the current record is:
ev_doc_img|<ExtraView_field>|<label> = pdf_page|<page_number> ev_attachments|<label> = pdf_page|<page_number>
The pdf_page|<page_number> parameters indicate where in the PDF document that the document or image will be inserted. As well as mapping these fields from the current issue, you can map them from repeating records and related issues, using the filtered field mechanism. The syntax is:
filter_ev_doc_img|<Filter>|<ExtraView_field>|<label> = pdf_page|
<page_number>filter_ev_attachments|<Filter>|<label> = pdf_page|<page_number>
An example might be to map the same image in an ExtraView image field named LOGO_IMAGE at the beginning and end of a document:
ev_doc_img|LOGO_IMAGE|start= pdf_page|0 ev_doc_img|LOGO_IMAGE|finish = pdf_page|10 - Filter definition for repeating rows and/or related records
The filter expressions that you can build are similar to the links you build with the LINK directive in Business Rules. Filter expressions are additive as they are defined and separated by commas. The basic syntax is:
FILTER|<Filter_name> = <expression>
This example shows how two filters can be used:
FILTER|personFilter = AREA = Legal, PROJECT = Personnel, PERSON = USER
You may use the special variables $$SYSDATE$$, $$SYSDAY$$, $$USER$$, and $$ID$$ to match the current date, current day, current user, and the ID of the current issue respectively. Similar to the LINK business rule directive, you use the RG_NAME and RG_TYPE attributes to define filters for related issues. The syntax is:
FILTER|<Filter_name>|RG_NAME = <relationship group name> FILTER|<Filter_name>|RG_TYPE = <relationship type>
The RG_NAME is the name of an existing relationship group. The RG_TYPE may be one of CHILDREN, GRANDCHILDREN, GRANDPARENTS, PARENTS, RELATED, MEMBERS, LINKED, or SIBLINGS. If you do not specify RG_NAME or RG_TYPE for a filter, the default relationship group is used, with an RG_TYPE of LINKED. The filter can be used to define how to display the results, when many records are returned by the filter. Typically, you will want to display the results horizontally or vertically. The syntax for the filter is:
FILTER|<Filter_name>|DELIMITER = delim
where delim is the string used to delimit the records. The default delimiter is a comma. If you want to display the results vertically you will use the delimiter \n to introduce a newline character between each result. The typical entries you will define for related issues that are to be mapped to a PDF document are:
FILTER|<Filter_name> = <expression> FILTER|<Filter_name>|RG_NAME = <relationship group name> FILTER|<Filter_name>|RG_TYPE = <relationship type>
An example of a filter definition for use within related issue mappings might be:
FILTER|myProjectFilter = AREA = Customers, PROJECT = Customer Data FILTER|myProjectFilter|
RG_NAME = CUSTOMER_ISSUES FILTER|myProjectFilter|RG_TYPE = CHILDREN
When handling repeating rows, you can use the ROW_NUM attribute to match a specific row. The syntax is:FILTER|<Filter_name>|ROW_NUM = <integer>
Creating the Button Field
The button field is created within the data dictionary as a User Defined Field with the following properties:
| Property | Purpose |
| Fixed Name | The name you use to create the field must begin with GENPDF_ and end with _BTN. For example, a valid name is GENPDF_SALESREPORT_BTN |
| Title | You normally will not want to see a title with the button field you are generating, therefore use a space character for the title. It is not recommended to use a hard space – – as a space character, as browsers generate this with a full height character, leading to empty space above the button |
| Display Type | This must be Custom |
| Default Value | This is the name of the template you created in the first step. It is important to use the exact name you created |
| Help Text | This is text that will be placed on the button and will be visible to the user. For example, you might put Generate PDF as the text |
| Help URL | This entry should either be the word ATTACHMENT to store the generated PDF document as an attachment, or the data dictionary name of a document field to store the generated PDF document in a document field. |
Configuring the Layout
Simply place the field you created in the previous step on the edit screen layout where you want to see the button. You may apply the usual layout cell attributes such as FIELD VISIBLE IF to the field on the layout.
Sample Configuration
ev_field|MANUFACTURER_REPORT_NUMBER = pdf_field|topmostSubform[0].BodyPage[0].Page1[0].Mfr_Report[0]

ev_field|UF_IMPORTER_REPORT_NUM = pdf_field|topmostSubform[0].BodyPage[0].Page1[0].UF_Importer_Report[0]

#

# Section A

#

ev_field|PATIENT_IDENTIFIER = pdf_field|topmostSubform[0].BodyPage[0].Page1[0].Patient_Identifier[0]

ev_field|PATIENT_AGE = pdf_field|topmostSubform[0].BodyPage[0].Page1[0].AGE[0]

ev_field|PATIENT_DOB = pdf_field|topmostSubform[0].BodyPage[0].Page1[0].BIRTH[0]

ev_field|PATIENT_WEIGHT = pdf_field|topmostSubform[0].BodyPage[0].Page1[0].Weight_lbs[0]

ev_field|PATIENT_GENDER|1 = pdf_field|topmostSubform[0].BodyPage[0].Page1[0].Male[0]

ev_field|PATIENT_GENDER|2 = pdf_field|topmostSubform[0].BodyPage[0].Page1[0].Female[0]

#

# Section B

#

ev_field|ADVERSE = pdf_field|topmostSubform[0].BodyPage[0].Page1[0].ADVERSE[0]

ev_field|PRODUCT_PROBLEM = pdf_field|topmostSubform[0].BodyPage[0].Page1[0].PRODUCT[0]

ev_field|OUTCOME|1 = pdf_field|topmostSubform[0].BodyPage[0].Page1[0].Death[0]

ev_field|OUTCOME|2 = pdf_field|topmostSubform[0].BodyPage[0].Page1[0].DISABILITY[0]

ev_field|OUTCOME|3 = pdf_field|topmostSubform[0].BodyPage[0].Page1[0].LIFE_THREATENING[0]

ev_field|OUTCOME|4 = pdf_field|topmostSubform[0].BodyPage[0].Page1[0].CONGENITAL[0]

ev_field|OUTCOME|5 = pdf_field|topmostSubform[0].BodyPage[0].Page1[0].HOSPITAL[0]

ev_field|OUTCOME|6 = pdf_field|topmostSubform[0].BodyPage[0].Page1[0].Other_Event[0]

ev_field|OUTCOME|7 = pdf_field|topmostSubform[0].BodyPage[0].Page1[0].REQUIRED[0]

ev_field|PATIENT_DOD = pdf_field|topmostSubform[0].BodyPage[0].Page1[0].Death_Date[0]

ev_field|EVENT_DATE = pdf_field|topmostSubform[0].BodyPage[0].Page1[0].EVENT[0]

ev_field|DATE_REPORT = pdf_field|topmostSubform[0].BodyPage[0].Page1[0].REPORT[0]

ev_field|DESCRIPTION = pdf_field|topmostSubform[0].BodyPage[0].Page1[0].DESCRIBE[0]

ev_field|RELEVANT_TESTS = pdf_field|topmostSubform[0].BodyPage[0].Page1[0].RELEVANT[0]

ev_field|OTHER_RELEVANT_HISTORY = pdf_field|topmostSubform[0].BodyPage[0].Page1[0].OTHER_RELEVANT[0]

ev_field|OTHER_REMARKS = pdf_field|topmostSubform[0].BodyPage[0].Page3Cont[0].concomitant[0]

#