Relationship Groups
Each issue in ExtraView may be associated with a Relationship Group. A Relationship Group is a grouping of issues within the system for the purpose of keeping track of similar or related items. There are a number of types of relationship groups that can be utilized within ExtraView. Each type has different characteristics and different methods of operation. Relationship groups may also differ considerably in the user interface that manages them.
There are several ways in which relationship groups, or related issues, can be displayed and managed. Two of these are shown below.
Creating Related Issues from an Add or Edit Screen
Consider the following Add screen:
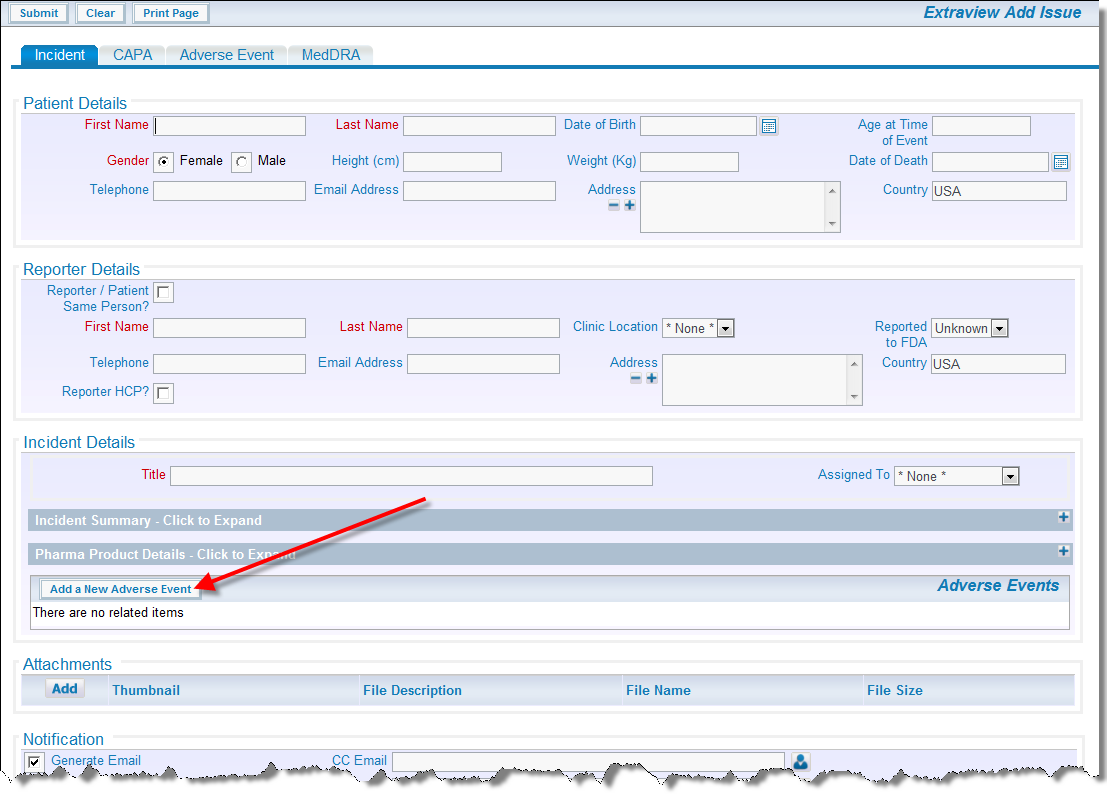
Add screen with a Related Issue Section
When you press the button to add a new related issue (in this case an Adverse Event), you will see a popup window as follows:
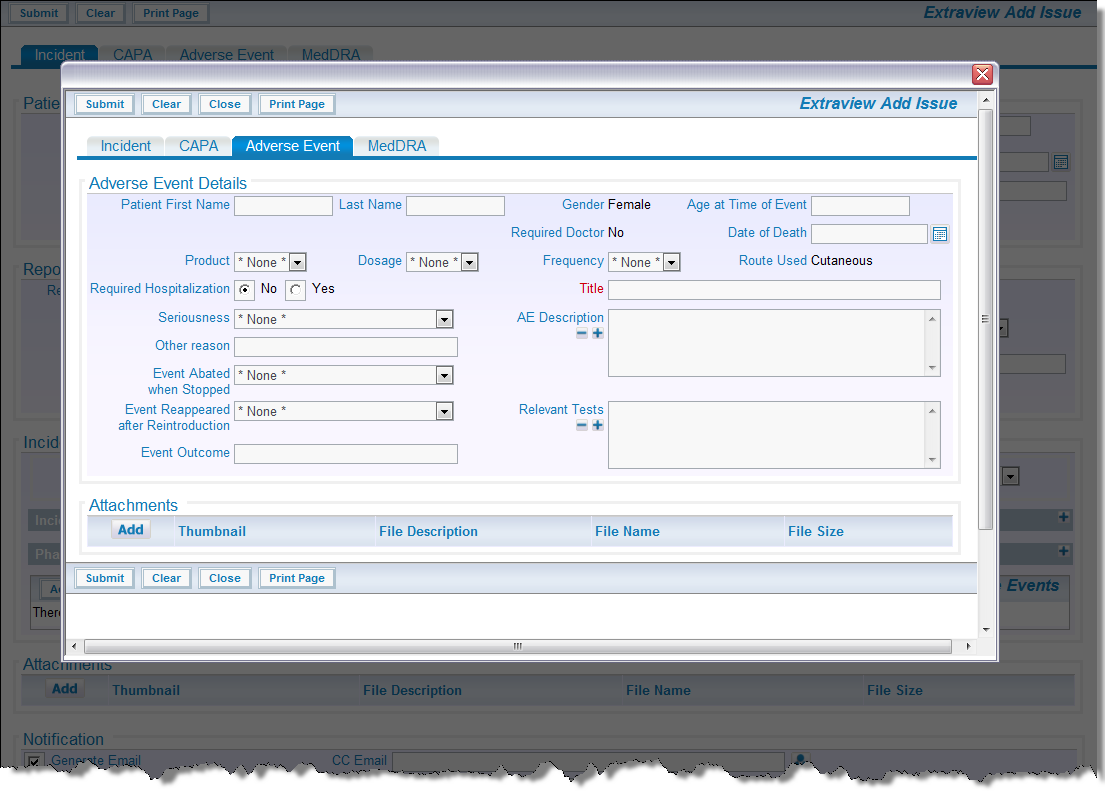
Popup to Add the Related Issues
Once you have added data to the Add screen and added a couple of related issues, the screen will look like this:
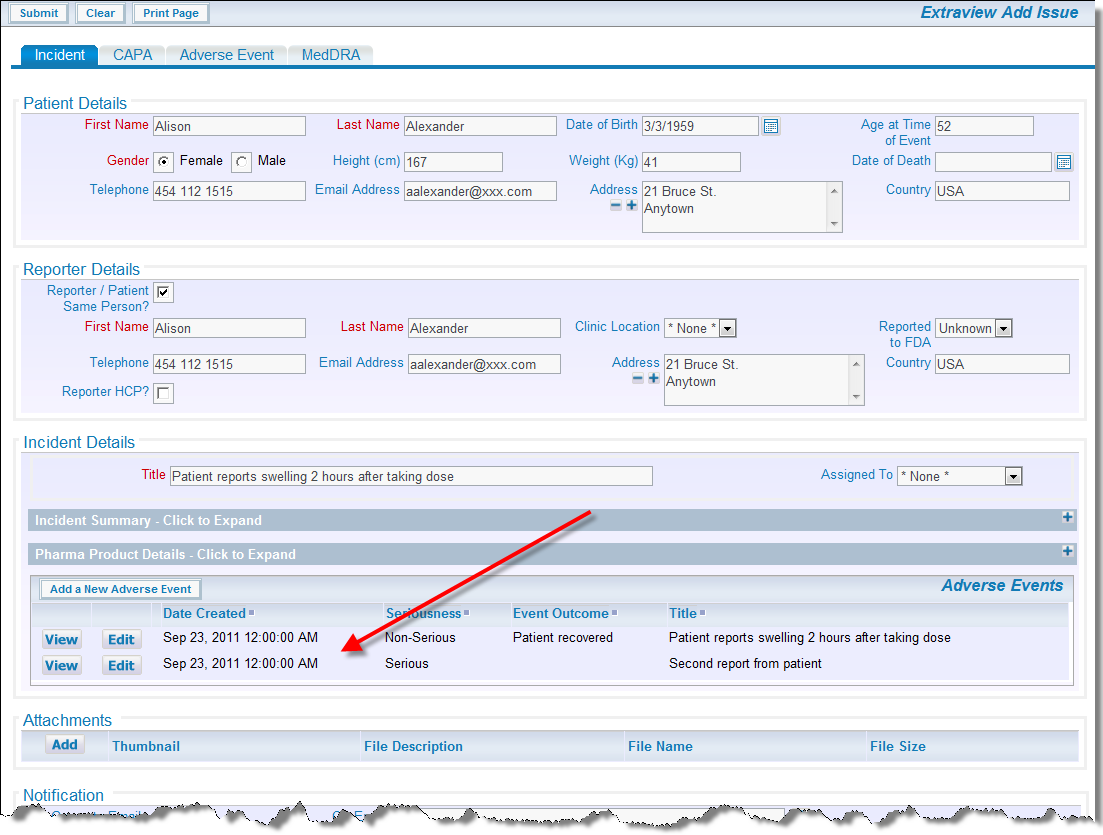
Add screen with related records added
Create or Update a Relationship Group from a Quicklist Report
You may also create new relationship groups, or add issues to existing groups, from the Quicklist report. This has the advantage of allowing you to group issues that have common attributes because of a previous filtered sort. Note that this feature is not turned on in the standard issue tracking installation, as its use will conflict with the previous method of relating issues to each other. Your system administrator will have configured this if appropriate.
After a search on a particular keyword, you might find that there are multiple variants of the same issue in the system, that these are assigned to different people, and that they are at varying stages of completion. Using relationship groups, you could decide to keep them all Open but still group them with the prospect of a common, future resolution. This can be done by producing a Quicklist report, then grouping the issues together.
To Create Groups from Quicklists
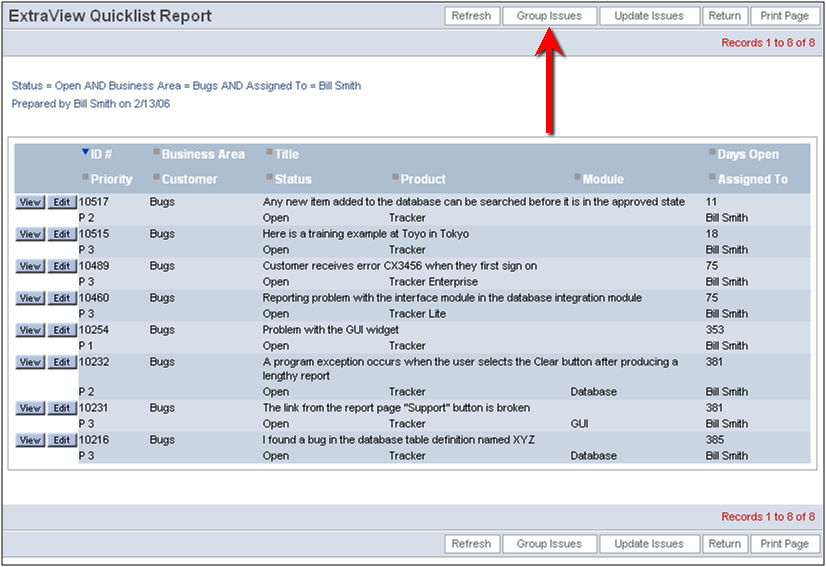
Quicklist Report screen
A screen similar to the following appears:
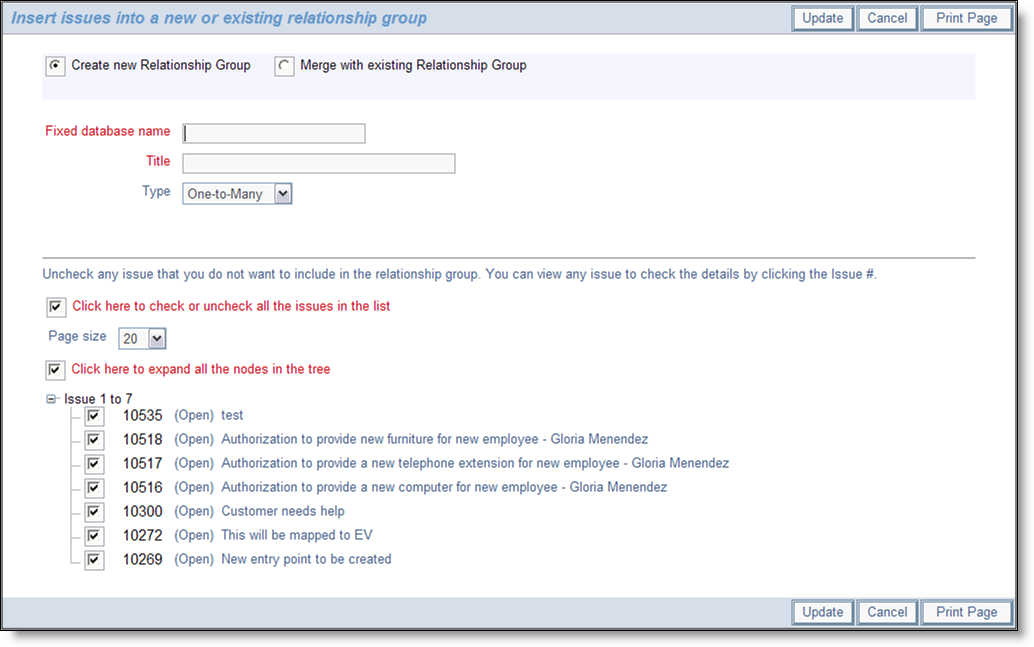
Create a New Relationship Group screen
-
Enter a new title for the relationship group, and select the type of relationship group from the dropdown menu. The different types of groups are as follows:
- Bi-Level – This requires that one issue from the group is the parent, or master issue. Rules may apply to the group. For example, you may not be able to close the master issue unless all the other issues are already closed. This type of relationship group is being deprecated, and you should use one of the other relationship groups. These types are supersets of the bi-level type, therefore you will only gain in functionality
- One-to-Many – This group requires that one issue from the group is the parent, or master issue.
- One-to-Many Cascade – This type is similar to the One-to-Many relationship group type. The difference is that when a user deletes an issue which is the parent of one or more child issues, then the child issues are also deleted, as opposed to leaving orphaned child issues in the database, once the parent is deleted.
- Many-to-Many – This group is a free-structured group where issues may have parents or children in an arbitrary way. This extends so that a child may in itself be the parent or a child of any other issue
- Click the Update button to form the group and continue.
To Update Groups with Additional Issues
From the previous screen, click on the Merge with existing Relationship Group button.
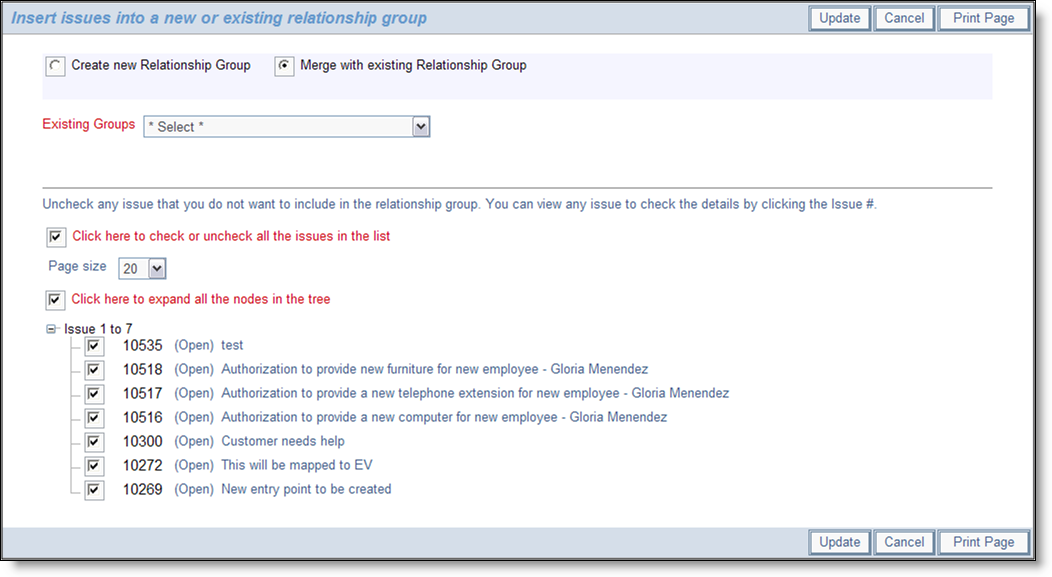
Adding issues to an existing relationship group
From the list of relationship groups select the existing group to which you want to add the issues. Again, you may alter the list of issues as you update the group.
Update Relationship Group Issues
Once a relationship group has been created, and issues have been associated with it, ExtraView will notify the user of the existence of related issues each time you do a issue update, and give you the opportunity to make batch-level status changes, as needed.
Perform Group Updates
- Edit a given issue as desired, and click the Update button.
-
If the issue belongs to a relationship group, the following screen appears:
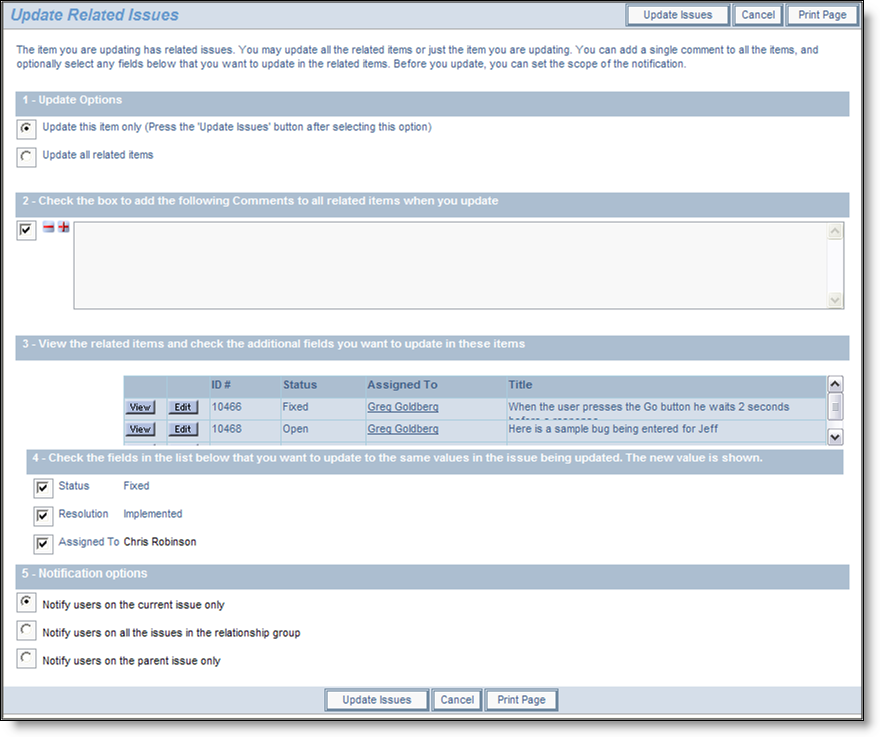
Update Related Issues screen - View related issues as desired, by clicking on the View button.
- Check appropriate boxes to update the status and/or resolution for every issue in the group.
- Enter comments to be automatically added to every issue in the relationship group.
- Click the Update Issues button.
Manage Relationship Groups
In addition to the ability to create relationship groups, add issues, and perform batch updates, ExtraView also provides relationship group management features, including merging relationship groups, and splitting relationship groups. Again, your administrator must have configured this option and given you permission to access this feature, before the button appears on the Edit screen.
- From a given issue’s Edit screen, click the Manage Relationship Groups button.
The following screen appears:
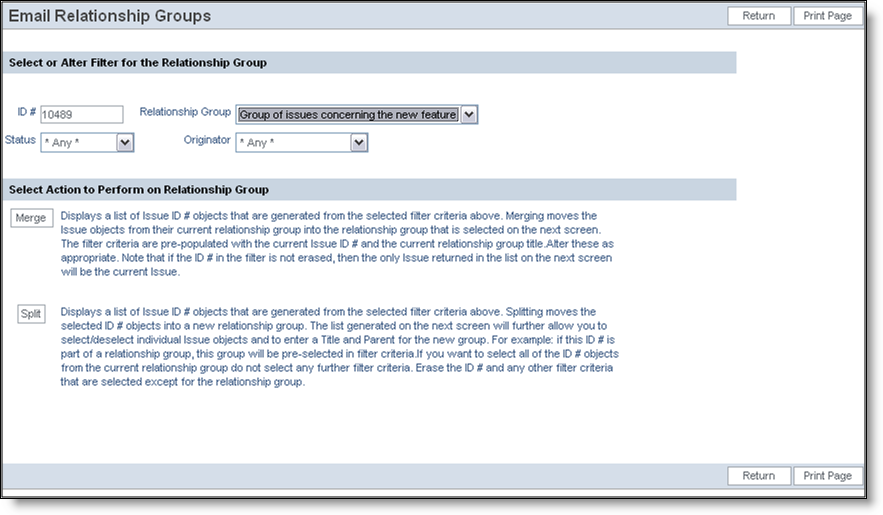 Manage Relationship Groups screen
Merge Issues into New Relationship Groups
- To merge a issue from one group into a different group, select filters to return appropriate issues, and click the Merge button.
- A screen similar to the following appears:
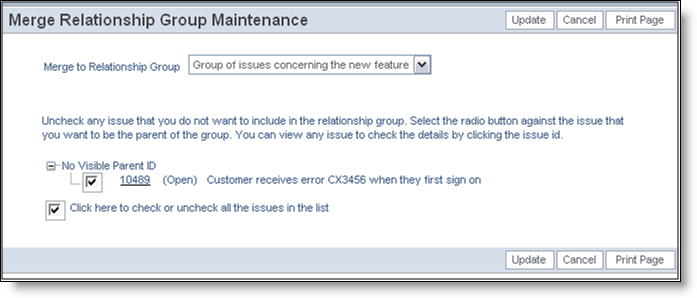
Merge Relationship Groups screen
To merge the issues in the sort result into a new relationship group, select the desired group from the pick list, and then click the Update button.
Splitting Relationship Groups
- To split an existing group by moving an issue over into a new group, select the desired filters, and then click the Split button.
-
A screen similar to the following appears:
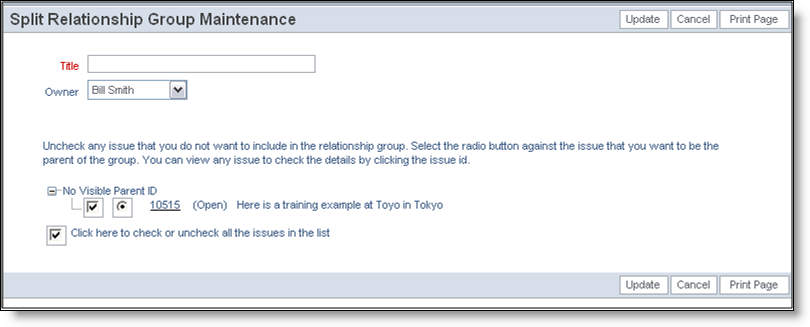
Split Relationship Group screen - Enter a title for the new Relationship Group, then select a Group owner from the pick list.
- Remove any issues that you don’t want to split off by un-checking the associated checkboxes.
- Select a parent issue for the new group.
- Click the Update button.