Scheduling Reports
Reports can be set up to be generated automatically on a time schedule, and delivered to yourself and other users via email. The scheduler may also send reports directly to the Document Repository. Your administrator will have enabled the scheduling of reports for the entire system, and assuming you have been given permission, you will be able to schedule your own reports to be received by yourself and other users of the system.
You can send a report to the document repository at the same time you send it to users on the schedule or you can set up a schedule to perform just one of these functions.
Column reports, Summary reports, Matrix reports, Charts and Container reports may be scheduled and delivered via email. Note that other report types may not be scheduled – typically because they require interactivity with the user. Also note that fields with drilldown capability, such as the Attahments, Document Fields and Image fields are removed from the output of a scheduled report. Before you schedule a report, you must first save it. After saving, you may edit the report and you will see a button in the menubar with the label Schedule Report. When you click this button, you will see a screen similar to:
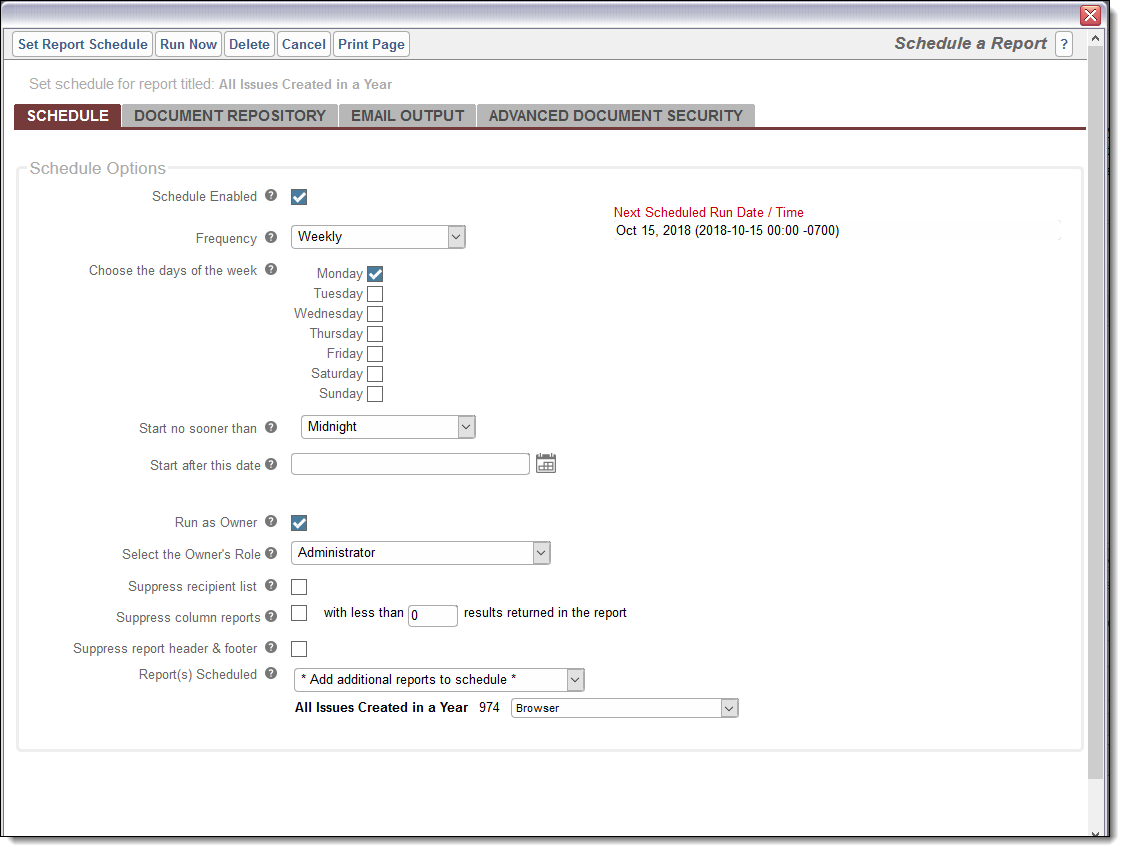
Setting the schedule for a report
The functions of the entries on this screen are as follows:
| Entry | Purpose |
| Schedule Enabled | You may enable and disable the schedule for a report. If you disable the schedule, ExtraView suspends the sending of future reports on this schedule, but the schedule details are maintained. |
| Frequency | You may select one of Hourly, Daily, Weekly, Monthly on a day, Monthly on a date, Quarterly on a day, Quarterly on a date, Yearly on a day and Yearly on a date. |
| Start after this date | This determines the first date and time that the report may be sent. Note that the report may not be sent precisely on the time you select. If many users have scheduled reports at the same moment, then ExtraView queues these and sends them one after the other. This avoids swamping the server and degrading the performance to all users while the reports are being prepared and sent. Note that the time selected is the time in the schedule owner’s own time zone |
| Run as Owner |
When Run as Owner is checked, the report will be run once as the owner and sent to all recipients, using the role selected in the next option. If this is not checked, the report is run as each recipient and sent to them individually.
Note that only roles that the owner can select are available as choices. |
| Select the Owner’s Role | By default the current role of the user creating the report is selected. However, there may be reasons to run the report as a different role, including the role of the owner at the time the report is run – this is the choice * Owner’s Current Role *. For example an Administrator may want to set up a schedule, but send out the report using the permissions of the Quality Assurance role. If you are not running the report as the owner, then this select list does not appear |
| Suppress recipient list | This allows the report scheduler to suppress the names of all the recipients who receive the report. |
| Suppress column reports | By default, ExtraView will always generate and send a scheduled report to all the recipients. If this option is selected, then the entire email is suppressed if there are less than the number of rows on the report. A zero implies that the report is suppressed if there are no results. It is worth noting that if the scheduled report is being prepared for each recipient, as opposed to being prepared once and sent to all recipients, then the report may or may not be generated for each individual user, according to the filters used on the report, such as privacy group. The administrator will have set up the options that enable or disable this functionality. |
| Report(s) Scheduled |
The first entry in the list is always for the current report. You may select and add additional reports to be sent along with the current report by choosing these from the list with the option * Add additional reports to schedule *.
Scheduled reports are sent as attachments to the email that the recipient receives. The option list by each report you select allows you to choose a different format for each of the scheduled reports. You can choose to send the attachment as either a text file, a Microsoft Word file, a Microsoft Excel file, an HTML file or an Adobe PDF file. Note that the links to many functions that appear within the same report created within a browser are removed, as are images. This is because these links and images rely on the user being signed on to ExtraView when they are utilized. Note that the output format you select for a scheduled report overrides the saved output format for any report. There is a button by each of the additional reports you add, allowing you to remove a report from the schedule. The list of reports on a single schedule can be accessed from within any of the scheduler screens within any of the reports. |
Once you have filled in the information, you click on the Set Report Schedule button in the menubar of the popup window to save your schedule.
Note that if you use the Save As option within a report editor, an option appears on the screen allowing the user to check a box if they want to copy the report’s schedule to the new report.
Sending Report Output to the Document Repository
This tab sets up the location of the output to which the output report document will be sent when the scheduler runs the report. The document repository is accessed via the Reports screen.
No output to the document repository is sent, unless the Send to Repository button is set to Yes. There is the capability to send the report to either a personal folder within the respository, or to send the document to a shared public folder. Click on the Select a Different Folder button to select a different destination folder from the one displayed.

Setting up output to the document repository
To select a different folder, simply click on its name in the folder list. You can use a mouse right-click on a folder to create a sub-folder within there. Right-click mouse actions also allow you to delete empty folders. Double-click on the folder title to edit its name.
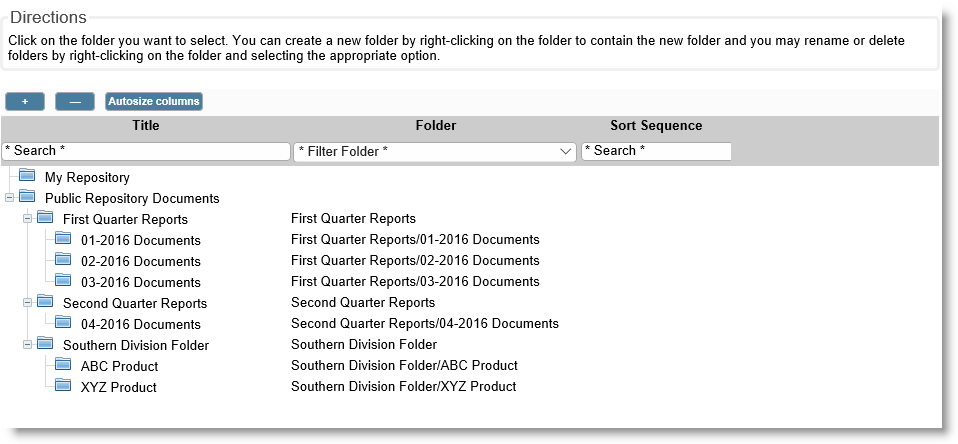
Selecting a document repository folder
The Advanced Document Security tab allows additional security around documents sent to the repository. The report editor may select individual users, user roles, or user groups. When selected, these options override the standard permissions of visibility, and narrow down the users who may view a document after it is sent to the repository. This is achieved with the Document Visible checkbox. The Document Editor checkbox again overrides the standard permissions for the documents, and controls which users may delete and rename documents within the repository.
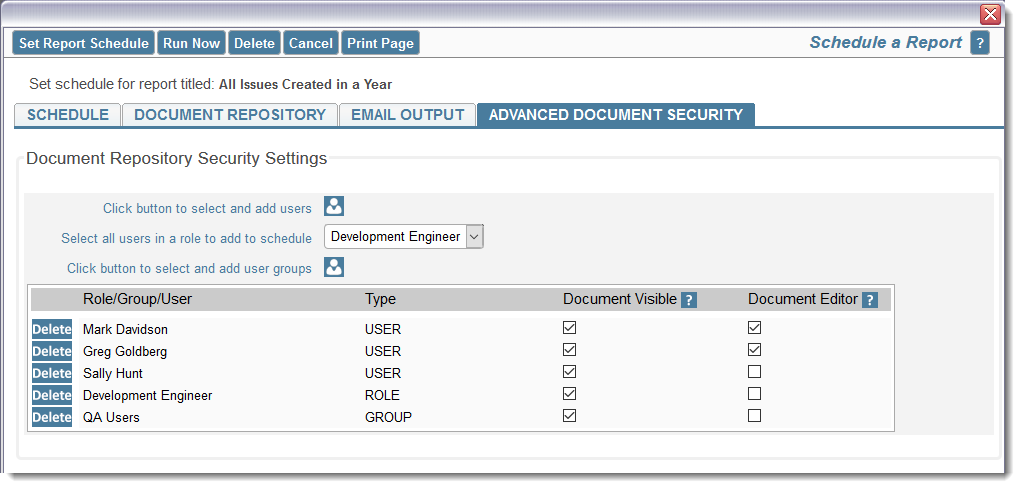
More information about the Report Repository can be found here.
Setting Up Email Delivery of the Scheduled Report
Click the Email Output tab to setup the recipients of the report, as well as the email subject and email body that will accompany the scheduled report output.
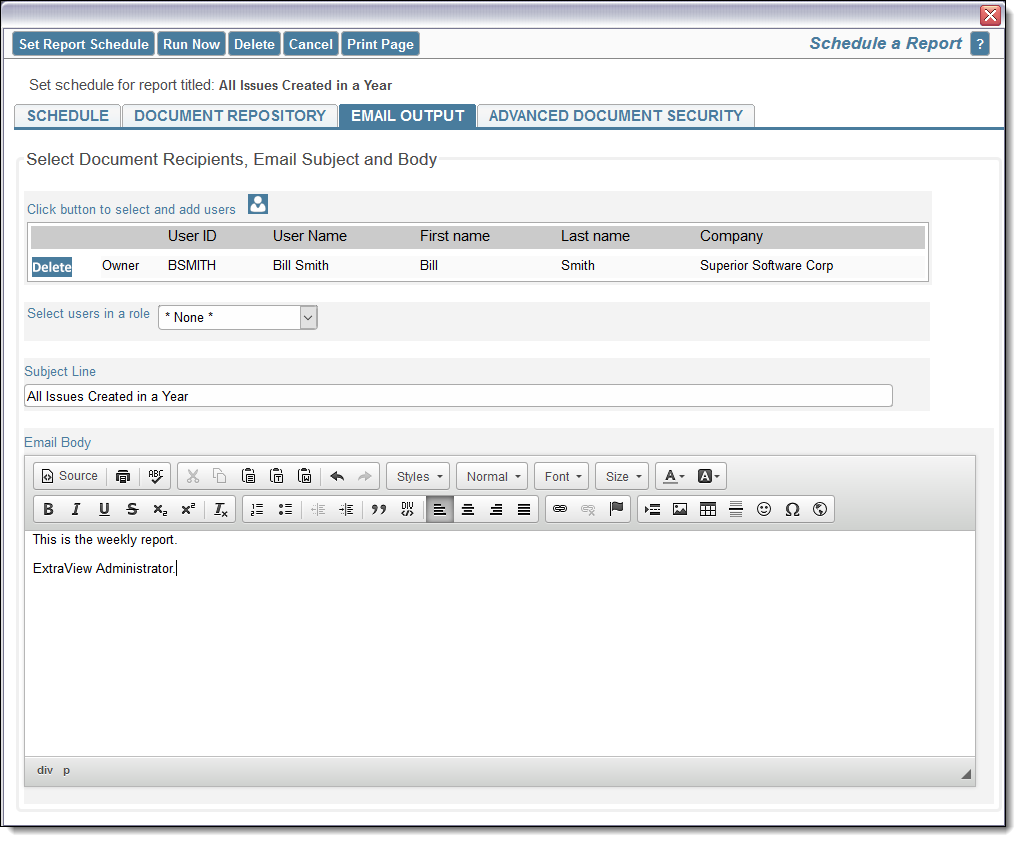
Selecting recipients for a report
Use the Click button to select and add users to schedule button to add users to the schedule, or use the Del button to remove the user from the schedule. You may only schedule reports to be delivered to licensed ExtraView users, not to any person through an email address. However, it is permissible to schedule a report for delivery to an ExtraView guest user so if you need to deliver a scheduled report to a person who is not an ExtraView user, ask you administrator to create a guest account with appropriate permissions.
You will usually want to create an accompanying email with the scheduled report. The default Subject Line for the email delivery is the title to the report, but you can change this. Use the Email Body editor to compose the email that you want to send. Note that if you want to embed an image or logo within the body of the email, that the image must exist on a server that both you and the recipients of the report can access. If any of the recipients are going to be outside the firewall of your company’s network, then you should use an absolute path to the image. For example, if you plan to add a company logo as part of your signature to the body of the email, you might include this image with a URL such as http://www.mywebsite.com/images/company_logo.png.
The Run Now Feature
Note the button named Run Now in the menubar of the popup. When you click this button, the report is immediately sent to the scheduler task and executed. All recipients should receive their copy of the report with this action, within a few moments of clicking the button.
Managing Your Scheduled Reports
On the Query screen, click the button with the title Manage Scheduled Reports. This will display a list of all scheduled reports for which you are the owner. From this screen you can edit the schedule for any report that has an existing schedule.
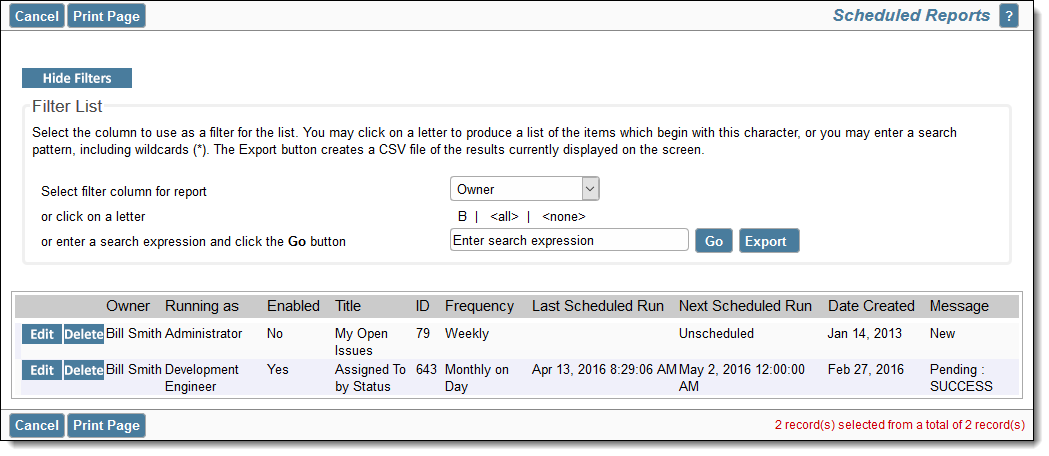
Managing your scheduled reports
Note that in order to be able to alter the schedule, you must be the person who created the schedule. The exception to this is that the administrator may also modify the schedule for all scheduled reports.
