Querying

To access the Query screen, simply click on the Query button on the main Admin menu bar. The Query screen allows you to quickly create and ad-hoc report and present the results on a Quicklist or a Detailed Report.

There are two types of filtering, using the Standard Query Filters or the Advanced Query Filters.
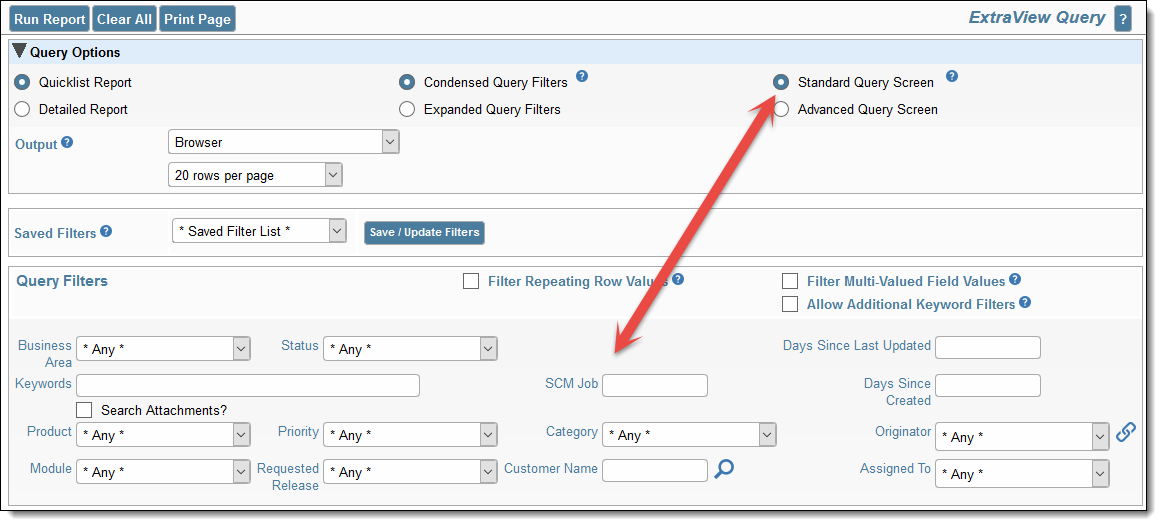
 You can also select options to allow you to use either Condensed Query Filters or Expanded Query Filters as well as saving your current filters for reuse at a future time.

Selecting query filters will impose restrictions upon the report being produced and return a set of results that matches the filters you set. For example, if you select the Status Open, then only open issues will be displayed. Filters can be combined together, for example to show Open issues for the product named XXX that have been updated in the last 7 days.


Saving filter sets

Dialog for saving filters

You may save any set of filters that you have defined, without making them part of a report. To achieve this, create the filters in either the Standard or Advanced mode as described below, then press the Save / Update Filters button. Within the popup window, you can either save the filters using a new name, replace an existing set of filters, or you can delete an existing filter set. The advantage is that you can quickly save and restore filter sets, using the Quicklist to display the results set.

The query filters change significantly, according to whether you are in Standard Query or Expanded Query mode.

Standard Query Mode

This allows you to choose the values for fields, upon which records are selected for the report. There is a set of filters available directly on the Query / Report screen, as well as from the screens where you prepare or edit reports that you save for future use.

Typically, the Query / Report screen will show the most common filters you use, while the remaining screens show a more complete set of filters to which you have access. The fields available for your use are set up by your administrator.


Standard query filters

Advanced Query Mode

For Advanced Mode, you first will select an individual field as the first filter to use in selecting individual records for the report. Then you select an operator such as “equals” or “greater than”, and then you select the value. For example, a filter may be:

Status not equal to Closed

You may add as many filters as you like, with each one beginning with a conjunction such as “and” or “or”. Advanced filters take a little longer to set up than standard mode filters, but they allow much more flexibility to create a complex set of query filters.

To add a new filter, use the button. Note that you can add filters following any existing filter. If you want to delete an individual filter from a query, use the button. This will eliminate the filter.

In advanced mode, you can set the same filter field multiple times and use the “or” value. For example, you may set two filters as follows:


Priority equals P1
or Priority equals P2

Alternatively, you can use the Expanded search mode described below, and select multiple values from the Priority list.

Note: You can toggle between standard search mode filters and advanced search mode filters at any time, but the filters currently on the screen are reset. Filters are not lost when you change between condensed and expanded filters.