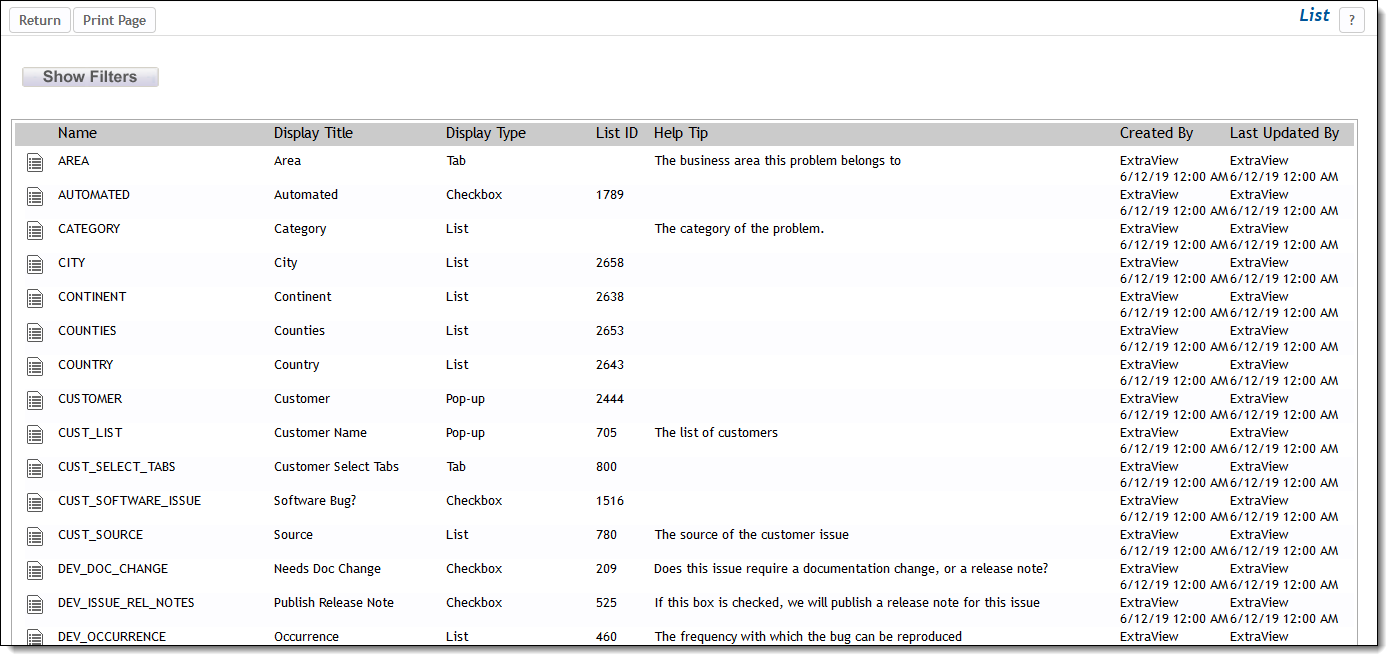
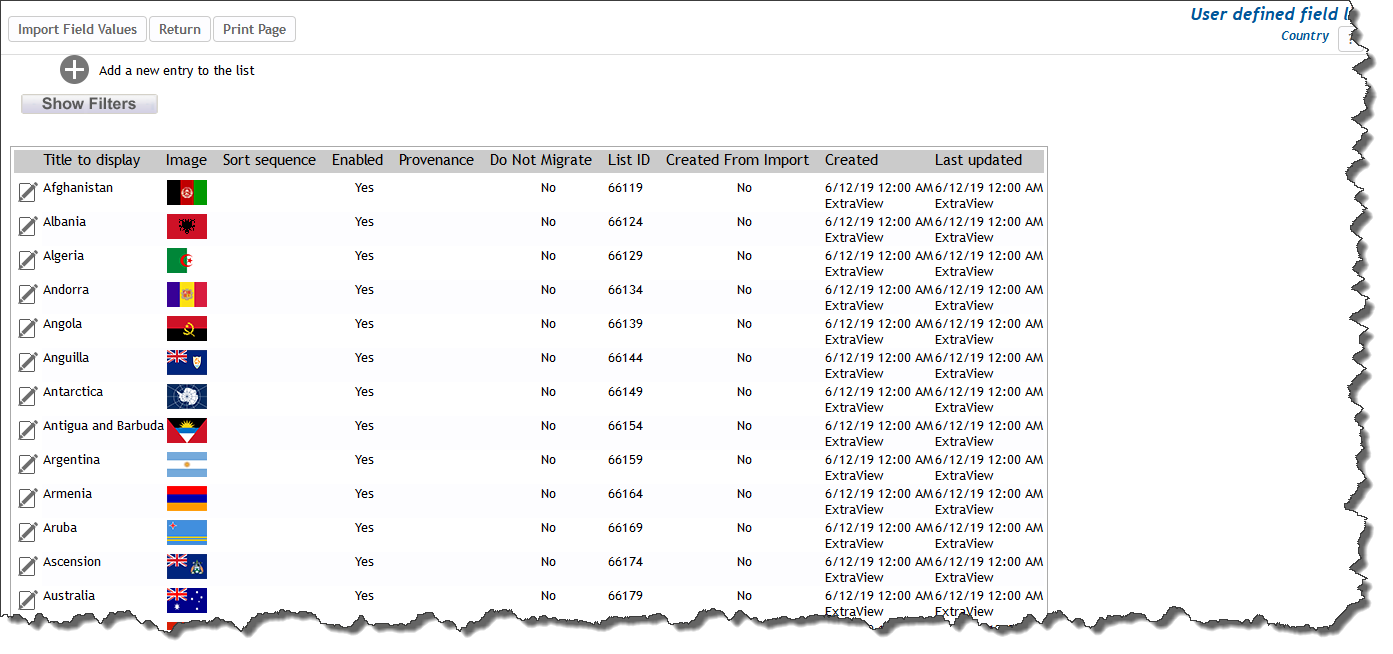
List values are maintained from one of several places - the Manage List Values administration menu, the List button by each list type field in the Data Dictionary, or by using your mouse to right-click on a list type field within the Design Center. This screenshot shows the Manage List Values screen as seen from the Manage List Values and the Data Dictionary. From within the Design Center you access the maintenance screen for each individual field directly:

Managing field lists
Note that once you have one or more values entered against any list type field by adding or updating issues, you are not able to delete the list value. If you want to remove a value from a list after data has been recorded against the value, most lists allow you to disable the value, so it will not appear in the add or edit screens. This allows reporting to show the historic data, even though the value is not currently being used. If a user edits an issue which has a disabled value in a list, they will see a message similar to this:

Warning when viewing a disabled value
The user may either update the record with the out-of-date value, or choose a new valid entry from the list. If the out-of-date value is removed from the list and the record updated, no user will be able to choose that value again. The behavior setting named IGNORE_DEACTIVATED_USER_FIELDS may contain a delimited list of fields with a display type of USER. Users will not be warned if they edit an issue which has a field in this list with a deactivated user. If a USER field does not appear in this list, the user will always be warned if the field has a deactivated user, when they edit the issue. There are a few lists which are managed differently:

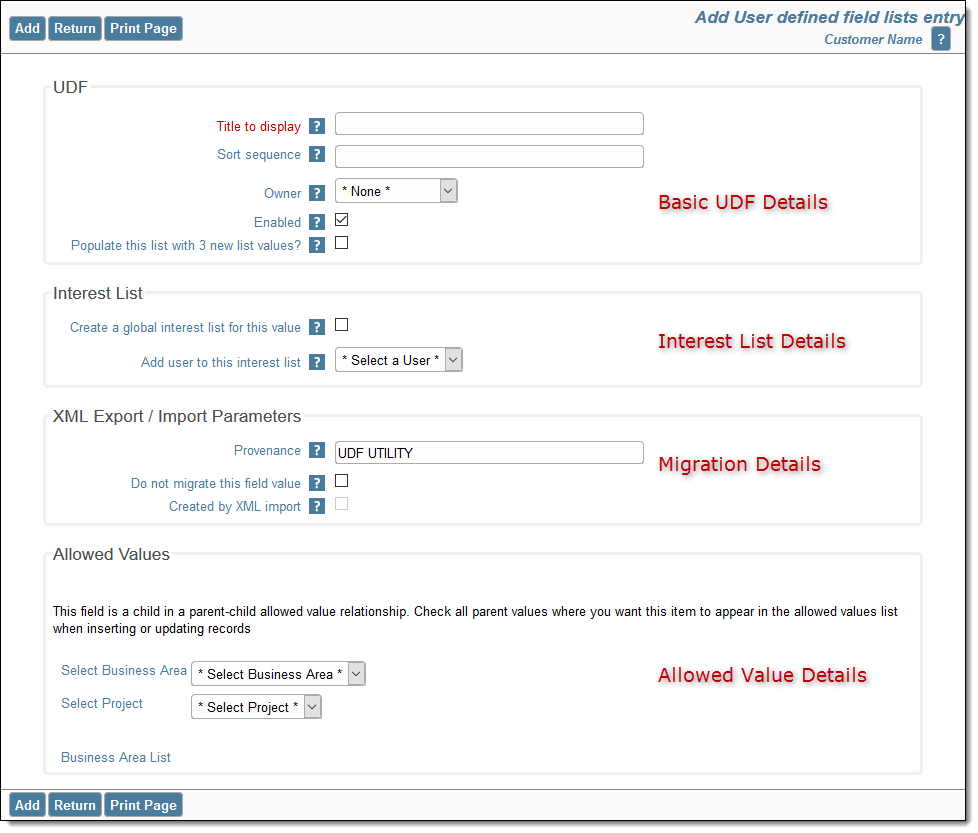
To add an entry to the list, press the Add button. To edit an entry, press the Edit button by the value you want to edit.

Editing a list entry
| Basic UDF Details |
These always appear, and you must provide a Title for the field. It's optional to provide a Sort Sequence and an Owner, and you may enable or disable the field value. If the behavior setting named COMPANY_NAME_LIST_UDF has the current field as its value, there is the additional prompt, Populate this list with nn new list values. This allows you to synchronize the list with the user's company's names. If the data dictionary propert to associate images with the list values is enabled, you will see an additional prompt within the basic UDF details that allows you to upload an image against each value.
Images are restricted in their size, to 50kB each. Images larger than this will be resized so they do not occupy additional space. As each image is displayed on add, edit and report screens, they will also be sized to be as uniform as possible and to match the user's personal text size option. This utilizes the behavior setting named LIST_IMAGE_SIZE_PCT which has a default value of 100. At 100%, the images are sized to have the same height as text characters used for list values and reports. You may decide to make this value larger or smaller to display correspondingly larger or smaller on user's screens. |
| Interest List Details | If the field may be used as an Interest List, this section appears. If more sophisticated processing of an interest list for the value is required, then the administrator should use the Interest List menu under the Notification tab of Administration. |
| Migration Details | It is occasionally useful to inhibit the migration of some list values between instances when performing XML exports / imports. This section allows the administrator to flag specific values so they will not be migrated between instances. Note that this section also displays how a specific list value has been created, for example through the user interface of this utility, or perhaps as a value created by an OBJECT business rule. |
| Allowed Value Details | This section allows you to define which parents a field value belongs to in allowed value relationships. |