Example 1

This example describes how to set up a relationship group that enables an issue to be related to a parent issue in an ad-hoc way – simply by entering an issue ID into a text field on an add or edit screen of the child issue. Each issue will then display the related issue in an embedded layout, where you have the option to remove each related issue, or to drill down and edit the related issue.

Here is a screenshot of the edit screen of the parent issue after setting up this example:

Example related issue display with its connecting parent issue ID

Step 1 – Setting up The Relationship Group

In this example, we will set up a relationship group that named BEST_DATA_RG. This will be a One-to-Many type of relationship group and uses a Parent / Child structure for the related issues.

  1. Go to Administration Site Configuration Relationship Group Maintenance and ensure the BEST_DATA_RG group exists – you may need to check the box next to “Show relationship groups that have no issues or only contain Closed issues”.


    Relationship Group Maintenance Screen
     

  2. If the BEST_DATA_RG relationship group is not present, create it by clicking on the Add button
  3. Set the Fixed name to BEST_DATA_RG and give it a Title of General Relationship Group. Select “One-to-Many” from the “Type” drop-down list. Click Add to complete the operation. You may use a different name for the relationship group, but remember this as you will need it later.

Step 2 – Create a Field in the Data Dictionary

Now that the relationship group is defined, we will create a field in the Data Dictionary that will handle any related issue number entered by the user.
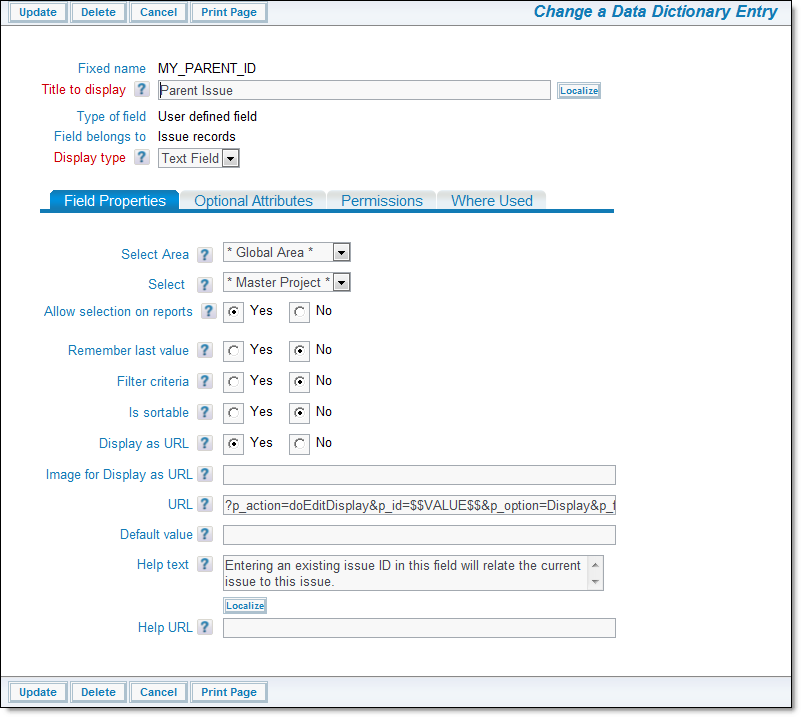

The new field

We also turned on Display as URL for the field, and set the URL to:

?p_action=doEditDisplay&p_id=$$VALUE$$&p_option=Display&p_from_action=search
&p_from_option=search

This provides a drilldown button by the field so we can see the parent issue by clicking on the button.

Step 3 – Grant Security Privileges

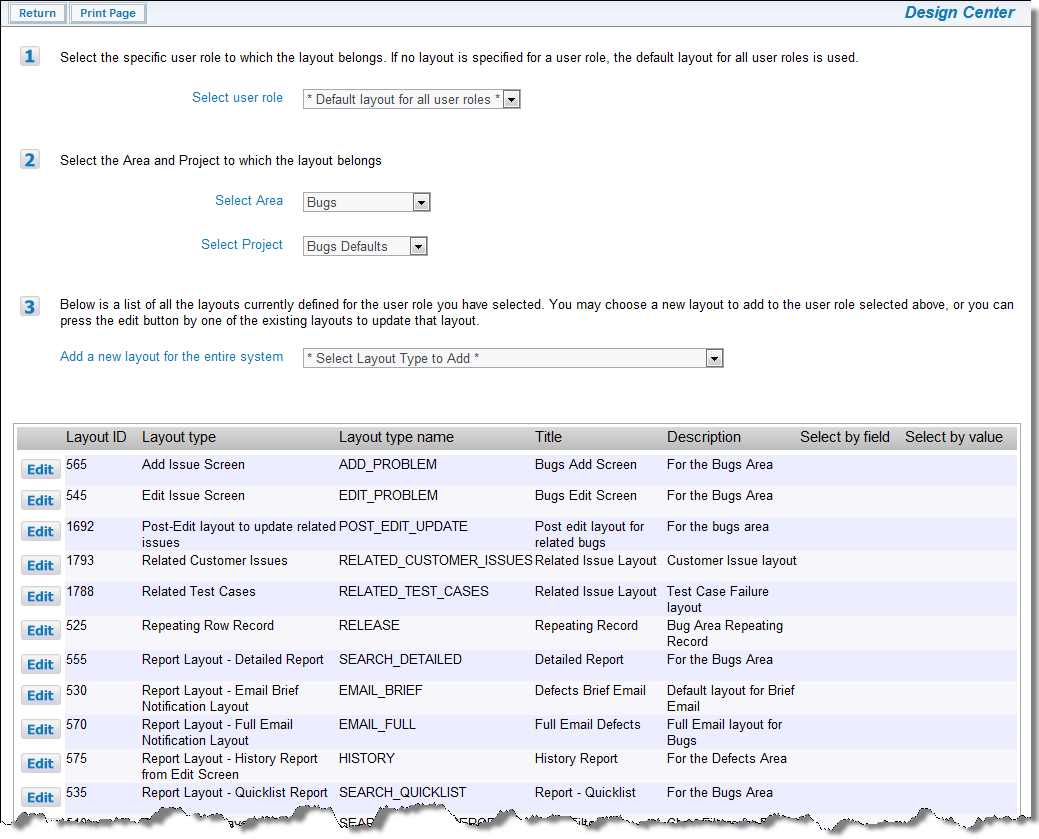
Next, make sure to set read/write permissions for any role that will be accessing this field.

  1. Go to Administration Site Configuration Grant Security Privileges
  2. Select the permission keys PR_RESOLUTION.MY_PARENT_ID
  3. Give Read and Write permissions for the user roles that will be using the related issues capability.

Step 4 – Place Field and Related Issue Display layout

Now we need to place these fields on a layout so they are accessible.


Ensure the Related Issue Display is available

  • If the layout does not exist, or you want to override the one that is present in the Global Area, create this layout:
    1. Select Related Issue Display from the * Select Layout Type to Add * list
    2. Add the desired fields you want displayed in this layout. This is an example of a related issue display layout:


    Related Issue Display layout example


  • After saving the Related Issue Display layout, edit the Edit Issue screen for this business area
  • Place the field that you created earlier onto this layout. Also, place the Related Issue Display layout onto the edit layout


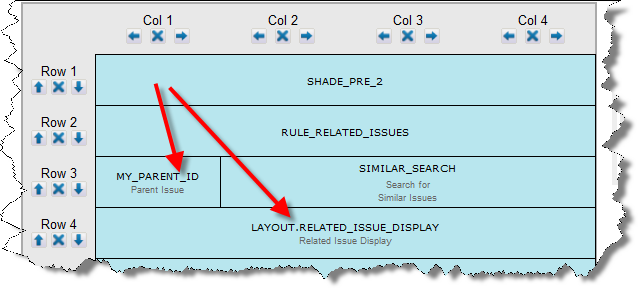
The fields and related_issue_display on the Edit Issue Layout

  • Add the following layout cell attributes to the MY_PARENT_ID field by clicking on the link button next to the field name:
    Attribute Value
    RID RELATIONSHIP NAME BEST_DATA_RG
    RID RELATIONSHIP TYPE Related
  • Add the following layout cell attributes to the RELATED_ISSUE_DISPLAY by clicking on the link button next to the field name:
    Attribute Value
    RID RELATIONSHIP NAME BEST_DATA_RG
    RID RELATIONSHIP TYPE Related
    VISIBLE IF ID is not null
    HEIGHT 30
  • Save the layout.

Step 5 – Updating Related Issues when Updating the Parent Issue

If you want the capability to update all related issues when performing the update of an issue, continue with the following steps. Otherwise, ad hoc related issues are now configured on your site.

  1. Go to Administration Site Configuration Behavior Settings and make sure the behavior setting named RG_UPDATE_BILEVEL_ONLY is set to a value of NO
  2. Go to Administration Site Configuration Design Center. Ensure that you have a layout with a type of POST_EDIT_UPDATE defined. If your installation does not have a layout of this type defined, use the Create and Maintain Layout Types entry on the Fields & Layouts administration menu to define this
  3. Add the layout with the POST_EDIT_UPDATE type to your current business area and project, or in a location from which it will be inherited
  4. Place the fields on the layout that you want to be available during the update process for related issues. It should look something like the following screenshot.

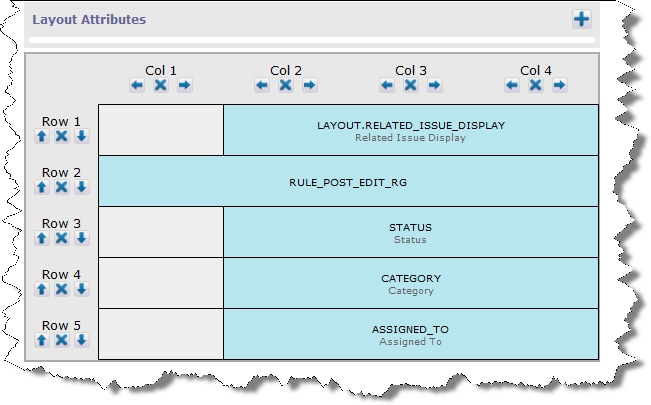
    Note that the fields named STATUS, RESOLUTION and ASSIGNED_TO are the fields that will be updated in the related issues. It is essential that you place the embedded layout, LAYOUT.RELATED_ISSUE_DISPLAY on this layout. Also note that the field named RULE_POST_UPDATE_RG is defined as a custom field and has its help text defined as 4 - Check the fields in the list below that you want to update to the same values in the issue being updated. The new value is shown. Remember that you may need to set the RID RELATIONSHIP NAME, RID GROUP REFERENCE FIELD and the RID RELATION TYPE layout cell attributes for the LAYOUT.RELATED_ISSUE_DISPLAY. When you edit the parent issue, the user will have the option to update the related issues at the same time.