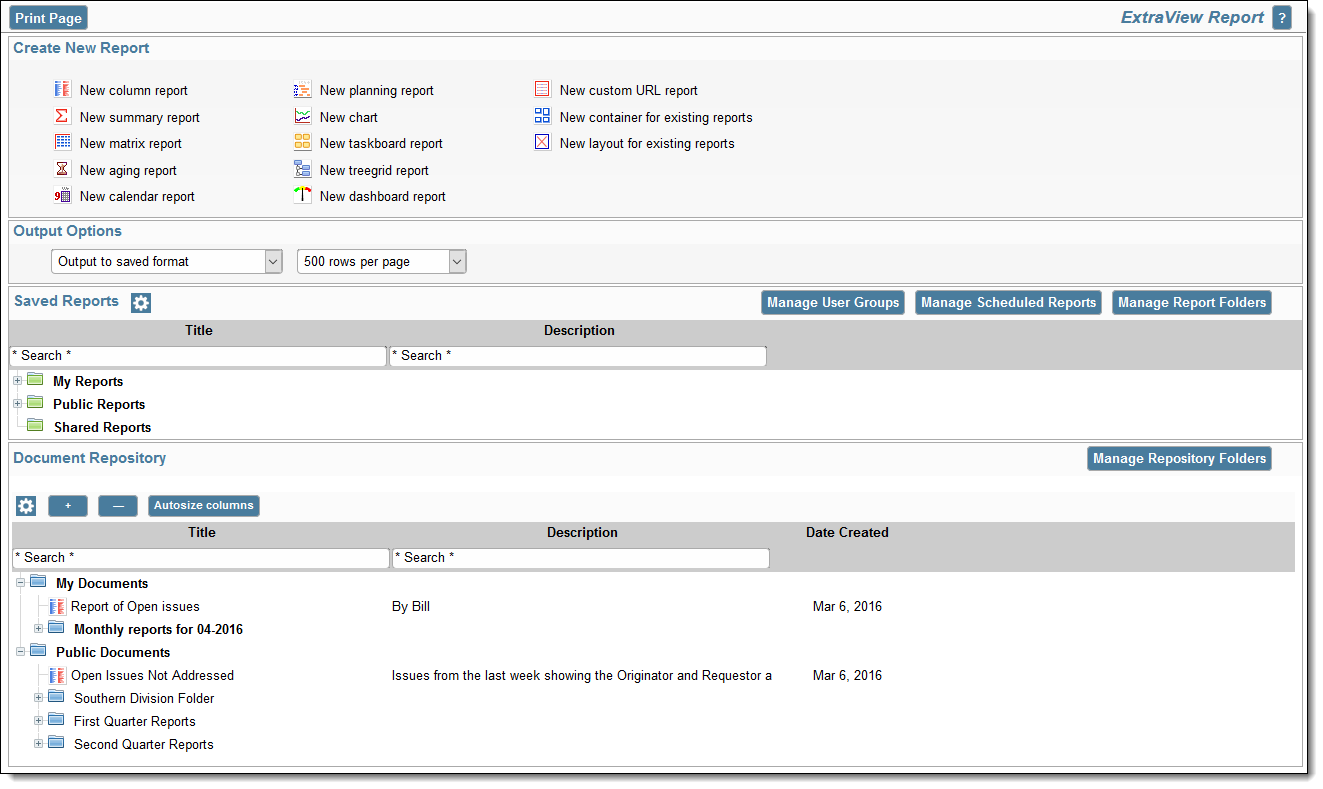
The document repository is accessed via the Reports screen. Users may send documents to the repository from the report scheduler, either on an immediate basis, or on a timed basis according to the schedule they create for the report. The user may store documents in a personal repository or within a public, shared repository. Permission from the administrator is required to write documents to the repository and separate permission is required to download documents from the repository.
Documents are saved in the repository by scheduling the report and setting the folder within the repository into which you want the document to be saved. You may create an automated naming convention to store your documents, for example indicating the year and month within which the report was created.
Reports sent to the repository are termed documents. These are viewed from the Reports screen, following the list of reports that a user may run. The repository documents may be stored in folders and sub-folders. Similar to reports, these can be personal in nature, stored in the My Documents section, or public, stored within the Public Documents section.
From a report editor of a saved report that supports being scheduled, click on the Schedule Report button. Then click on the Document Repository tab.

Setting up the Report Scheduler to Send a Document to the Repository
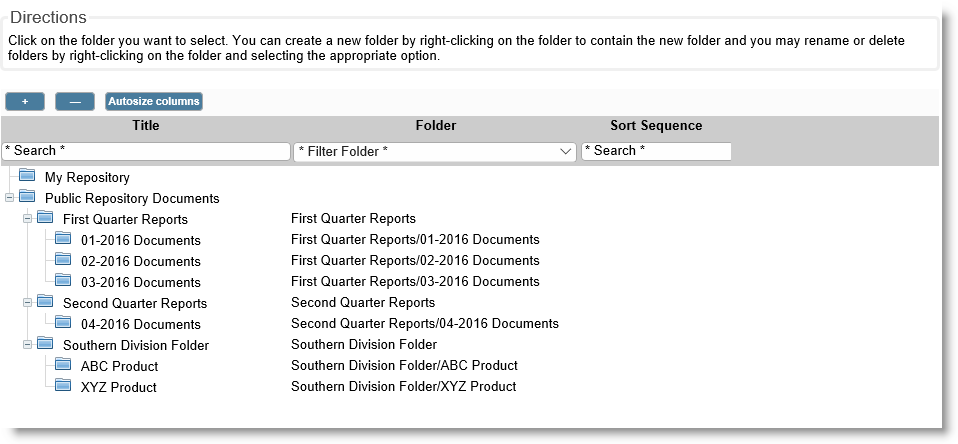
From the Document Repository tab, you set up output to the repository with the button Send to Repository, and then you select the folder in the repository to which you want the document to be placed when the report scheduler runs.

Select a Document Folder for Repository Output
Within the popup where you select the folder, you can also create new folders and sub-folders. Simply right-click on the folder beneath which you wish to create a new folder, and a New Folder appears. Name this folder appropriately.
Within the document repository it is often useful to collect documents for similar purposes under the same folder. The user has no ability to alter the name of the folders as documents are being created for insertion into the repository, as the report scheduler creates the documents automatically.
For example, you might want to place all the documents generated for a specific month into the same folder, or you might want all the documents generated about a specific product placed in the same folder. To facilitate this requirement, you can create a folder with a virtual name. The ExtraView report scheduler will use the information within the virtual name to automatically create folders as necessary. For example, when a new month starts and the report scheduler creates a new document for insertion into the repository, a new folder will be created automatically.
The date-based tokens you can use to create a virtual folder are:
| $$DAY$$ | The numeric day of the current month |
| $$MONTH$$ | The numeric month of the current year. Note that month names are not supported to ensure readability of the months by non-English language users and to ensure that the months will be kept in a reasonable sort order within the repository |
| $$YEAR$$ | The current year as a 4-digit number |
The tokens can be interspersed with normal text. For example, a virtual folder name of Monthly reports for $$MONTH$$-$$YEAR$$ will be actualized as Monthly reports for 02-2016 when the current month is February 2016.
There are occasions when you might want to send a report output to the document repository without setting up a schedule for the report. To achieve this, from the report editor, click on the Schedule Report button, click on the Document Repository tab, set the folder as necessary and choose to send the report to the repository, then click on the Run Now button.
From the Reports screen, click on the View Documents button within the Document Repository section of the screen.

The Document Repository on the Reports Screen
You may view or download any document by simply clicking on its title. If you have permission, you may use the right-click mouse button to delete the document. If you click on the gear wheel in the controls for the repository, you will see additional columns as follows:

Extended Repository Options
From this view, you can click on multiple documents, and delete them. Use the Select checkbox to identify the documents you want to delete. In addition you see additional information about the documents stored.