The import utility for user data allows the administrator to upload a tab-delimited or comma-delimited file from their client computer, for the fields and values within this file to be mapped to ExtraView values, to validate the data and to finally import the data. Data being uploaded is imported as new user data. You cannot use this utility to update existing user data. Access to this feature is via the security permission key named CF_USER_FILE_IMPORT. Much of the user data file import utility is similar to the previous topic of importing issue data, so this section focuses on the differences. When you choose to import user data, similarly to importing issue data, you will create a template that can be reused with different uploaded files. This is shown in the next screenshot.
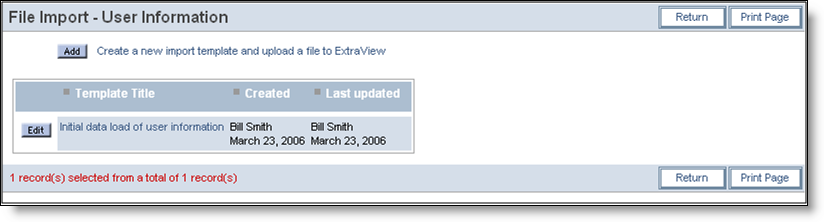
Adding a new user upload template
Once you have created a template, the process is to:
All mapping operations are similar to those for importing issue data. The fields that can be mapped to within ExtraView are:
| Field | Purpose | ||||||
| ADDRESS_LINE1 | The first line of the user’s address. If none is specified, this is left blank | ||||||
| ADDRESS_LINE2 | The second line of the user’s address. If none is specified, this is left blank | ||||||
| ALPHA_TIMEZONE | The user’s time zone. If none is specified, the value in the behavior setting named DEFAULT_TIMEZONE is used | ||||||
| AREA_ID | The default business area for the user. If none is supplied, the user will be placed in the current business area of the user performing the import | ||||||
| CELL_PHONE | The cell phone number of the user. If none is specified, this is left blank | ||||||
| CHART_FONT | The user’s font they will use on charts they produce. If none is specified, the value in the behavior setting named DEFAULT_CHART_FONT is used | ||||||
| CITY | The City of the user. If none is specified, this is left blank | ||||||
| COMPANY_NAME | The user’s company name. If none is specified, this is left blank | ||||||
| COUNTRY | The Country of the user. If none is specified, this is left blank | ||||||
| DATE_FORMAT | The user’s date format If none is specified, the value in the behavior setting named DEFAULT_DATE_FORMAT is used | ||||||
| DRILLDOWN_REPORT | This has the value QUICKLIST by default. The two valid values are QUICKLIST and DETAILED | ||||||
| The user’s email address If none is specified, the value is left blank | |||||||
| EMAIL_FORMAT | The default for this field is the value HTML. The list of valid values is HTML, TEXT, BRIF and VERY_BRIF, corresponding to HTML, text, brief text and very brief text | ||||||
| ENABLED_USER | The default for this field is the value Enabled. If you want to create the user in a disabled state, then use the value of Disabled. | ||||||
| FAX | The fax number of the user. If none is specified, this is left blank | ||||||
| ** FIRST_NAME | The first name of the user. If none is specified, this is left blank | ||||||
| HOME_TELEPHONE | The home telephone number of the user. If none is specified, this is left blank | ||||||
| HTTP_CHARSET | The user’s character set If none is specified, the value in the behavior setting named HTTP_CHARSET is used | ||||||
| JOB_TITLE | The job title of the user. If none is specified, this is left blank | ||||||
| LANGUAGE | The language defaults to the setting in DEFAULT_LANGUAGE. Note that this should be in lower case. If you set another value, then ensure you have created the appropriate locale | ||||||
| * LAST_NAME | The last name of the user. Note this is a required field in the import file. | ||||||
| LOGIN_ID | The alternative User ID. If none is specified, the SECURITY_USER_ID is used | ||||||
| MS_OFFICE_CHARSET | The user’s character set to use when outputting information to Microsoft Office products. If none is specified, the value in the behavior setting named MS_OFFICE_CHARSET is used. Note this is only useful if you are running versions of Microsoft Office prior to the Office 2003 versions | ||||||
| NOTIFY_ON_OWN_UPDATES | The default for this value is Y. You can also give it the value of N. | ||||||
| PAGER | The pager number of the user. If none is specified, this is left blank | ||||||
| * PASSWORD | The password, in plain text, for the user. The password is not stored in plain text, but is encrypted within the database as the user is created. | ||||||
| PASSWORD_EXPIRY_DATE | The date you want the user’s account to expire. Note that if you do not provide this value, the password will never expire | ||||||
| PASSWORD_INTERVAL | The number of days between password expirations for the user. If this is not supplied, the default is zero which means the password will not expire | ||||||
| POSTAL_CODE | The postal code of the user. If none is specified, this is left blank | ||||||
| PRIVACY_GROUP | Each user may belong to multiple privacy groups; therefore importing privacy groups requires a different syntax than for most other user fields. Refer to the section above titled Importing Repeating Row Data. This shows how to construct the spreadsheet data to import user roles into ExtraView. Use Privacy Group as the title to the field. | ||||||
| PROJECT_ID | The default project for the user. If none is supplied, the user will be placed in the current project of the user performing the import. The project must be valid for the AREA_ID specified | ||||||
| RECORDS_PER_PAGE | This defaults to 20 and is the number of records that will be displayed on a home page report | ||||||
| REGION | The language defaults to the setting in DEFAULT_REGION. Note that this should be in upper case. If you set another value, then ensure you have created the appropriate locale with its region | ||||||
| REPORT_1_ID REPORT_2_ID REPORT_3_ID | This is the location to set the three Home Page reports. For each report, you must use the precise mapping of the report’s name. This is case sensitive. As an example, if you want to refer to a Public report that has a title of Assigned to you, and a description of Issues assigned to you then you would enter Public:Assigned to you, Issues assigned to you | ||||||
| * SECURITY_USER_ID | This is a required field and is the key field for the entire user record. It must be alphanumeric, and be from one to thirty characters in length. As well as alphanumeric characters, the user ID may also contain periods (‘.’) and underscores (‘_’). | ||||||
| START_PAGE_ID |
By default this has a value of zero. The potential values for this are:
Note that it is possible for the administrator to add additional values to this list. |
||||||
| STATE | The state of the user. If none is specified, this is left blank | ||||||
| STYLESHEET | The default value for this field is small. Other valid values are medium and large. These correspond to the font size for the user’s account | ||||||
| TWENTY_FOUR_HOUR_TIME | This defaults to N. You may also provide a value of Y if you want the user to use a twenty-four hour clock | ||||||
| USER_FIELD_1 USER_FIELD_2 USER_FIELD_3 USER_FIELD_4 USER_FIELD_5 | These are user defined fields that may be imported into ExtraView. Their titles are set in the data dictionary, and you may import values into these fields from your import file. | ||||||
| USER_ROLE | Each user may have multiple roles; therefore importing roles requires a different syntax than for most other user fields. Refer to the section above titled Importing Repeating Row Data. This shows how to construct the spreadsheet data to import user roles into ExtraView. Use Role as the title to the field. See below for additional information | ||||||
| VARIANT | The user’s region variant. If none is specified, the value in the behavior setting named is used. This is not commonly used. | ||||||
| WORK_TELEPHONE | The work telephone number of the user. If none is specified, this is left blank. |
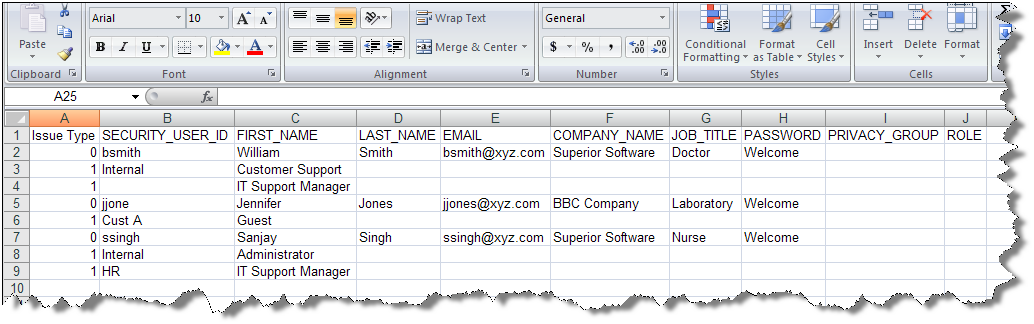
** indicates that the field is always required. * indicates that the field may be required, depending on the value of the behavior setting ENFORCE_DETAILED_USER_INFO. This screenshot displays a sample import file. Note how the PRIVACY_GROUP and ROLE fields may be mapped to multiple values, for a single user. The fields with the multiple values are defined in the first row, and the values are placed in rows following each user, using an Issue Type of 1 as opposed to the user details which have an Issue Type of 0.
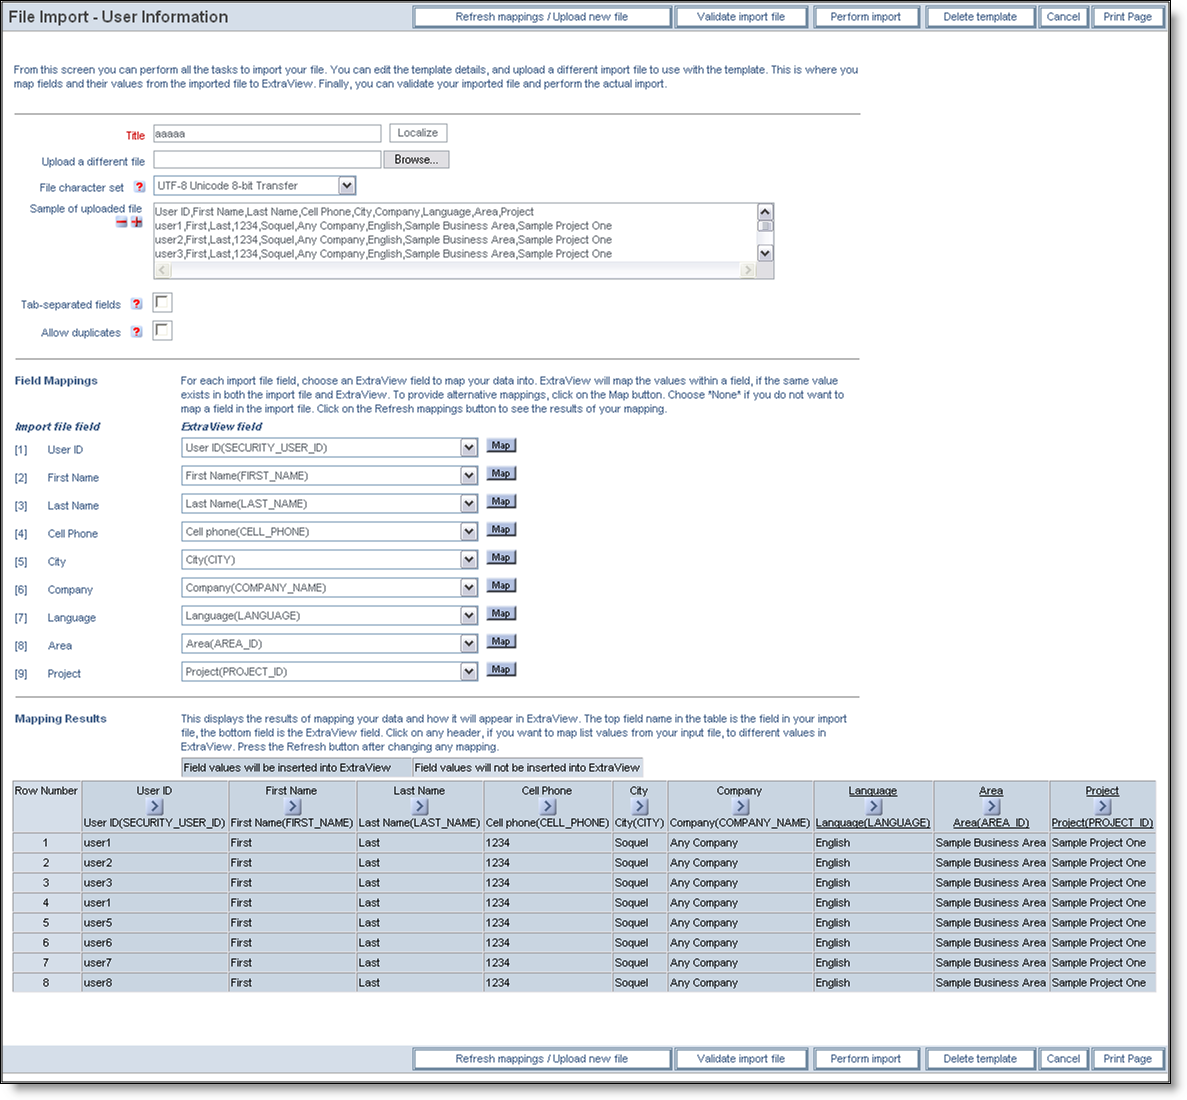
The following screen shot displays the screen where you map the fields, validate the data and perform the import. Again, please consult the previous section for full details. The one difference to importing issue data is the prompt Allow duplicates. When this is checked, any duplicate combinations of First Name and Last Name or duplicate values of Email Address will be allowed. If this is not checked, then whenever a duplicate is found, the value will be rejected during the import phase.
Validating and Importing Users
When validating the data and performing the import you will receive feedback in the same way as described in the previous section.
Note: For security purposes, the initial password of the user is set to a random value and is not defaulted to any value. The passwords will need to be set by the administrator individually, or via a custom-designed process.
Note: If inserting a new user will violate the number of licensed users, then an error is generated, and no update to the database is made. However if you do not specify the license type for a user, then they will be set to be concurrent, and this most probably will avoid any license constraints when loading the user. You may also load users in the disabled state by setting the ENABLED_USER field to a value of D.
Note: If your input file contains, or would cause a user to be created with a duplicate email address, or with a duplicate combination of first and last name, an error is also generated and the record is rejected.
Excel is a great tool but has one inherent disadvantage for importing user role information. Each user may have multiple roles, and we need to represent that a single user may have multiple roles, all on a two-dimensional spreadsheet. To achieve this, we use the first column in the spreadsheet (with the title Issue Type as a label to indicate whether the row of data is the user information or the role information that refers to the user. The user information is indicated with a 0 in the cell, whereas we indicate that it is user role information in the role by placing a 1 in the cell. When you signify that the row is to hold user roles, the headings in the first row of the spreadsheet do not apply, and you can place the roles in the columns of that row. However, you must still tell ExtraView that the spreadsheet contains user roles, and this is done by placing the title ROLE in the first row of the spreadsheet. The Excel screenshot further up this page shows how this is configured, for both Privacy and User Roles.