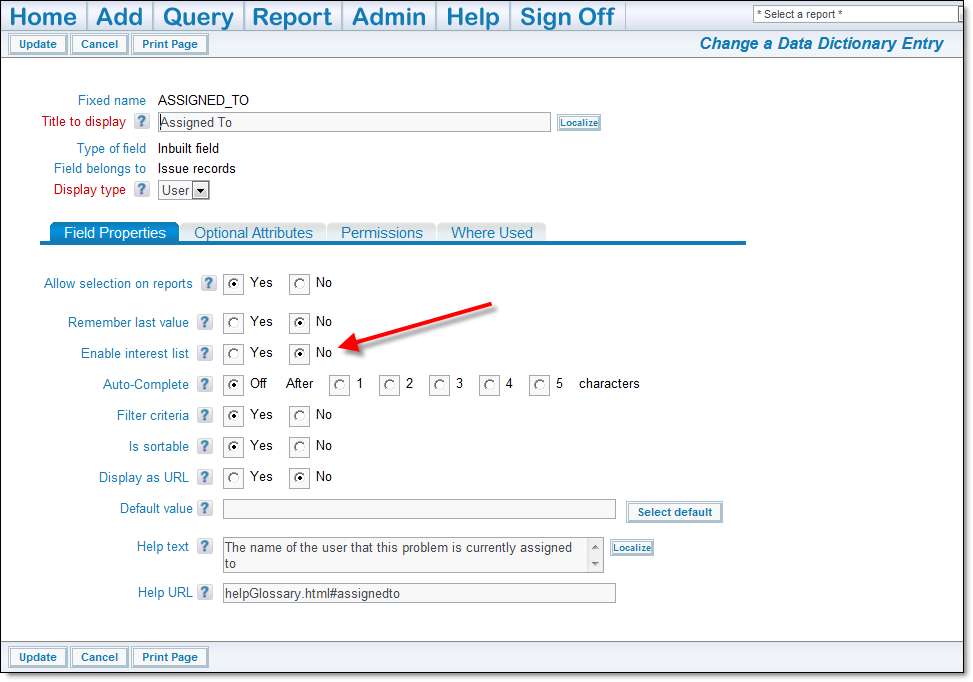
You many enable interest list on fields that have a display type of List, Tab, or Popup. In addition, end users may create an interest list on any issue, provided their role has permission to the security keys PR_ADD_PROBLEM.INTEREST_LIST or PR_RESOLUTION.INTEREST_LIST. Interest list on fields are enabled within the data dictionary.
Option to Enable Interest Lists
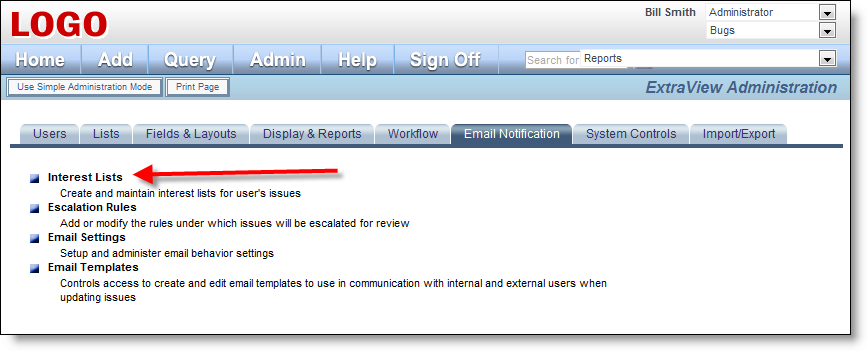
Interest lists are enabled on each field from within the field’s data dictionary definition. Within the Email Notification section of administration, there is a menu entry named Interest Lists. This administration function is controlled by the security permission key named CF_INTEREST_LIST.
Interest List Access
Note that you may grant non-administrative users permission to this permission key. When you do this, they will see a prompt on the Notification section of their Personal Options screen that allows them to administer the interest lists. Note that this gives them a level of administrative privilege, including being able to create and delete interest lists, and to add and remove any user to and from an interest list. When you select this menu entry, a screen similar to the following will appear:
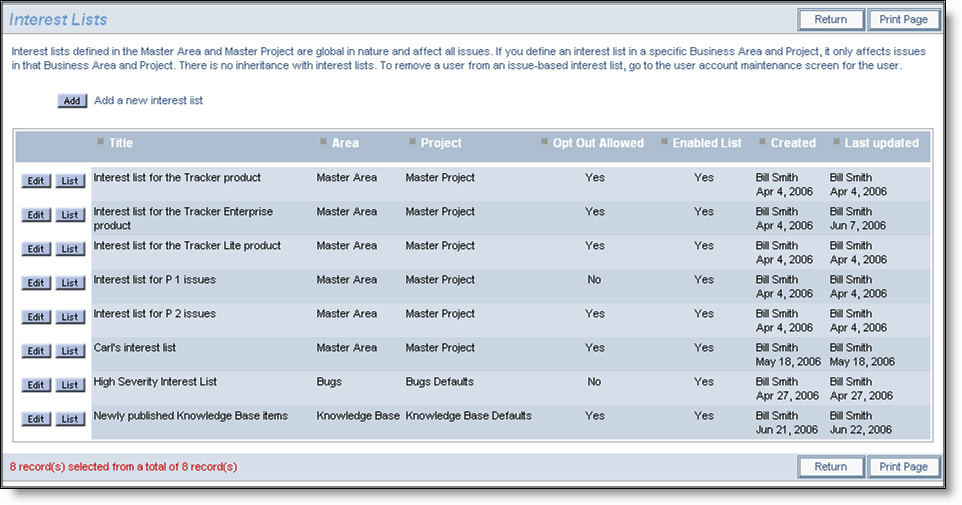
Interest List Definition
From this screen you may create new interest lists, modify existing interest lists, or manage the list of users who are subscribed to any interest list. To create a new interest list, click on the Add button. The following screen appears:
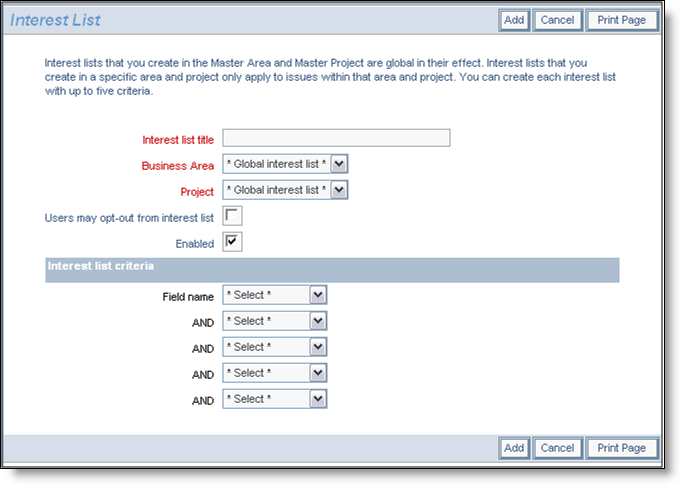
Adding a new interest list
If the interest list you create is to be global, create it with the Business Area and Project having a value of * Global interest list *. If you want the interest list to be mandatory for all users, then do not check the box Users may opt-out from interest list. If you check this box, users will be able to opt-out of the interest list from their personal account option screen. You can also disable an interest list, without deleting it from the system with the Enabled checkbox. If the field you select for the interest list criteria is a multi-valued list field, then you may only select a single value for the interest list. If you need to select multiple values, you will need to set up multiple interest lists. Interest lists may be built upon field conditions beyond looking for equality with a value. For example, for fields with a display type of LIST, POPUP, and TAB, you may create an interest list condition looking for when a field is changed to or changed from a specific value. The following screenshot displays how this is achieved.
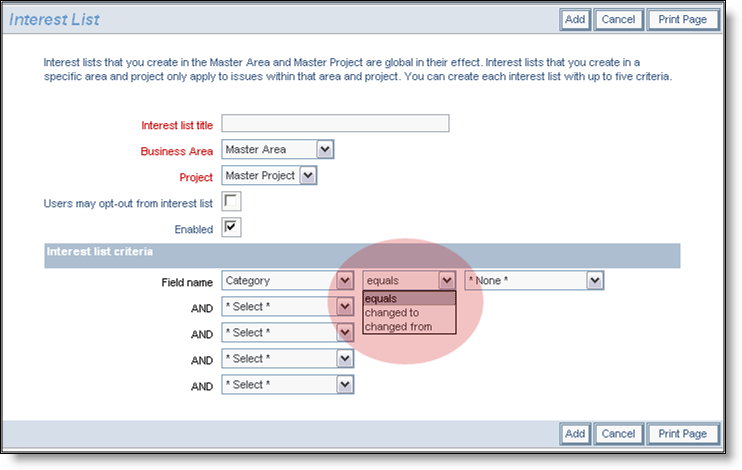
Setting the operator for an interest list field
After adding an interest list, you manage the users associated with the list using the List button by the interest list details. The following screenshot shows the presentation of the interest list members and where they are maintained.
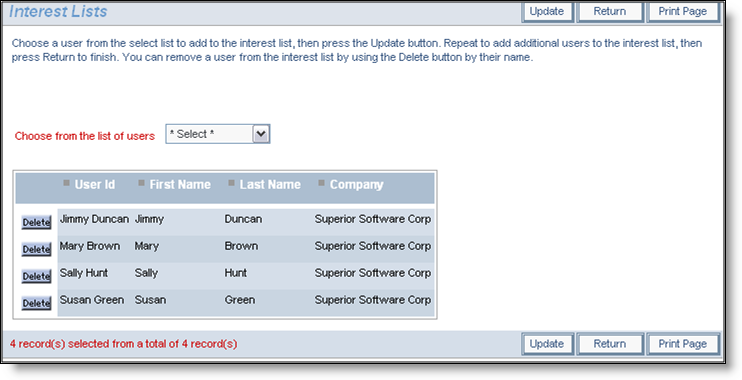
Maintaining the list of users on an interest list
Add new users to the interest list by choosing their name from the select list, then pressing the Update button. Delete users from the list by pressing the Delete button by their name.
Note: Only regular users of ExtraView can be added to interest lists. According to the terms of the license agreement, guest and other users who only belong to the behavior setting named LIMITED_USER_ROLE, cannot be added to interest lists.