Within ExtraView administration, enter the File Import Utility. The following screen appears:
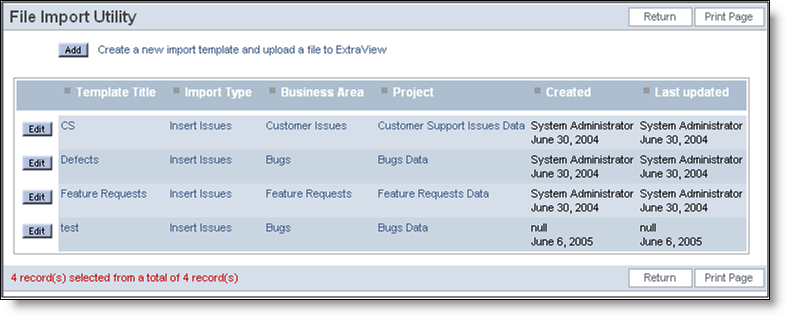
File Import Utility
Create a new import template and the following screen appears. Simply provide a name for the template, and select the file that is to be uploaded. Note that if your installation uses Business Areas and Projects, select lists for these will appear on the screen. Once a template has been created for a specific Business Area and Project, these cannot be altered. Note that you select whether the template is to be used to create new records, or to update existing records. You achieve this using the Select Mode prompt.
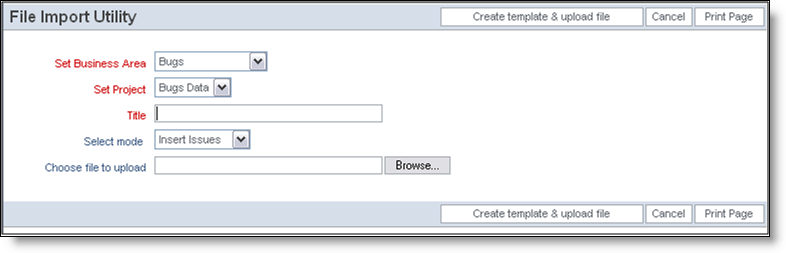
Creating the import template
Now you will see the main import screen, as follows:
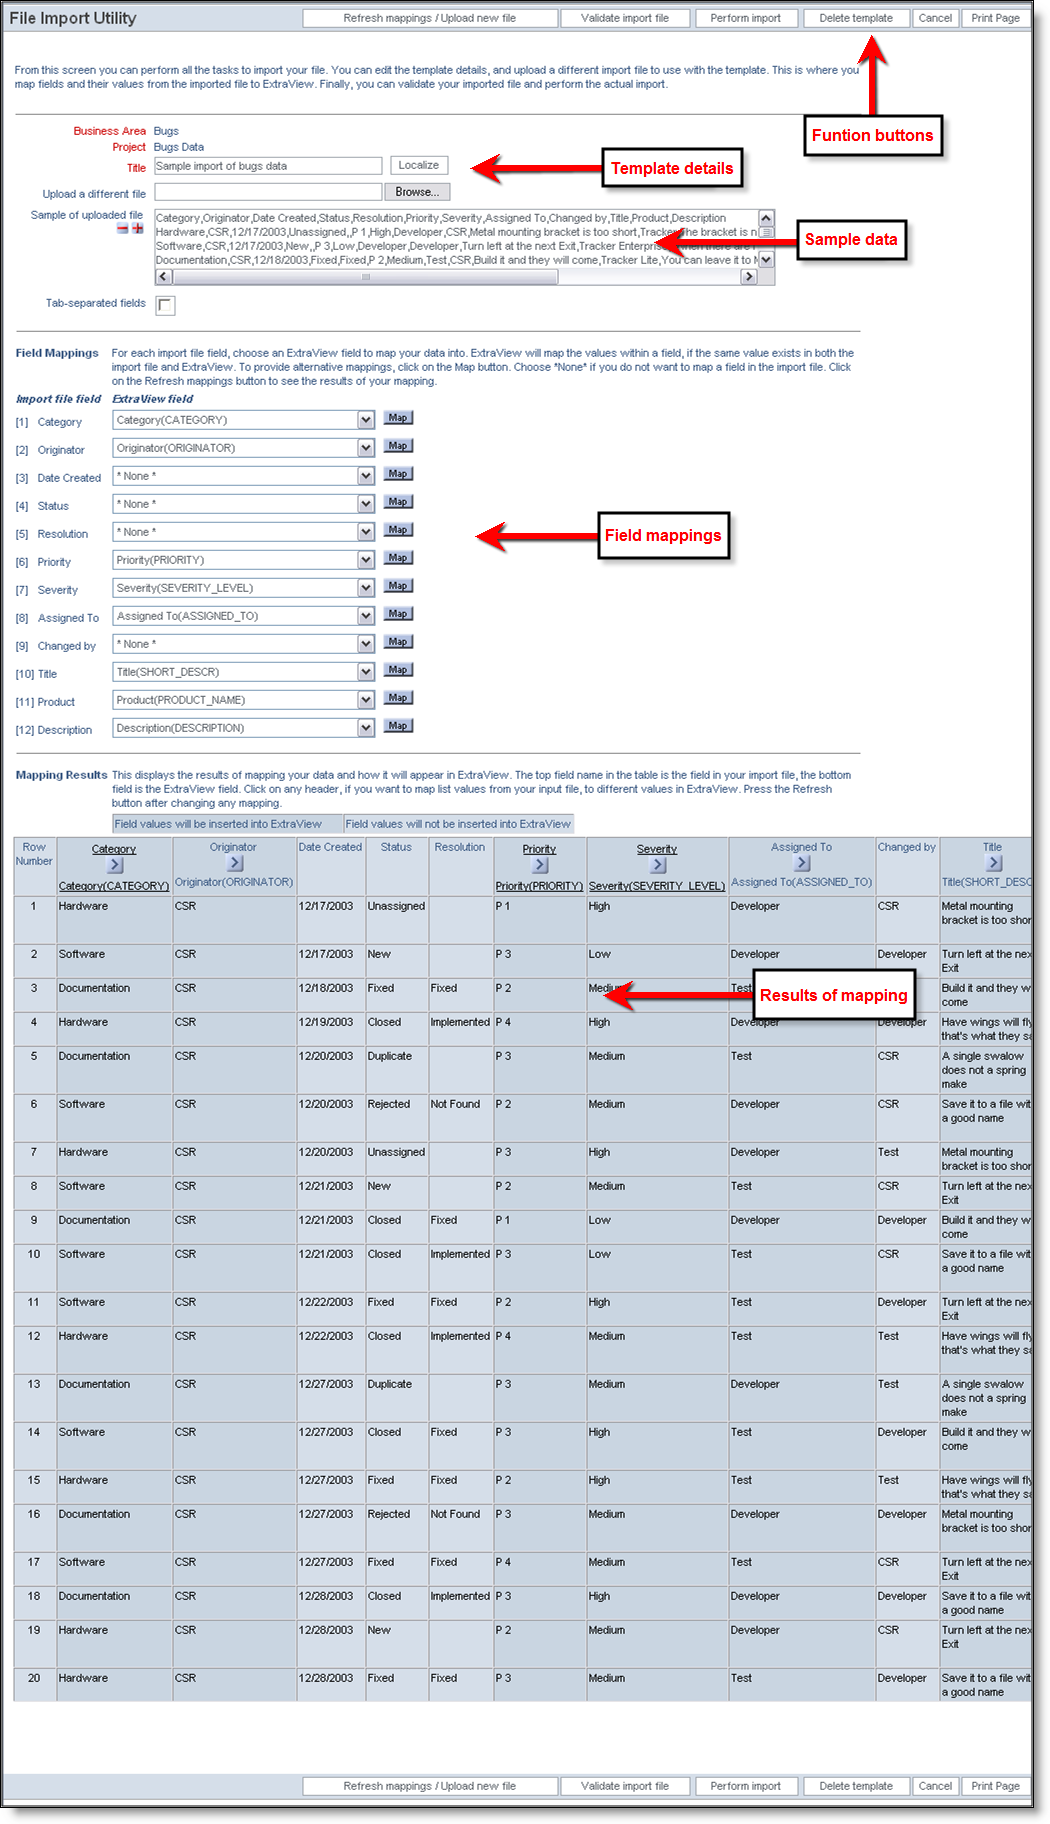
Import screen
Function buttons – these perform the following functions:
Template details – shows the title of the template and allows you to upload another file into the template. Note that if the installation utilizes Business Areas and Projects, these will be shown for the current import template.
Sample data – this section shows a sample of data from the file that has been uploaded. You cannot edit the data within this text box, but must return to your source data to make any amendments.
Field mappings – Here you will see a fixed field name for each field header in the import file and a select list offering all the available fields within ExtraView to which you can map that column. To be a valid field for the import, the field must exist on the add screen layout or one of its embedded layouts for the appropriate business area and project, if these are in use and for the current role of the user performing the import. The field must have its security permissions set so the field can be updated. Further, you cannot map to the ID field. The ID field is maintained by ExtraView, and no value can ever be assigned to this from an external source. See later in this section on how to deal with read-only fields on your add screen layout. If you are trying to preserve the key identifying field from a previous system, the usual practice is to map the record identifier to the ALT_ID field.
ExtraView will attempt to map the field in the import file to a field on the edit screen layout, by comparing the field name in the import file to the data dictionary titles of the fields on the edit screen layout. This comparison is case insensitive. When a match is found, ExtraView sets the ExtraView field as the selected field for the mapping. You can override this selection, and you can provide your own selection for any field. This includes mapping a field to * None *, thereby skipping it during the import.
In a similar way that fields are mapped, ExtraView will attempt to map the values within any field that has a display type list, tab, or popup.. User fields cannot be mapped at this point. Performing a validation will show which field values are not mapped. To map the values within a field, press the Map button to the right of the field. The screen that appears will be similar to the following:
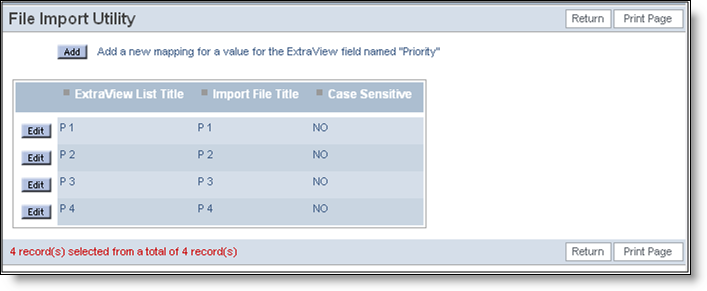
Mapping field values
You may press Add to create a new mapping, or you can edit an existing mapping. Note that you have a choice as to whether you want the mapping to be case sensitive or case insensitive. One point of note is that you can map fields with null values to a specific value in ExtraView, and you can map values to different values than set as default. This gives you flexibility in altering the data that you are importing.
Note: Field mappings are retained within your template. This means that if you set up a number of mappings and want to re-use these with a different import file, you simply need to re-use the same template.
Results of mapping – This section of the screen shows which values will be inserted on which records, when you perform the import. The color-coding shows the fields that will be skipped when importing the data and shows the specific values that will be inserted into specific fields in the ExtraView database.
If you provide the Business Area or the Project field in your input file, then you must provide both of these.
If you do not include these, then the File Upload Utility will use those specified in the template for the upload.
The file import utility has the capability to upload a file and to then update existing issues within ExtraView. To achieve this, a match must be made of a key field within the import file, with an existing key field within ExtraView. The only two key fields that can be used are either the ID field, or the ALT_ID field. Further, as ExtraView does not impose a unique value limitation on the ALT_ID field, the user must ensure that the values are unique. In practice this is usually achieved with the ALT_ID field by using user custom code.