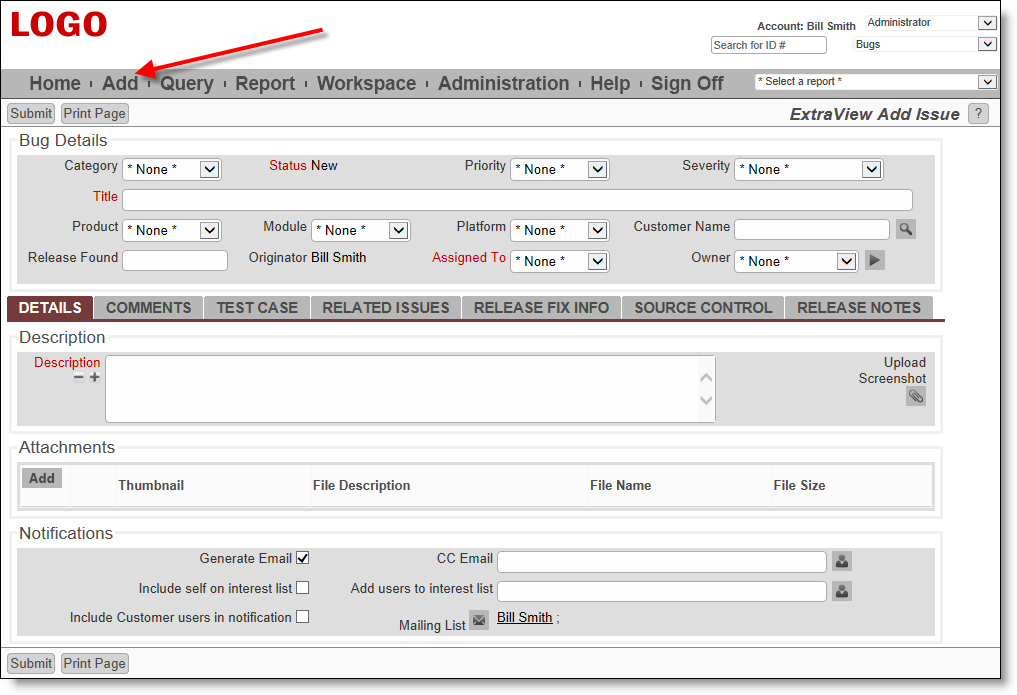
Add Issue screen
For the ExtraView Add Issue screen pictured above, enter information in the various fields as appropriate, and the click the Submit button. The tab field in the center of the screen allows you to enter information into sub-layouts on the screen; each contains information appropriate to the tab you select.
Note: Deselect the Generate Email box to disable automatic email generation. Select the name of a desired one-time automatic email recipient in the CC Email field. Click the Mailing List link icon to see the list of all current email recipients. This list will include users who are on an Interest List.
Note: Field names given in bold or highlighted in some other way, are required fields. Also, note that where field dependencies exist, a selection must first be made in the parent field’s pick list in order for the child field’s metadata to appear.
If you click the Submit button and errors exist with your data, you will see appropriate alerts, and you can resubmit your issue after correcting the problems.
In most installations, you will see a confirmation screen once you have successfully submitted your issue. This will show you the entry you have made, and again, in most cases, you will be able to edit the issue if you spot any errors or see changes you'd like to make. Note that the confirmation screen does not display the mailing list. If you want to go back and see who was notified of the submission, you can look at the history of the issue.