The Report Manager utility allows the ExtraView administrator to maintain public reports and user's reports. Both public reports and reports owned by individual users may be accessed, deleted and some report attributes may be updated. Reports may be be moved from one user to another. The update operations act on single reports or different filtered groups of reports. The typical functions of the utility are to perform the following tasks:
The utility is extremely flexible in allowing the administrator to filter through very large groups of reports, to quickly decide on which reports the mass operation is to be fulfilled. It is possible to delete many reports with a few keystrokes, so unless you are familiar with the operation of this utility, it is suggested you take a backup of the entire site before beginning. When first entering the utility, the screen will look somwewhat similar to this:
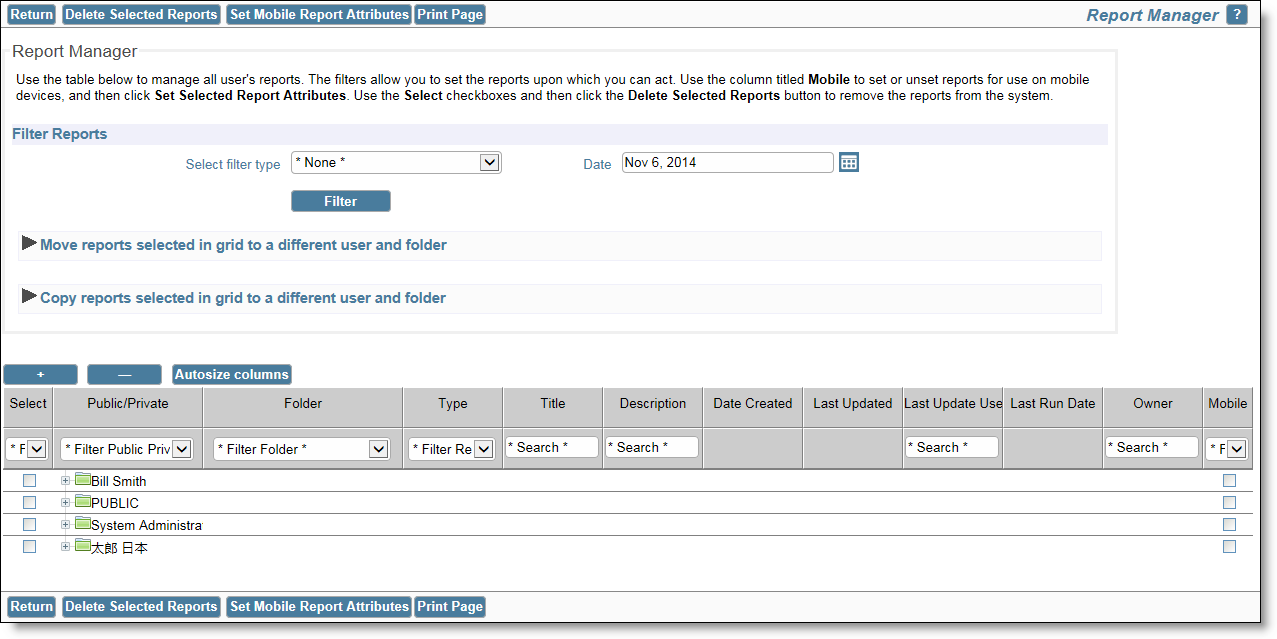
The filters allow you to select the date range to be viewed, based on either the dates the reports were created, the dates they were last updated, or the dates they were last run. If you do not use the filters, you are able to view all the reports in the system.
The overall functionality of the report grid is:

Once you have selected the reports to move, select the user and their folder into which to move the reports. Then click the Move button

Once you have selected the reports to copy, select the user and their folder into which to copy the reports. Then click the Copy button
The columns in the grid have the following functions:
| Select | This is the checkbox that allows the selection of a report upon which you want to act. Note that you can check the box within the title to select all the filtered reports and you can check at a node within the tree to select all the reports that reside within that node, such as all the reports that belong to a user or the reports that reside within a specific folder |
| Public / Private | All Public reports are grouped together, within the Public node of the tree. Within the grid, the Public reports are followed by the reports for each user. If you place your mouse over the folder that contains a user's reports, you wlll see the key data associated with the user's account, such as their user ID, Comany name and whether they are an enabled or disabled user. When you place your mouse over a report, you will see data such as the report ID within the database and whether the report is shared |
| Folder | This is the folder name, if any, beneath which the report is stored |
| Type | This is the type of report, such as Column Report, Matrix Report, etc. |
| Title | The title of the report |
| Description | The description of the report |
| Created | The date the report was created. This is one of the filters that may be used when creating the grid |
| Last updated | The date the report was last update. This is one of the filters that may be used when creating the grid |
| Last update user | This is the user ID of the person who last update the report |
| Last run date | The date the report was last run, by any user with permission to the report. This is one of the filters that may be used when creating the grid |
| Owner | This is the user ID of the person who last update the report. For user's reports this will always be the same person who appears in the Public / Private column |
Once you have made the selection of reports within the grid, the following actions can be taken:
Delete Selected Reports - All the reports which are checked in the Select column will be deleted permanently from the database. Note that empty folders which result from deleting all the reports they contained are also deleted.