New Incidents will be created via the Add navigation button. The first step when entering a new Incident is to enter the patient details, with required fields highlighted in red. It is easy for your administrator to have any or all fields required on any form. Please note that some of the fields on this page may look different, or have new fields if your administrator has customized this page. An administrator can easily create new fields that have display types such as text fields, radio buttons, list fields, document attachments or dates. Depending on the user role and permissions, you may have permission to view or edit only some of the fields. If the reporter carries the same personal information as the patient, simply check Reporter / Patient Same Person and all pertinent information is populated automatically without the need to reenter the data.
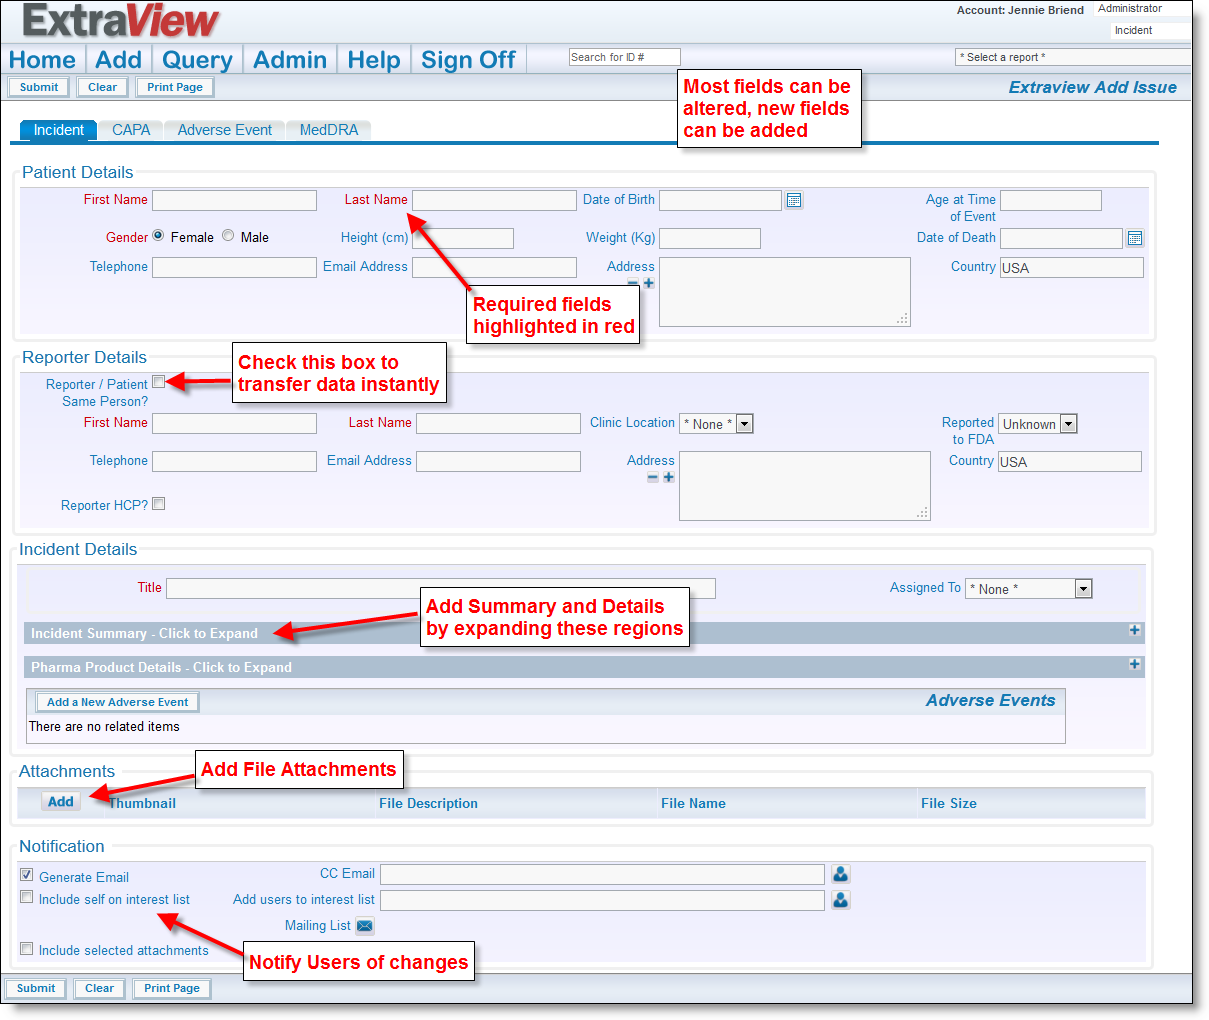
Incident Add Screen
The solution comes with a simple workflow which will meet many customers' needs, with three statuses of New Incident, Evaluation, and Closed, but may be customized to your needs. ExtraView provides you the ability to add more complicated steps or specific rules to your workflow with ease.
If you wish to learn more about configuring a system to your company's own process, please consult the End User Guide and the Administration Guide, or if you would like personalized help, please contact ExtraView directly.
To enter information about the incident enter the title and click on the folded area Incident Summary, as shown below.
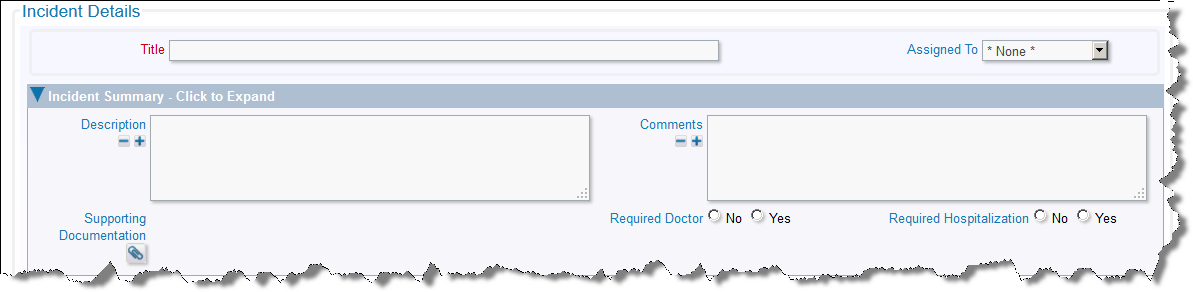
Incident Summary
Depending on how your particular company has the solution configured, you will either have the option to enter Pharmaceutical Incidents or Medical Device details. It is straightforward to change the underlying layouts to enter incidents about both pharma products and devices.
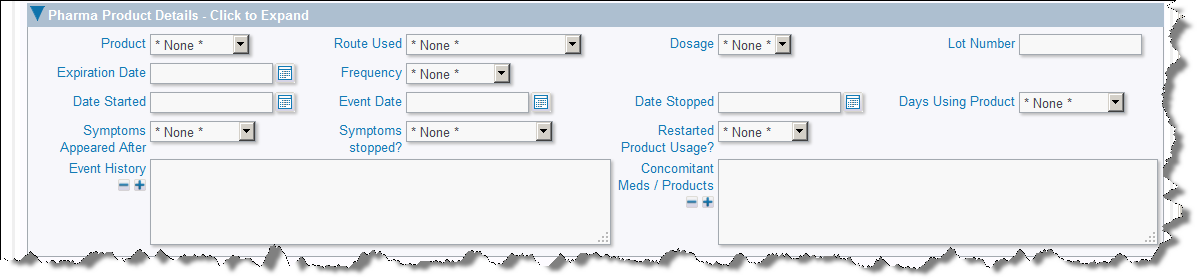
Pharma Details
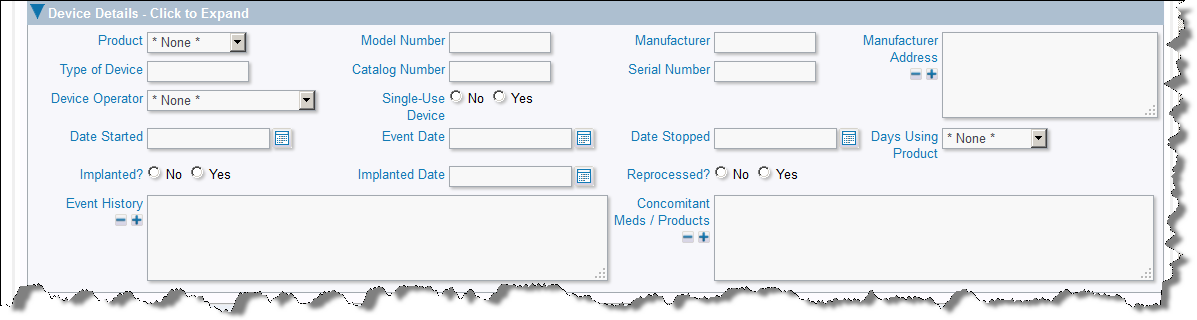
Device Details
You can update, or edit, incidents by starting from a variety of places:
In the standard configuration of this solution, there are additional functions and fields on the edit screen. These include an indication of where the incident is within the workflow, and the ability to enter and update CAPAs associated with the incident. You can also prepare any regulatory reports from the edit screen.
When you Edit an Incident, you will see a screen similar to the following:

Incident Edit Screen
A full historic audit trail of all the changes to the incident is available by clicking on the History button on the menubar of the screen.