Lists are managed in the same way, from a variety of different places in ExtraView. For example, there are lists of field values, lists of behavior settings, lists of fields in the data dictionary, interest lists and many others.
When you first access a screen with a list it will look similar to this:
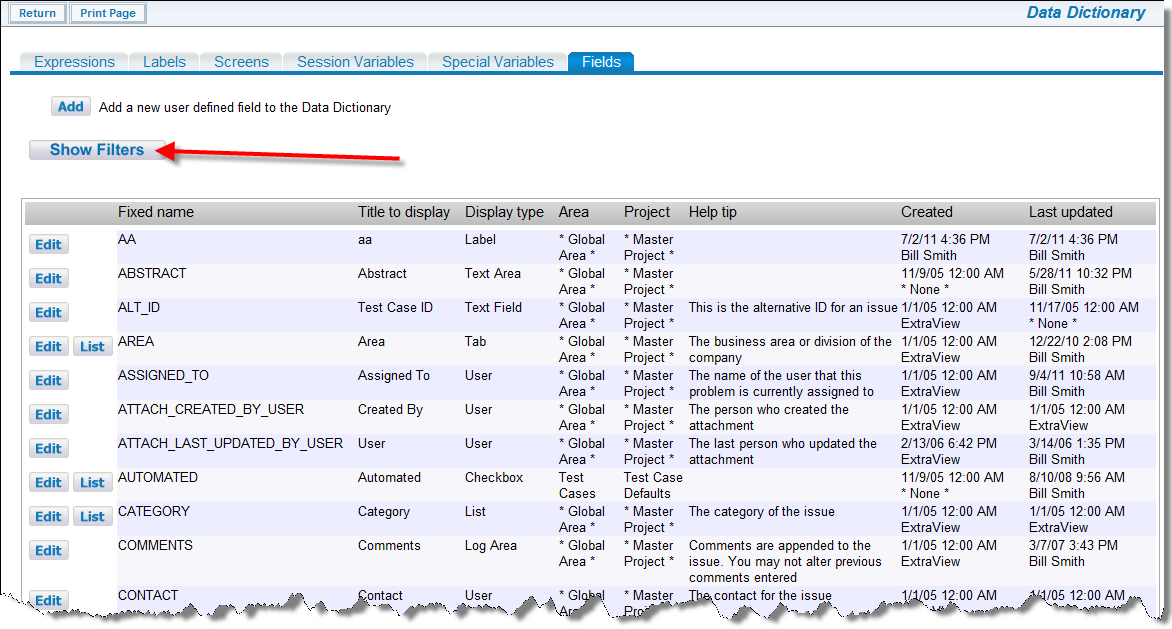
Data dictionary list
If you do not have either read or write permission to a field, it will not appear in the above list.
You can manage the list by using the Add button to add a new entry, or by clicking the Edit button at the left hand side of each entry in the list. Some lists such as behavior settings allow you to edit a value, by clicking on the value. If there is a delete capability, edit the list entry and delete the value from there.
Note the Show Filters button on the above screen. This is provided to offer a search capability on long lists. When you click on this button, you will see a screen like this:

Data dictionary list with filters
Set the filter column to one of the columns displayed in the list, and then click on a letter to see all the list entries that have the displayed column's first character.
You can enter a search expression, including wildcards, to retrieve the subset of records you want to work with. For the longer lists, you can also use the Export button to create a CSV (Comma Separated Value) file with the list values.
Lists behave differently, according to how many entries are in the list, and the value of the behavior setting named ADMIN_LIST_SIZE, in order to provide a balance between ease of use and scalability, when the number of records retrieved for an administration list exceeds the value of ADMIN_LIST_SIZE.
When the number of entries in a list is less than the value of ADMIN_LIST_SIZE, the list is immediately displayed in its entirety. When the number exceeds the value, a search screen is displayed, with the first character of each entry of the list being available to click on as a shortcut to looking only at these records. Thirdly, if you set a negative number, as opposed to a positive number, the list acts similarly to the second option, but with an abbreviated interface.
You can sort lists by clicking on any of the column headings that have a  symbol in the heading. When you click on a column heading that is sorted in an ascending order and shows a
  then the sort symbol alters to show
  and the list is sorted in descending order using this column.
You can sort a field list within the add, edit and query screens for each list field by allocating a sort sequence to its entry within list administration. The sort sequence is a number or string of letters. Valid sort sequences would be:
| 23 | 2 | a | 2a | open |
If no sort sequences are provided, the list is sorted alphabetically, using the title of the field. If you provide a sort sequence, then the entries to the list are sorted in their ASCII sort order sequence. It is recommended that you establish a sort sequence for a list, allowing room to insert new values in the future. This will give the most flexibility. For example, if you have a list that starts with five values, but may grow, use a sequence such as:
| 010 | 020 | 030 | 040 | 050 |
This will allow you to insert new values between each of the entries, if needed in the future.
Within all user defined lists, there is the opportunity to disable a value. Once the value has been disabled, it will not appear in any screen in a selectable manner. If an existing record already has the value set, then the user may leave the value in place or they may select a new, enabled value.
Note that checkbox fields are stored internally as lists that are constrained to just two values, typically Yes and No, On and Off or something similar. You may not disable a value within a checkbox field.