To create a new test plan simply navigate to the Add Test Plan screen.
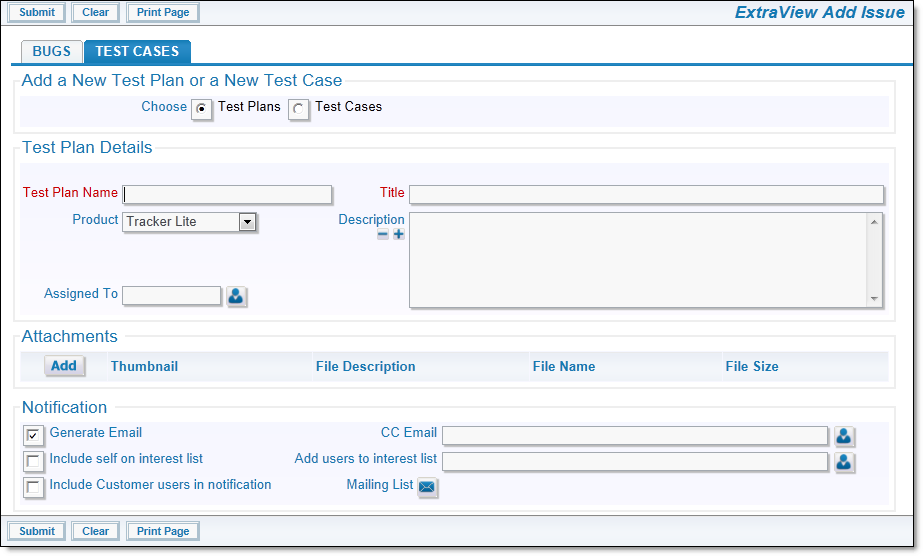
Test Plan Add Screen
Once you have created a Test Plan, you will then add Test Cases to the plan, so that, in the final step, they may be executed by the tester, with the Test Case Results being added to each Test Case. When you edit a Test Plan, the user will see a screen similar to this:
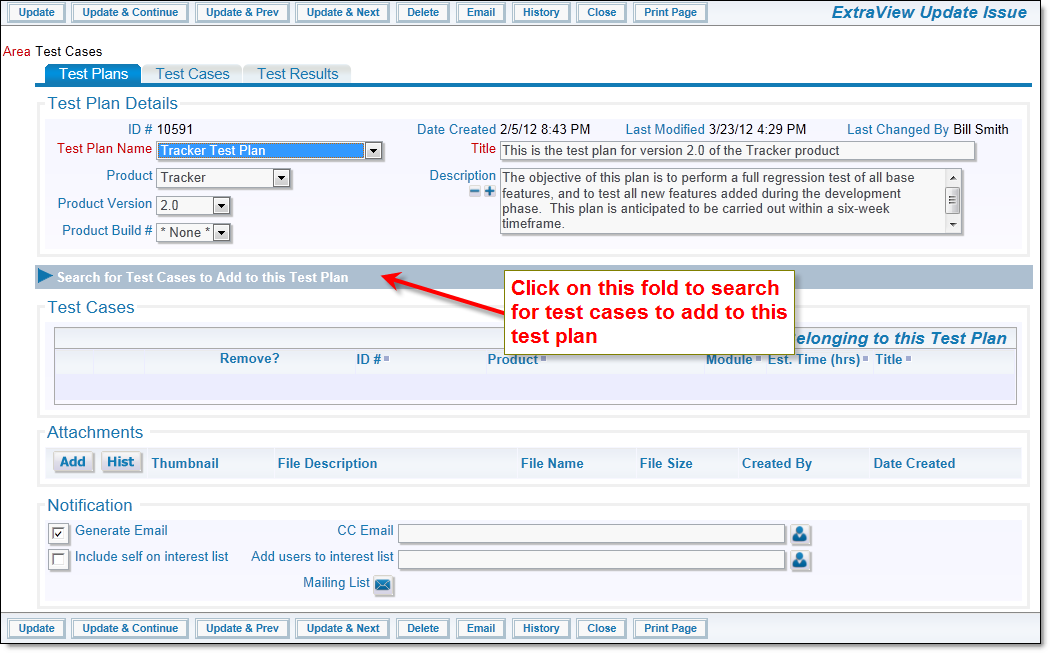
Test Plan Edit Screen
The first step is to search for the Test Cases that you want to assign to this Test Plan. Click on the fold and use the search filters to create a list of the most likely candidates, from the entire set of Test Cases.
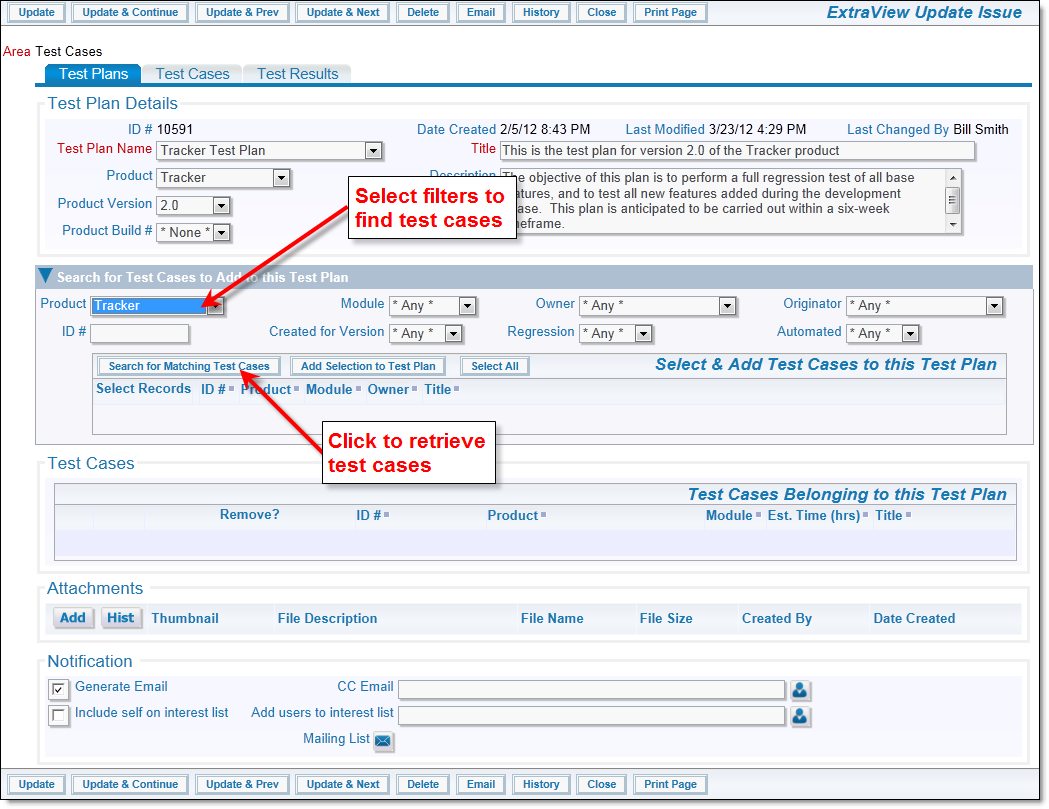
Search for Test Cases
After selecting the filters, press the Search for Matching Test Cases button to view the results:
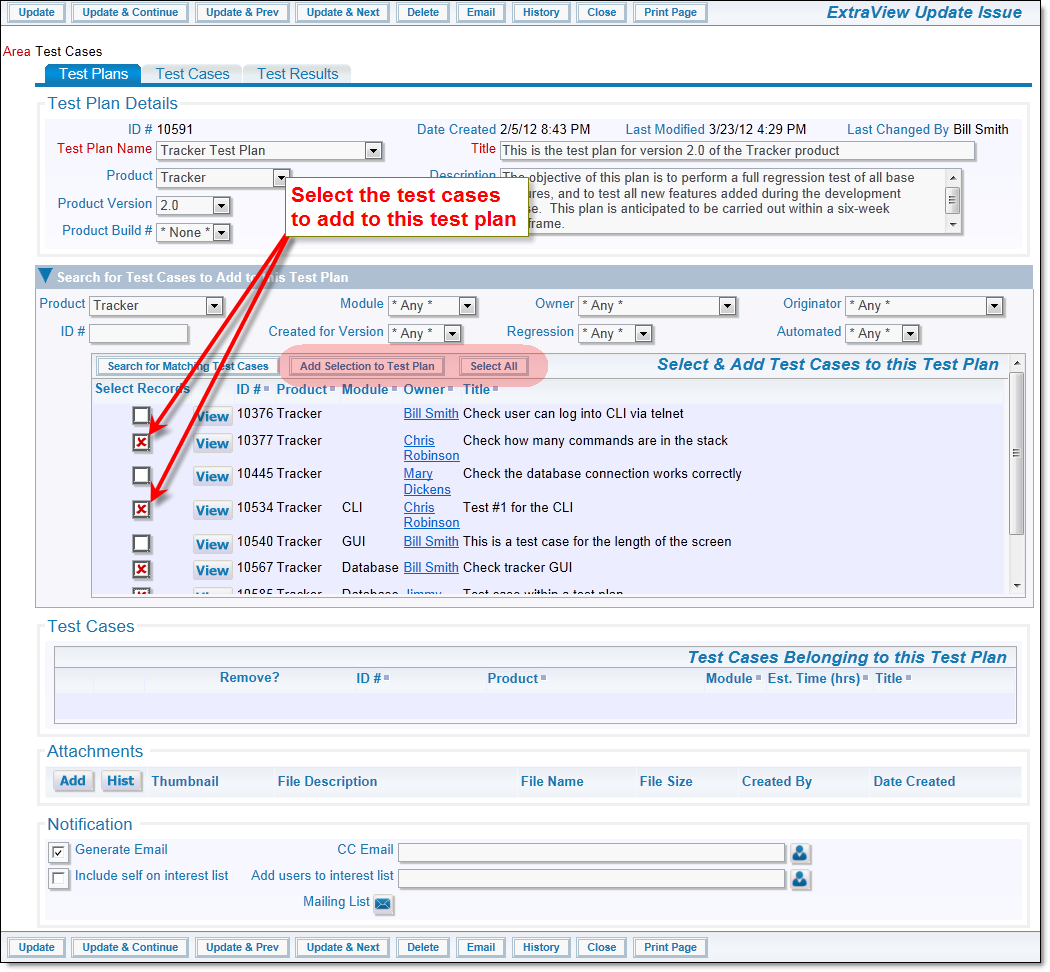
Select the Test Cases
The user is able to select results individually from the returned search items, or may use the Select All button to select all of the Test Cases returned. Next, the user presses the Add Selection to Test Plan button to include their selected Test Cases within the Test Plan.
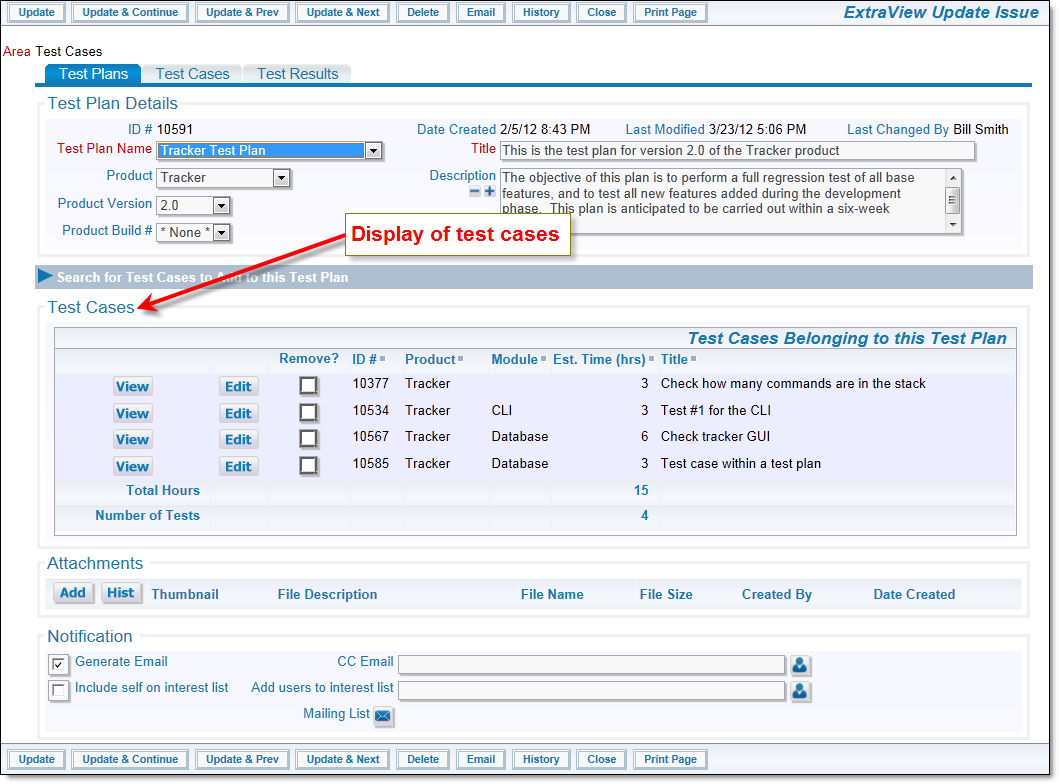
Test Cases included in a Test Plan
The above screen will look a little different if you configured the solution for high scalability. You will not see the section Test Cases Belonging to this Test Plan but will instead see the same issues, summarized by Product and Module. You can click on any row of the summary, to drilldown and view the individual test cases.
You may repeat these steps as many times as desired to add additional Test Cases to the Test Plan. Note that the Test Case list is summarized within the Test Plan, and you can see how many test cases, and the total estimated time that they will take to execute.