The objective of executing the test cases is to record a test result for each test case wthin a test plan. Accordingly, the tester or testers will select a test plan and methodically work through the test cases, recording passes and failures.
When a Test Case fails, a business rule is triggered, causing a bug to be created automatically within the bug tracking area.
To select a Test Plan to work on, choose one of these methods:
Once you have determined the Test Plan on which you want to work, click the Edit button of the plan. You will see a screen similar to this:
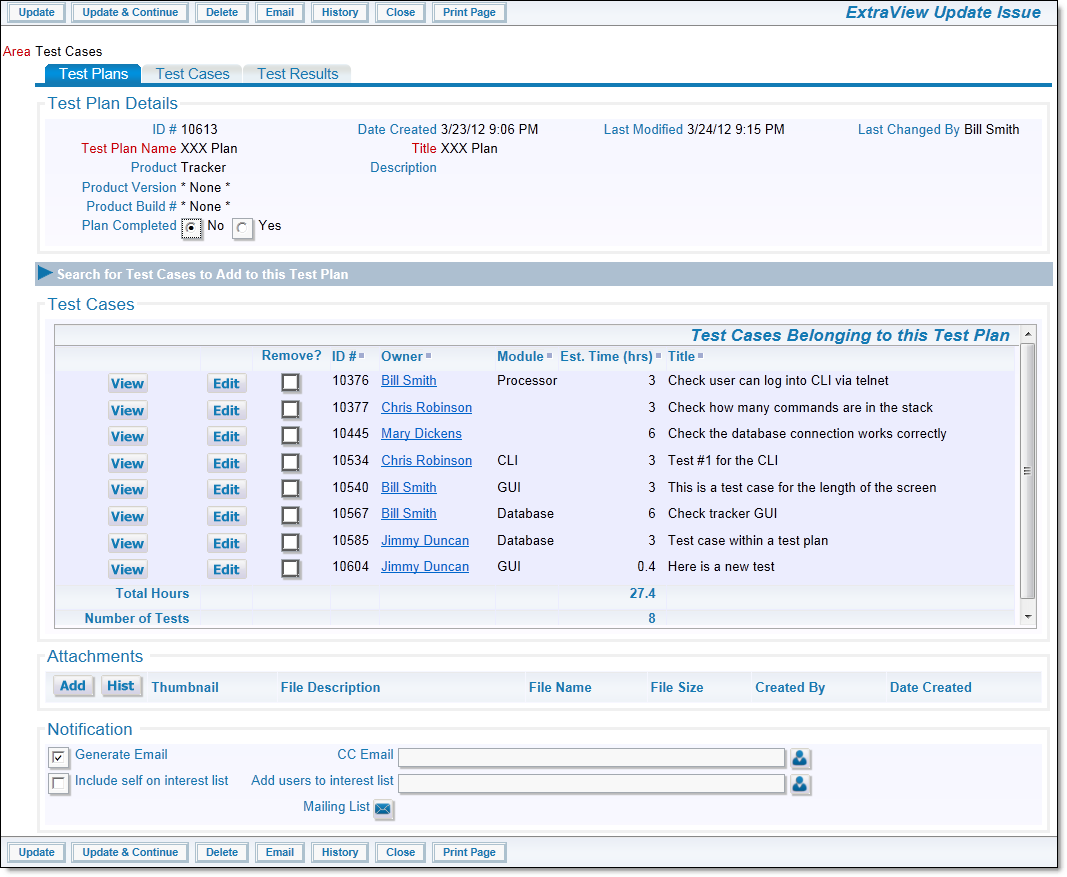
Test Plan Screen Displaying the List of Test Cases to Execute
You will see a summary of each of the Test Cases that are scheduled to be executed for the Test Plan. Typically, the Owner of a Test Case will now Edit each of their Test Cases in turn, perform the testing required, and then record a result. The first step looks like this when they edit a Test Case:
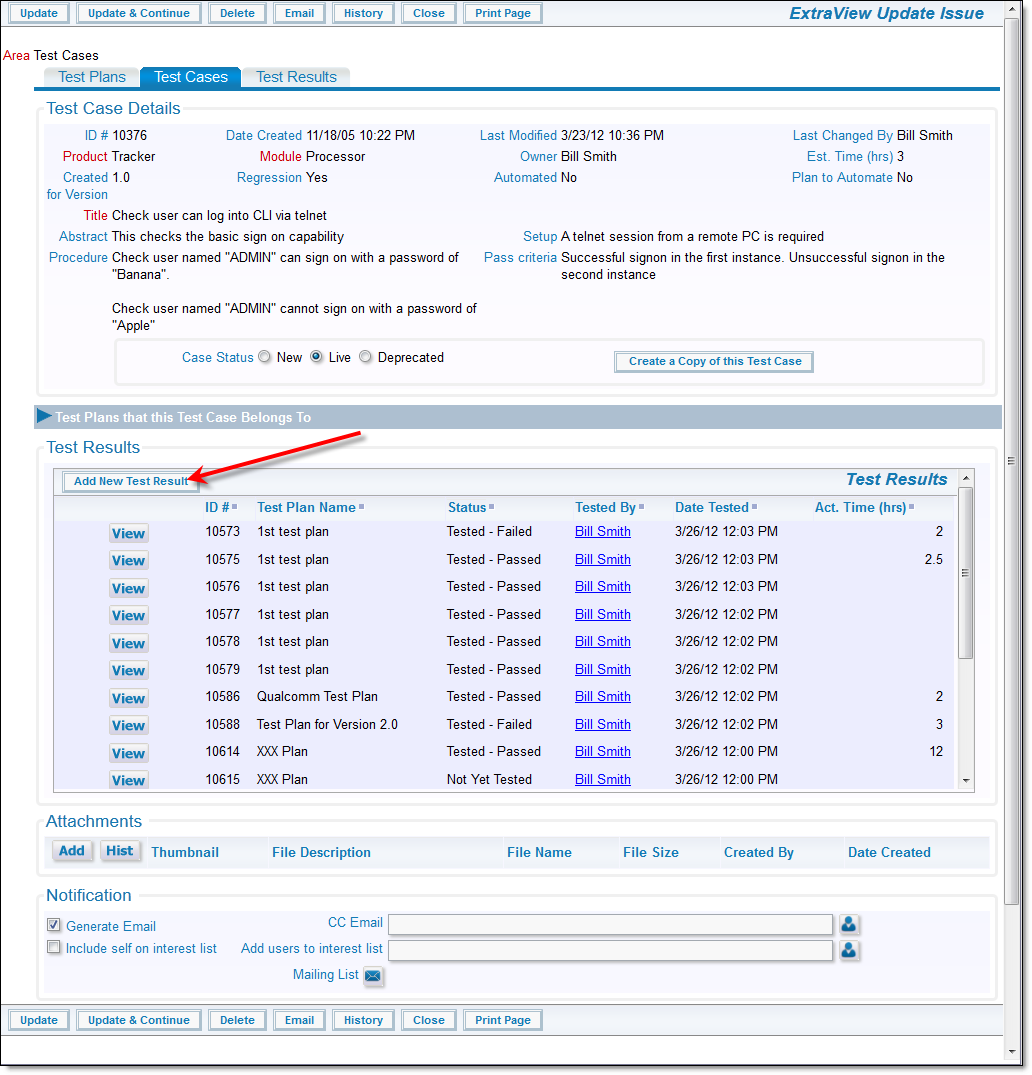
Executing a Test Case
The tester sees the details of the test case, along with the results of previous executions of the Test Case. The tester will click on the Add New Test Result button, to record the result of the test. This pops up a window similar to this:
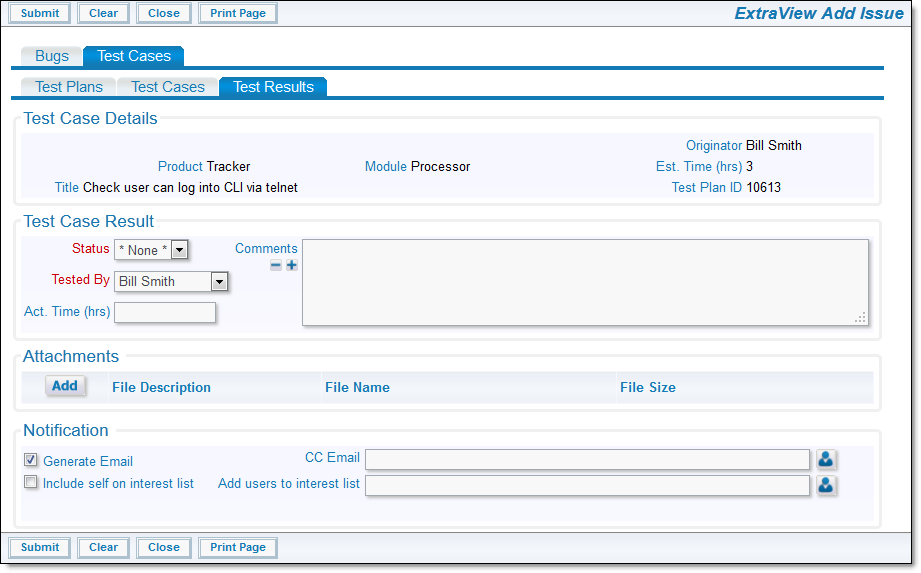
Entering the Result of Executing a Test Case
The tester will enter the result of the test in the Status field, recording whether the test passed or failed. If the tester wants to leave the test open, to return later, they can record a status of Not Yet Tested and Submit the result. They can also enter any comments and update other fields that appear on the screen.
The tester uses the Submit button when they have updated the Test Result.
The next Test Case can then be chosen so that the tester may continue, repeating the above sequence.