Calendar reports are named as their output is presented in a traditional calendar format. All calendar reports rely on choosing a date on which an event happens. The date may be, for example, the due date of an activity or task, or may be a date such as the date a group of issues were created.
When there is an activity or event displayed on a calendar report, you will see metadata associated with the event on the report, and additional information when you hold your mouse over the event. Double-clicking on the event will pop up an Edit window for the event. Double-clicking on an empty spot on the calendar will allow you to create a new event (or issue). Assuming you have permission to alter the date that is being displayed on a report, then you can drag the event to a new place on the calendar. Doing so automatically updates the underlying issue. You may take an existing event and create recurrences of the event. For example, you might have an inspection that is due each Tuesday morning at 10:00 a.m. You create the first inspection event, then use the recurrence to create additional events at the same time on each successive week. Any one issue or event may be set up to recur a maximum of 366 times.
Once displayed, the calendar report contains many views - daily, weekly, the work week, monthly and an agenda view. Of special interest is that you may overlay many calendar reports on top of each other. This allows you to create many filtered views of events using different dates within your system, or events with different filters. These can then all be displayed on the one calendar report screen, using color to differentiate between the different sets of results. It is simple to navigate to different dates and date ranges.
A key point is to recognize how dates with a field display type of date and day are treated. Date type fields are placed on the calendar output at the precise time during the day that they occur. Day type fields have no time component and they are always placed at the top of the calendar report, at midnight of the day on which the event occurs.
From the Query screen, choose the Create new calendar report option. You will see this screen:
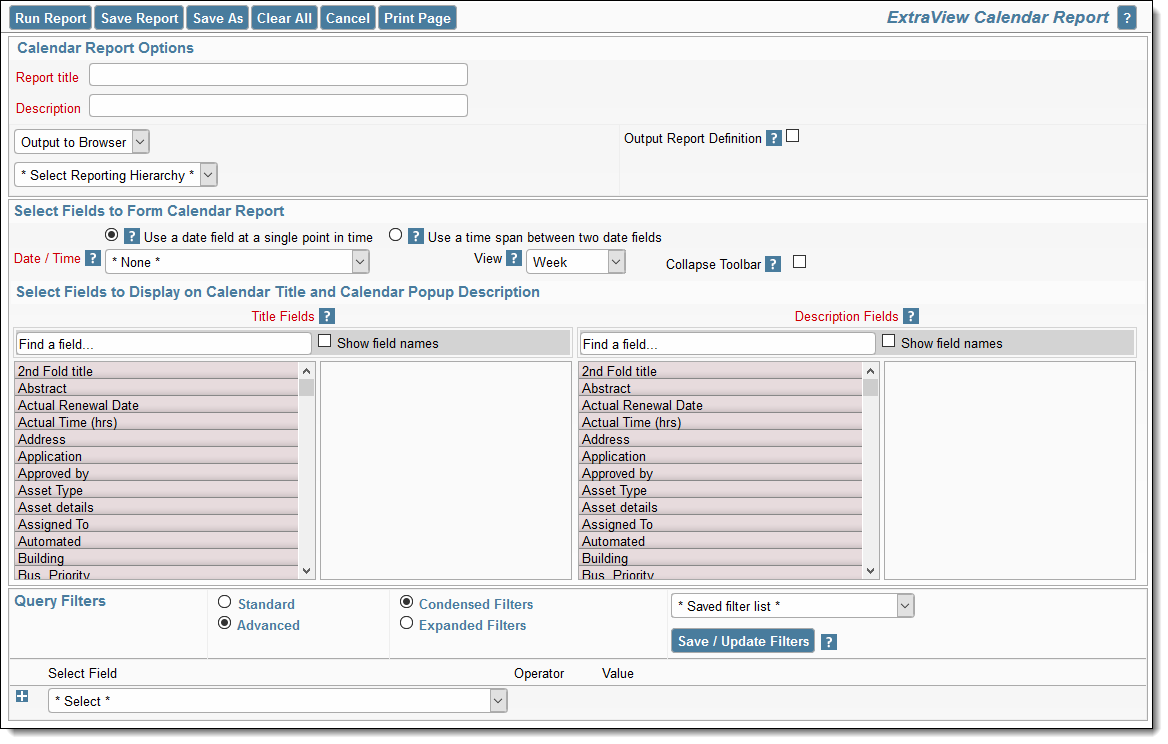 Calendar Editor
 Choosing dates for calendar reports
Click on the Day button to see the daily view.
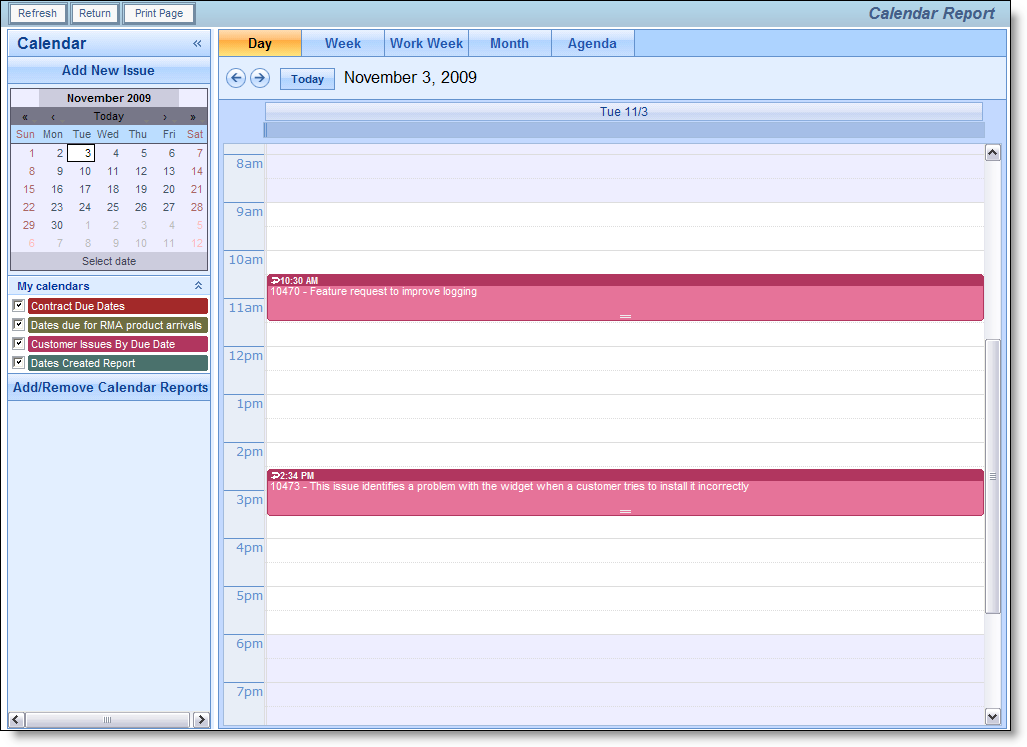 Calendar Daily View
Click on the Week button to see the weekly view. Note there is also a Work Week view which will only display Monday through Friday.
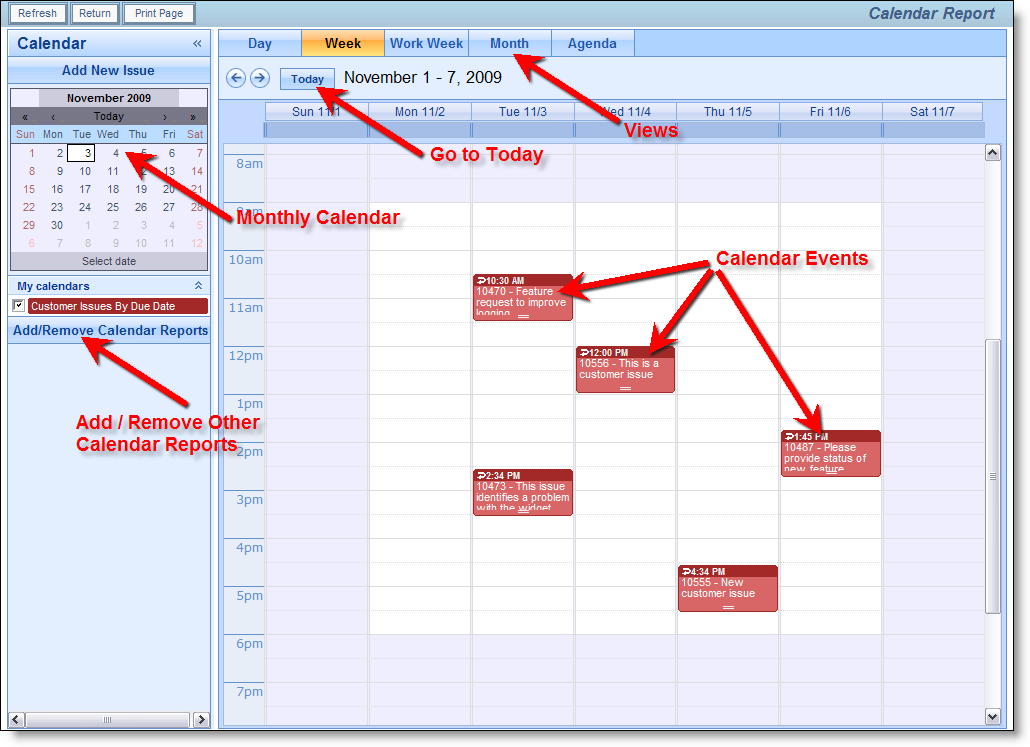 Calendar Weekly View
Click on the Month button to see the monthly view.
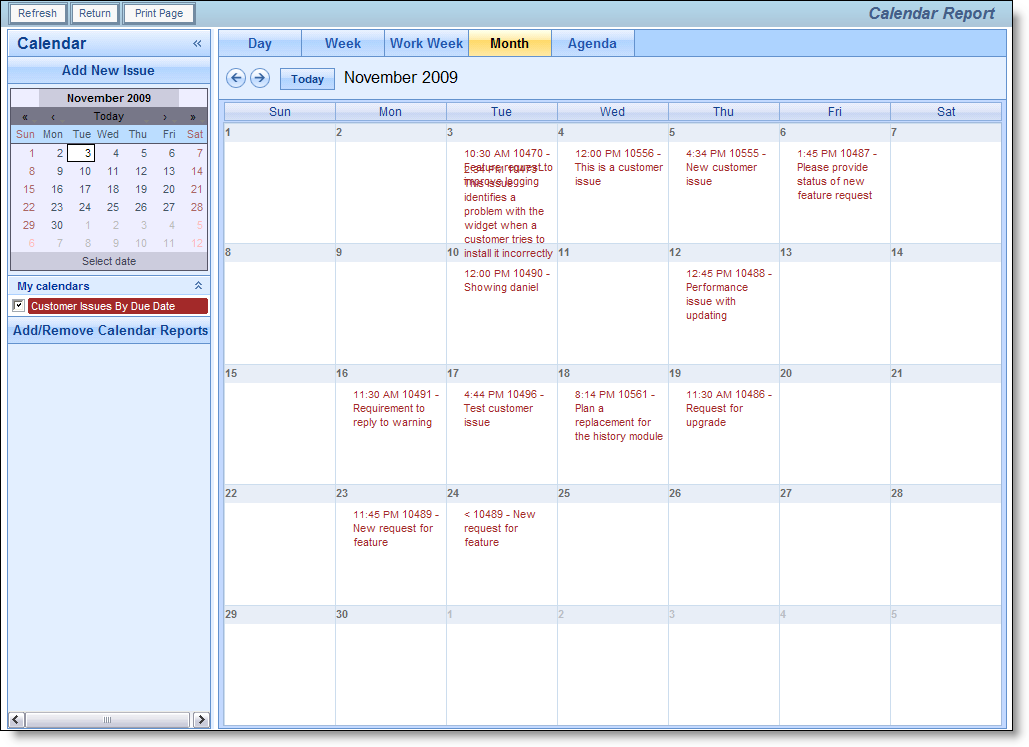 Calendar Monthly View
Click on the Agenda button to see the agenda view. This displays all the results in time-sequence.
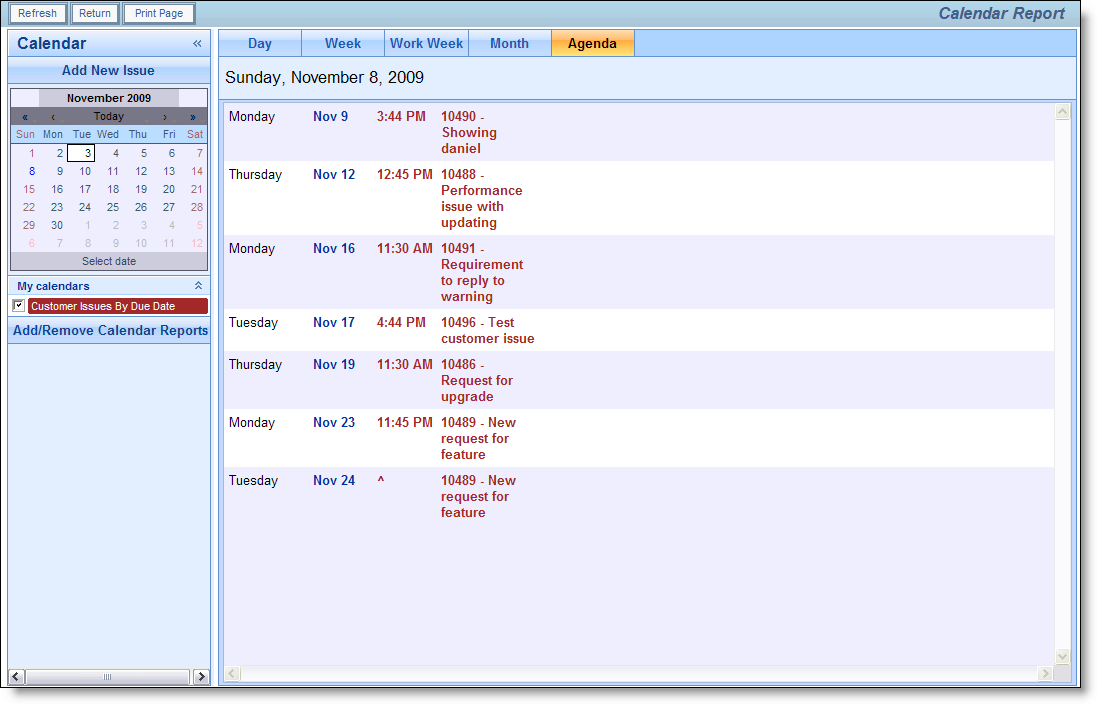 Calendar Agenda View
If you place your mouse over an event on the calendar, a popup appears displaying the fields selected in both the title and description field lists in the report editor.
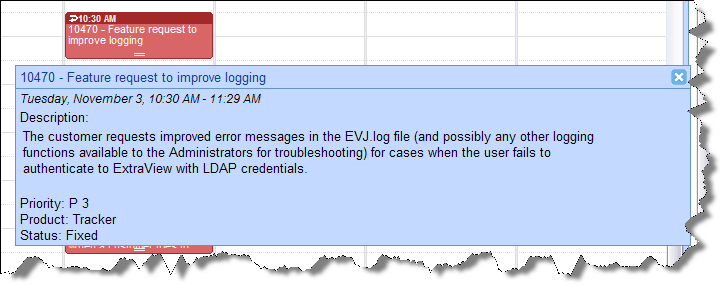 Calendar Popup
You can both update events directly on the calendar report as well as add new events. In addition you can alter the time or duration of the event by dragging it to a new location on the calendar.
A useful attribute of the calendar is the ability to many calendar reports onto the same report output. The results of each additional query after is selected via the Add/Remove Calendar Reports button after displaying the first calendar. When you press the button, you will see a screen similar to:
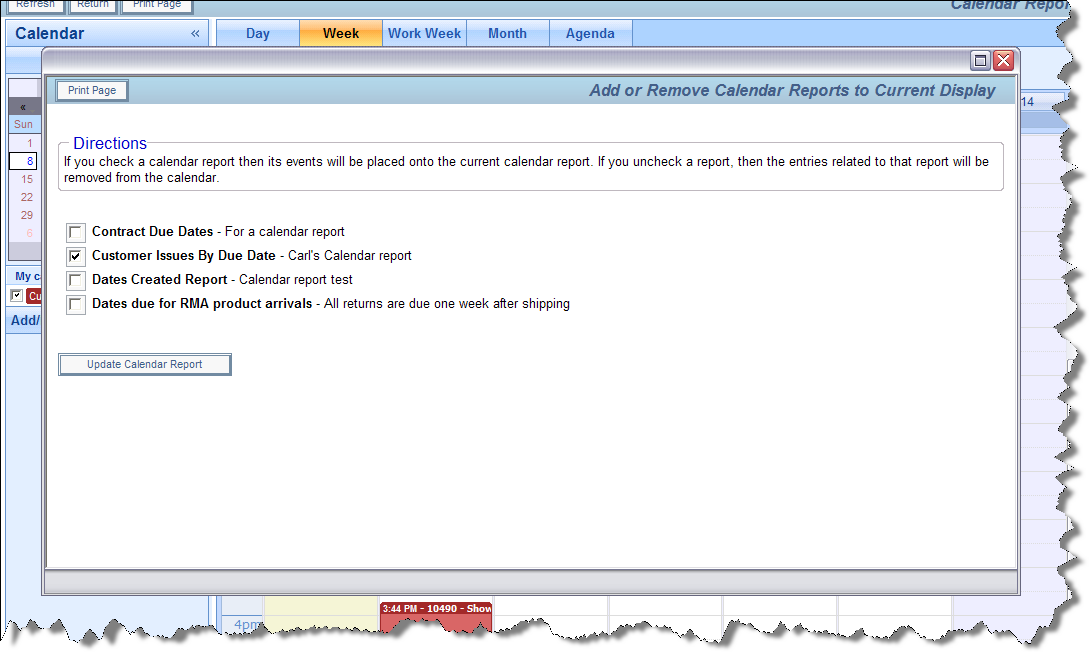 Adding Additional Calendars to the Report
Simply check the reports you want to add into the existing report output. Up to 24 calendars can be added into the one report. This image shows two calendar reports displayed together:
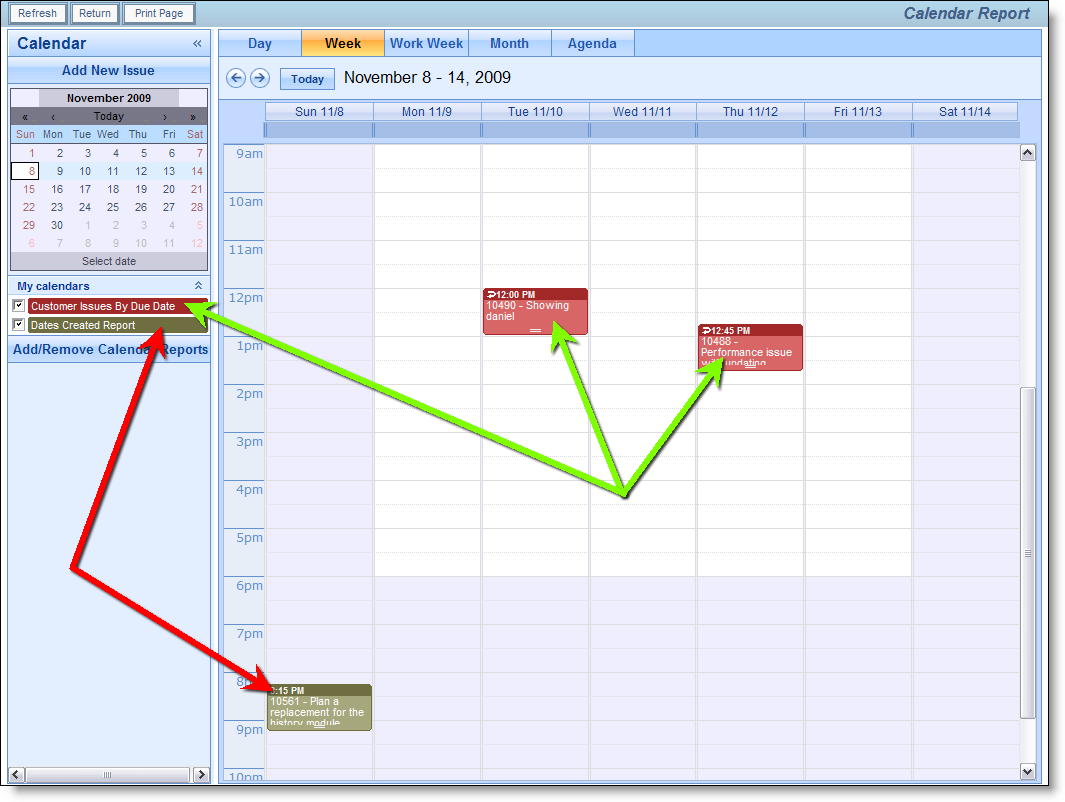 Multiple Calendars on a Single Report
If any of the calendar reports that have been added to the output have runtime filters, then an icon appears beside the report title at the left-hand side of the screen. Clicking this icon allows the runtime filters for the report to be altered.
Recurring events may be created from any calendar event where there is write permission to the date field(s) upon which the report is based. For example, you cannot create a recurrence on a report based on the date created field as this is system maintained, but you may create a recurrence from a calendar report that is based on a user defined field to which the user has write permission. The ability to create a recurrence is indicated by a small arrow at the top left-hand corner of the calendar event as shown here:

Click here to enter the recurrence for an issue
When you click on the arrow, a window dialog box pops up, allowing you to create various types of recurrence:
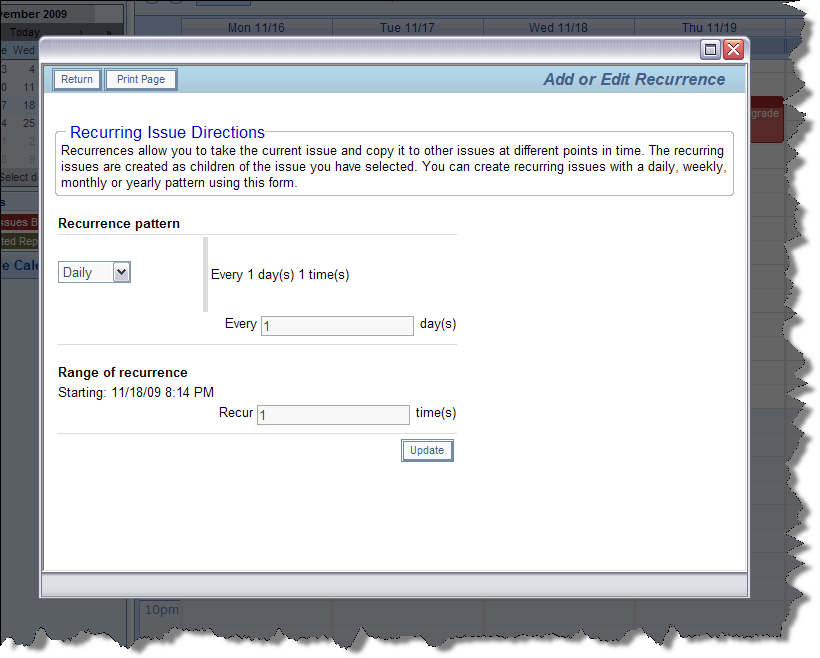 Creating a recurrence for an issue
Issues can be made to recur on a daily, weekly, monthly or yearly basis. For any choice of the period, the popup dialog box alters to allow you to set up the recurrence. For each recurrence, a new issue is cloned from the original at the appropriate day and time. You can set up any issue to recur a maximum of 366 times. Once the issues have been created, they work independently when a user updates each issue, although you can alter the recurrence, or sever an issue from the recurrence.
If your administrator has defined hierarchies on which you can report, you will see an additional prompt on the report editor screen:
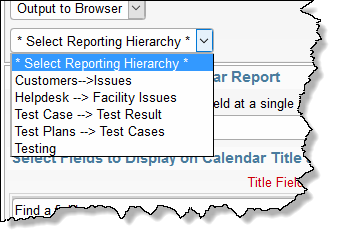
Reporting on hierarchies within calendar reports is similar to the way they are defined for column reports (See the section on Column reports for a full explanation). The key difference is that you are only required to select the filters for each level in the hierarchy. These filters will be applied to each level of the hierarchy for the preparation of the data to be placed on the report. The report output will look very similar to a standard summary report, except that the additional filters are applied.