The objective a container report is to take one or more layouts, and combine them together on a single PDF as the output. As stated earlier, a layout does not output directly to a PDF, but it is required to place the layout into a container, and it is the container that is output to the PDF.
When you select the Create new container for existing reports option from the Query / Report Options selection list, you will see a screen similar to the following:

Report Container Screen
- The report container options are largely self-explanatory, but note that you have the ability to provide the title for the container and a legend. These have the ability to adopt a style using the
 button. When you hold your mouse over the button, you will see a summary of the style that is set. When you click on this button, you will see a pop up window where you can set the style
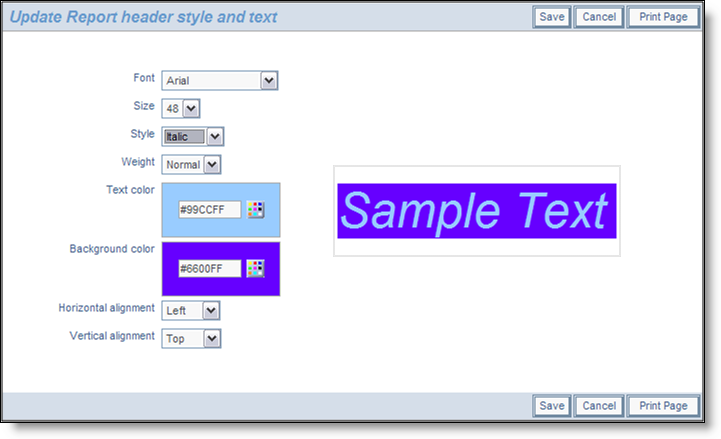
Setting the style of an element on a PDF report
- There is a button to the right of the Report Container Title that appears when you are editing an existing report. When you place your mouse over this button, you will see who created the report, who last updated the report and the dates when these actions occured. This is most useful for managing public reports.
- Within the Overall Page Settings, you can select the paper size, the orientation and the select from inches or centimeters as the measurement. Using this measurement, you may also set top, left, right and bottom margins of the PDF you will create.
- The Page Headers and the Page Footers allow you to set text and styles for the PDF headers and footers
- If you want to place the page number on a header or footer, use the pseudo-field $$PAGE_NUM$$
- You can place a logo or other image within any of the header or footer areas. The image must be available on a server, so ask your administrator to place the image there if you do not have access to the server yourself. The image is referenced using a pseudo-field, with the following syntax within the text:
$$HTML:<img src="http://www.site.com/image.png" width=100 height=50>$$
You must use an absolute path to the image. If you do not include the width and height, ExtraView will scale the image as best it can to an appropriate size.
- You can insert a line break into a header or footer with a <br> tag
- In the section Select Reports to Place in Container, you first set how many reports across and how many reports down the page you want to render. These may be rendered by column or by row, giving a different layout on the PDF
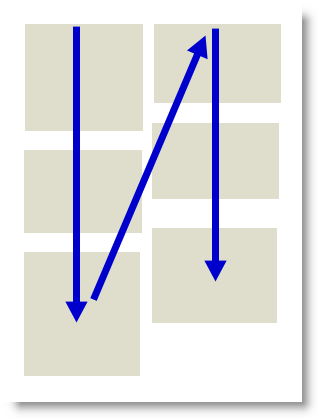
Rendering by column |
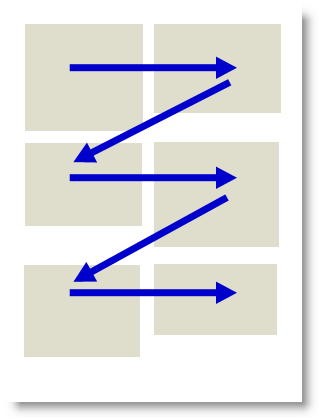
Rendering by row |
Note how the top of each report in the container is aligned according to whether you are rendering by column or by row.
The number of selection boxes will change according to how many rows and columns of reports you will include in the container. Simply select the report you want to place at the appropriate place in the container.
- You cannot run the report and create a PDF until you save the container. Once you have done this, you can simply click on the link to the report and see output, that with our example may look something like this:
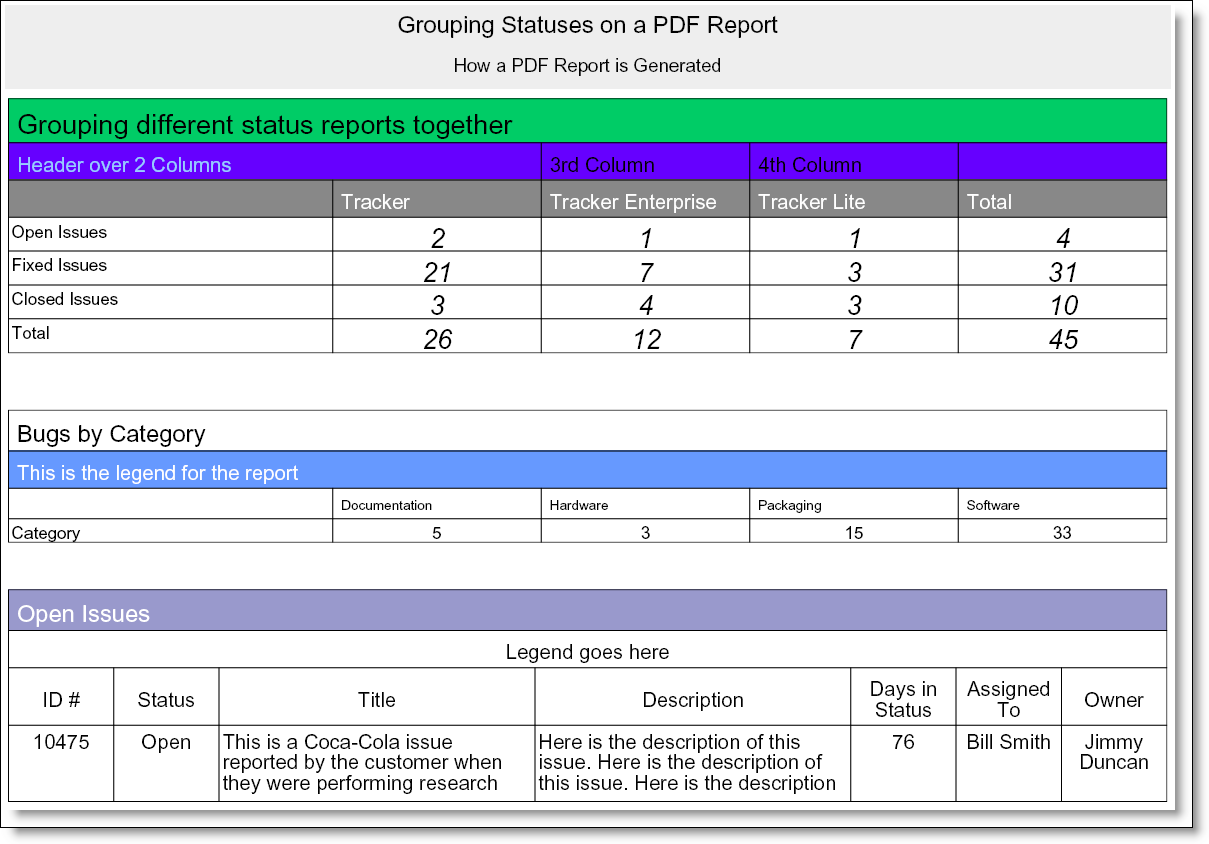
Sample Container report output as a PDF
Note: When you output a report to a PDF, and you see the message “ERROR:Infinite table loop”, this indicates that there is too much data to fit horizontally on the output page. The most likely solution is to reduce the number of columns you are trying to place on the output page, or to reduce the font size of the output.