The objective a container report is to take one or more layouts, and combine them together on a single PDF as the output. As stated earlier, a layout does not output directly to a PDF, but it is required to place the layout into a container, and it is the container that is output to the PDF. You can also place many report types directly into the Container report, with the one drawback, that these do not have the range of formatting options that are available with the layouts.
When you select the Create new container for existing reports option from the Query / Report Options selection list, you will see a screen similar to the following:
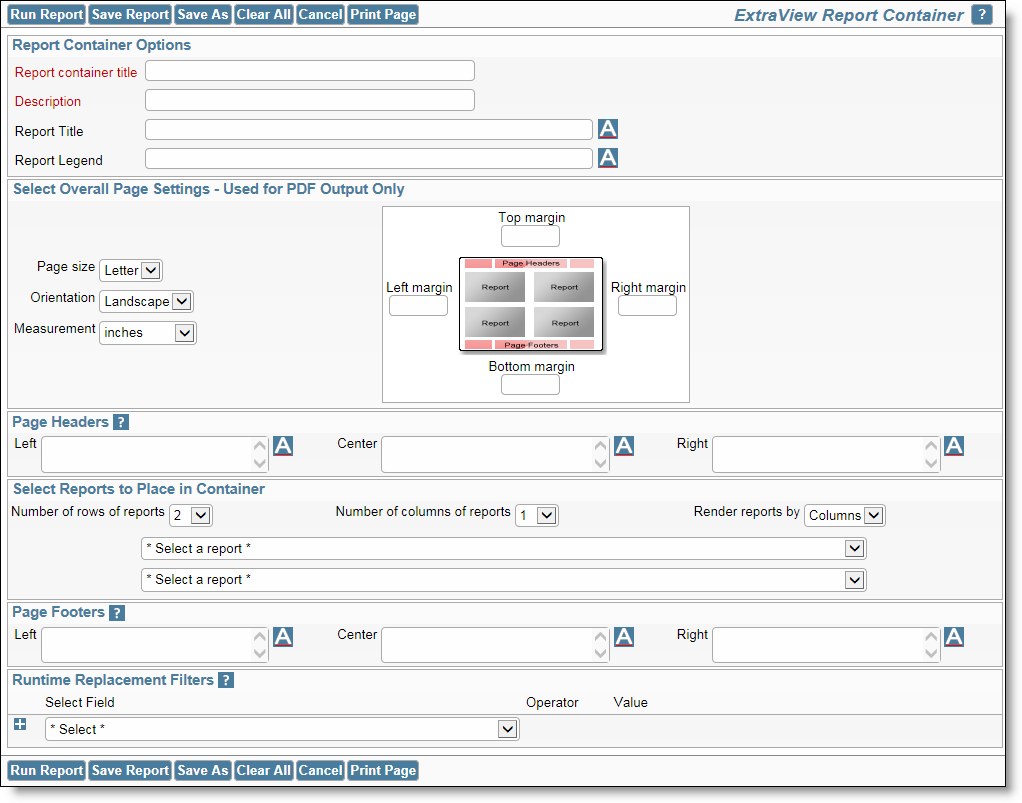
Report Container Screen
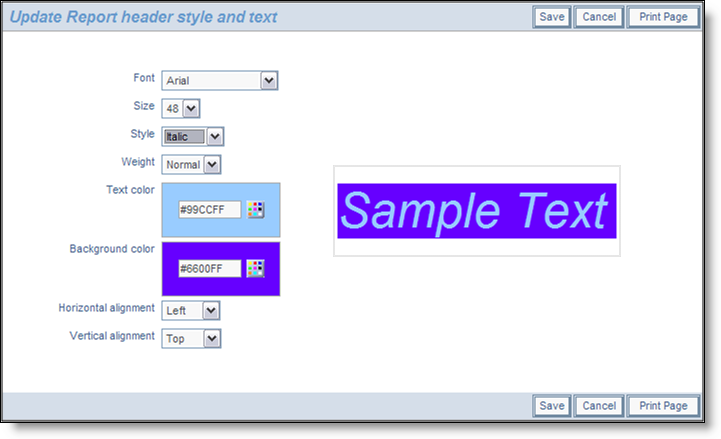
Setting the style of an element on a PDF report
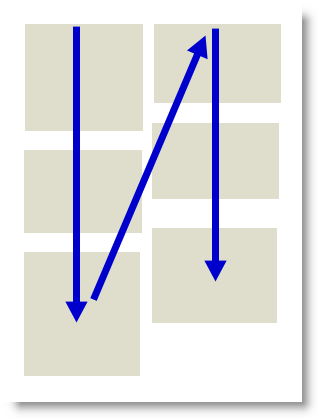 Rendering by column Rendering by column |
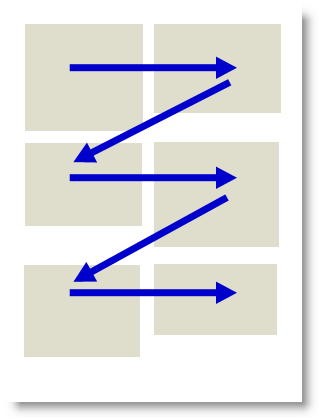 Rendering by row Rendering by row |
Note how the top of each report in the container is aligned according to whether you are rendering by column or by row. The number of selection boxes will change according to how many rows and columns of reports you will include in the container. Simply select the report you want to place at the appropriate place in the container
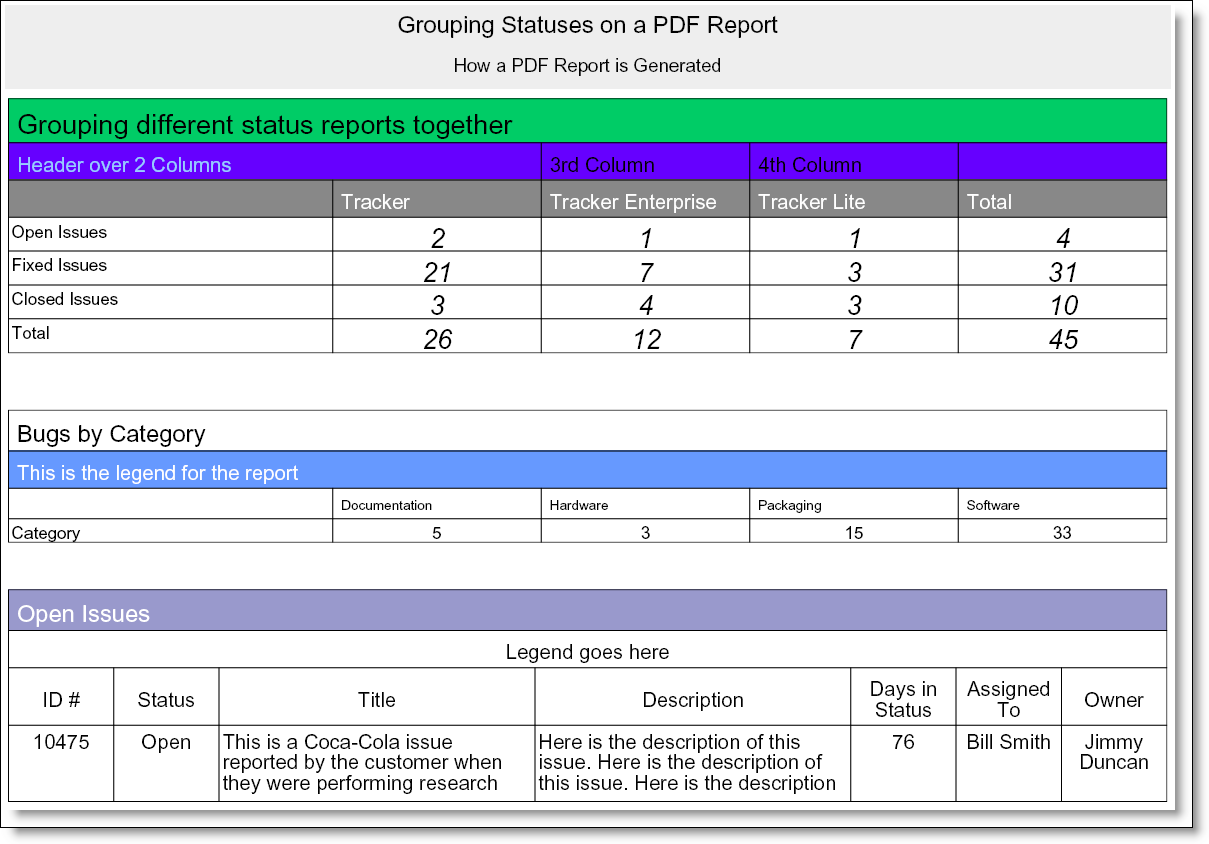
Sample Container report output as a PDF
Note: When you output a report to a PDF, and you see the message “ERROR:Infinite table loop”, this indicates that there is too much data to fit horizontally on the output page. The most likely solution is to reduce the number of columns you are trying to place on the output page, or to reduce the font size of the output.
Setting runtime replacement query filters on Container reports allow you to apply these filters to all the individual reports configured within the Container report. For example, you might want to apply the same date range to all the reports, or to select a single report as a filter for all the reports. Note that if any of the reports contain a filter on a field used as a runtime replacement filter, then the filter at the individual report level is dropped completely and replaced with the runtime replacement filter for the field.
For example, you might want to apply a runtime replacement filter that applies the same date range to all the output, or apply a filter that provides only results from a specific product within the output.
When you specify runtime replacement filters within a Container report, they will replace filters for the same field within the individual reports that they contain. If a filter on a field specified at the Container level does not appear within the contained report, it will have no effect. Further, it is not possible to specify conjunctions for the runtime replacement filters - they simply replace filters for the same field within the contained reports. The runtime replacement filters are always displayed in expanded mode, allowing you to make multiple selections within a field.
Tip: A typical use case might be to create a Container report that contains several reports about all your products, but you want to filter on the report output by a single product. You cannot select a runtime replacement filter with a value similar to Product = Any, but you can select all the product values in the list and store that as your filter. Then, after viewing the Container report, you can select a new filter value that is either just one, or a selection of products.
It is often useful to be able to substitute a value in the header, footer or legend of a Container report with the current value from the report. For example, you might prepare a report for a Product that is chosen at runtime, or you might want to put the current date onto the report metadata. To achieve this, you can use tokens, of the form $$FIELD_NAME$$ within the container report legend, footer or headers. There are several built-in tokens that you may use, as follows:
| $$field_name$$ | The value of the filter with the field name of field_name |
| $$SYSDAY$$ | The current date |
| $$SYSDATE$$ | The current date and time |
| $$PAGE_NUM$$ | The current page number of the report |
| $$NUM_PAGES$$ | The total number of pages in the report |
| $$HTML:<img src="http://www.site.com/image.png" width=xx height=yy>$$ | This inserts an image that exists at the URL you specify into the output, with a width of xx and a height of yy |
| $$REPORT_ID$$ | The report ID of the report, as stored in the database |
| $$CONFIDENTIALITY_MESSAGE$$ | The value of the behavior setting named CONFIDENTIALITY_MESSAGE |
| $$USER$$ | The name of the user creating the report |